In this tutorial im gonna explain how to add Thin Lite style Css3 Navigation Bar to blogger. This Lite style navigation bar work fine with every modern internet browsers. You can link with your main pages by using this Css3 thin navigation bar. Im using Css3 and HTML Just check out demo.Its easy to add to blogger.

You may like these articles
Add Multilevel CSS3 Menu Bar With Icons
Modern Ribbon Hover Effect Menu Bar
Rollover Css3 Navigation Bar
Beautiful Bouncing jQuery Menu Bar
How to Add Lite Style Css3 Navigation Bar to Blogger
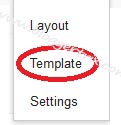
1. Log in to blogger account and Click drop down.

3. Now you can see Live on blog, Click EDIT HTML Button"
4. Find this tag by using Ctrl+F ]]></b:skin>
5. Paste below code Before ]]></b:skin> tag
/* The CSS Code for the menu starts here bloggertrix.com */
 #btrix_litemenu {
 width:800px;
 background:#166bea;
 border-bottom: 5px solid #993300;
 border-top: 1px solid #e14d09;
 clear: both;
 overflow: hidden;
-moz-box-shadow: 2px 3px 5px #000000;
-webkit-box-shadow: 2px 3px 5px #000000;
box-shadow: 2px 3px 5px #000000;

border:none 5px #000000;
-moz-border-radius-topleft: 16px;
-moz-border-radius-topright:16px;
-moz-border-radius-bottomleft:16px;
-moz-border-radius-bottomright:16px;
-webkit-border-top-left-radius:16px;
-webkit-border-top-right-radius:16px;
-webkit-border-bottom-left-radius:16px;
-webkit-border-bottom-right-radius:16px;
border-top-left-radius:16px;
border-top-right-radius:16px;
border-bottom-left-radius:16px;
border-bottom-right-radius:16px;

 }
 #btrix_litemenu ul {
 float: left;
 width: 100%;
 }
 #btrix_litemenu li {
 float: left;
 list-style-type: none;
 }
 #btrix_litemenu li a {
 background:#166bea;
 color: #fff;
 display: block;
 font-size: 14px;
 padding: 5px 17px 5px 15px;
 position: relative;
 text-decoration: none;
 }
 #btrix_litemenu li a:hover {
 background:#002660;
 color: #fff;
 }
 #btrix_litemenu li li a {
 background: none;
 background-color: #0d56c4;
 border: 1px solid #0d408d;
 border-top-width: 0;
 color: #fff;
 font-size: 14px;
 padding: 5px 10px;
 position: relative;
 text-transform: none;
 width: 130px;
 }
 #btrix_litemenu li li a:hover {
 background: none;
 background-color: #166bea;
 }
 #btrix_litemenu li ul {
 height: auto;
 left: -9999px;
 margin: 0 0 0 -1px;
 position: absolute;
 width: 160px;
 z-index: 9999;
 }
 #btrix_litemenu li:hover ul {
 left: auto;
 }
6. Go to blogger and click Layout
7. Click Add Gadget and select 'HTML/Javascript
8. Paste below code.
<div id="btrix_litemenu">
<li><a href="#">Home</a></li>
<li><a href="#">Sub Menu 1</a>
 <ul>
<li><a href="#"> Menu 1</a></li>
<li><a href="#"> Menu 2</a></li>
<li><a href="#"> Menu 3</a></li>
</ul>
</li>
<li><a href="#">Sub Menu 2</a>
 <ul>
<li><a href="#"> Menu 1</a></li>
<li><a href="#"> Menu 2</a></li>
<li><a href="#"> Menu 3</a></li>
</ul>
</li>
<li><a href="#">Menu 1</a></li>
<li><a href="#">Menu 2</a></li>
<li><a href="#">Menu 3</a></li>
<li><a href="#">Menu 4</a></li>
<li><a href="http://www.bloggertrix.com/">Menu 5</a></li>
</div>
Replace # with your links.
9. Now save your HTML/Javascript'. You are done.
If you have any problem regarding this Thin Lite style Css3 Navigation Bar. Leave a comment.