Saturday, August 24, 2013

Stylish Social Media Widget with Search Box

Social media is very important in these days.In this tutorial im gonna explain,how to add social media widget with search box for blogger.Social media always helps to bring quality and fast traffic to your blog.All bloggers must use social medias sites like Facebook, Twitter,Linkdin.By sing this social media widget, you can link with your social profiles.And other thing is, this widget include with search box too. So, you can save your blogger side bar space by using this 2 in 1 widget.In this  post  im gonna  explain  how to add social media  widget with light search box for your blog. Im using css3 and HTML for this widget. you can take a look at in demo page.

Stylish+Social+Media+Widget+Search+Box

1. Go to Blogger Dashboard > Layout
2. Click Add Gadget and select 'HTML/Javascript'
3. Paste below code.


<style>
#btrixwidget{width:307px;
padding:0 0 5px 0;
border:1px solid black;}
#btrix-searchbox {
    border-radius: 5px;
    background: URL(https://blogger.googleusercontent.com/img/b/R29vZ2xl/AVvXsEhaYIfsBR7OKMwA67bc6YUPFPHyC9NQCjVhFgunGtdf03XlueS2PngPuWmKplejUXXe8RfILra-GCjrv2m_gIq6ElypvA3alUeGlX7kY9Jry4-5yXSBqoTq-_dvFJ5YLHnecYWZ-k5nGO1j/s1600/blue.png) no-repeat scroll center center transparent;
    width: 307px;height: 50px;disaply: block;}
form#btrix-searchform {
    display: block;padding: 9px 16px; margin: 0;}
 form#btrix-searchform #s {
    padding-left: 24px !important;padding: 7.5px;margin: 0;width: 198px;
    font-size: 16px;font-family: georgia;font-style: italic;color: #666666;vertical-align: top; border: none;background: transparent;}
 form#btrix-searchform
#sbutton {margin: 0;padding: 0;height: 40px;width: 74px;vertical-align: top;
    border: none;background: transparent;}
</style>
<div id="btrixwidget"><center>
<a href="http://twitter.com/bloggertrix" target="_blank" wrc_done="true"><img src="https://blogger.googleusercontent.com/img/b/R29vZ2xl/AVvXsEidt68o9W-rAnmAjc_1msmXYENzYQ2lKsTl9DeaCJ0-Lcv_Twwg7obIv_Zi20rfQRBILMTVQkvnqKgh4sUzwVACglujfaqBZwwqg_9-kKS8R8d7ErgSVdmG1_Fg0sT3gVxIXiHC0VpN9hc/s1600/btrix-twitter.png" alt="" title="twitter" width="62" height="78" class="alignnone size-full wp-image-6249"></a>

<a href="http://www.facebook.com/bloggertrix" target="_blank" wrc_done="true"><img src="https://blogger.googleusercontent.com/img/b/R29vZ2xl/AVvXsEgO9RkKx95iA1_TJPKY8QuKCZttMc3gF18_1-LRLGEW6TOdD6RPaHd1NwMGGlPQTAbhsenhT2EC1XEgVdd-F1UAU0_5Uzy4pjxERrm8Jrn3x6KozB1TJSjavnof0XDhEiYNb_ScEcbxRuY/s1600/btrix-facebook.png" alt="" title="facebook" width="62" height="78" class="alignnone size-full wp-image-6248"></a>

<a href="http://feeds.feedburner.com/bloggertrix" target="_blank" wrc_done="true"><img src="https://blogger.googleusercontent.com/img/b/R29vZ2xl/AVvXsEhDgWDgnX6ckWlvF0ZYKdGCuFfbVKV_zQ6MwPF7U2v07F17Etkizl46aRjp9Wnb9p9VVJIOUsoB2NaMR7K-EzFI-xnXZN2BVxuK76ED1kTP7nvddINLxDbeJ6pIgzEnT2rwI6IRcWhOWug/s1600/btrix-rss.png" alt="" title="rss" width="62" height="78" class="alignnone size-full wp-image-6251"></a>

<a href="http://au.linkedin.com/username" target="_blank" wrc_done="true"><img src="https://blogger.googleusercontent.com/img/b/R29vZ2xl/AVvXsEjGtED51H8L7umH-y-K4G-lPL0xu5-U-1gyb2s_7hyphenhyphenWZnfURwSQcaRy13t3fA3bhslk-FpZeoy1uS2QqnLAL-IGMZugneCj4mTKSK65leGVc5xV1har3PXzScFff0N2x22AyOiZLFkelZU/s1600/btrix-linkedin.png" alt="" title="linkedin" width="62" height="78" class="alignnone size-full wp-image-6250"></a>

<div id="btrix-searchbox">
    <form id="btrix-searchform" action="/search" method="get">
        <input type="text" id="s" name="q" value="Search..." onfocus='if (this.value == "Search...") {this.value = ""}'
        onblur='if (this.value == "") {this.value = "Search...";}' />
        <input type="image" src="http://img1.blogblog.com/img/blank.gif" id="sbutton"
        />
    </form>
</div>
</center>
</div>

Replace bloggertrix with your twitter profile
Replace bloggertrix with your facebook profile
Replace bloggertrix with your feedburner profile
Replace username with your linkedin profile

4. Now save your HTML/Javascript'.

You are done. If you have any problem related to this Stylish Social Media Widget. Just leave a comment.I will help to you.
Read More

Saturday, August 17, 2013

Css Icon Hover Effect Navigation Bar For Blogger

Every web developers using Css3 Icon hover effect during their development process.There have many techniques they have to focus on.Like faster loading,efficient and handling easier.There have lot of advantages of using Css3 hover effects,web developers and webmasters know it well.Designing website also learning process.On this tutorials also show us how to use Css3 Icon hover effect  navigation bar without using any JavaScript library. Css3 always helpful to customize our animation easily.It is very easy because optimized by HTML.Hope every visitors have browsing experience with,how is the Css3 Icon hover effect works.

Navigation bar is very important  bloggers. We can navigate our pages, categories without having problem.There have lot of benefits of using Css3 Icon hover effect navigation bar.It help our audience to find our important pages like contact us page, About us, Advertising etc.And other thing is, if you choose some nice looking navigation bar, it help to make your blog attractive.By studying this tutorial, you can learn how to add Css3 Icon hover effect navigation bar to blogger.This is very useful
web developers as well. You can check demo by demo button.How this helpful to you.

How to add Css Icon Hover Effect Navigation Bar

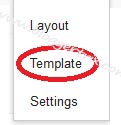
Css+Icon+Hover+Effect+Navigation+Bar


1. Go to Blogger Dashboard > Template
2. Backup your template
3. Click on Edit HTML
4. Find  ]]></b:skin>   and add below code just above it

/* The CSS Code for the menu starts here bloggertrix.com */ #btrix-nav {margin: 100px auto;list-style: none;width: 632px;height: 87px;overflow-y: hidden;}
#btrix-nav li {float: left;}
#btrix-nav li a {display: block;color: white;width: 120px;height: 61px;margin-top: 24px;text-decoration: none;text-align: center;border-top: 1px solid #bbb;border-bottom: 1px solid #555;}
#btrix-nav li a span.aname {font: bold 17px/61px "Arial";color: #fff;text-transform: uppercase;cursor: pointer;position: relative;top: 0;transition: top .5s ease;text-shadow: 1px 1px 1px rgba(0, 0, 0, 0.5);}
#btrix-nav li a img {position: relative;top: 0;transition: top .5s ease;}
#btrix-nav li a:hover {cursor: pointer;}
#btrix-nav li a:hover img {top: -85px;}
#btrix-nav li a:hover .aname {top: 85px;}
#btrix-nav li:nth-child(1) a {background: #3eb006;border-radius: 5px 0 0 5px;border-left: 1px solid #bbb;}
#btrix-nav li:nth-child(2) a {background: #9bc704;}
#btrix-nav li:nth-child(3) a {background: #0dc3ff;}
#btrix-nav li:nth-child(4) a {background: #51a2ec;}
#btrix-nav li:nth-child(5) a {background: #6e3cab;border-radius: 0 5px 5px 0;border-right: 1px solid #555;}


5. Go to blogger Layout
6. Click Add Gadget and select 'HTML/Javascript'
7. Paste below code.

<div id="btrix-nav">
<li> <a href="#"><span class="aname">Homes</span> <img src="https://blogger.googleusercontent.com/img/b/R29vZ2xl/AVvXsEib98FxdOWWW-nQBDjW-LgXOr800Q2XpWtJ7qDfoCXKQs5IAsexnC7sfRXncgD8Mt0j1GjLxeuOFkkiRJb6HDnmsslo29Swzt4q6vDqGvLMYJx0NRe18Bu8PIC7BHI5SJ0xvBkp7AxrFBM/s1600/btrix-home.png" /> </a> </li>
<li> <a href="#"> <span class="aname">Download</span> <img src="https://blogger.googleusercontent.com/img/b/R29vZ2xl/AVvXsEgjiLIDOzp9c2vI-S0NXX5FvopSZh54mZTY2aFIEG3m-1KcviVXqnoXjGwJFVI9iXuY9sd5CBWICcSeqLMVd1YdHrdCQLJmSNmaegGyPLT9Ra9AB08HZw42RUuJD9CuaT_ovw5cDxpUQkY/s1600/btrix-download.png" /> </a> </li>
<li> <a href="#"> <span class="aname"> MySql</span> <img src="https://blogger.googleusercontent.com/img/b/R29vZ2xl/AVvXsEgGfIzWrcKPdg4gtNXnA7Zhg7O3HPKF3HaPT1ItNtvb3oaDtZ5FE1DbpDRlQ41WOSeC5a3HAiSsZFo_3KJLBV7r84SPDU-fsDBhOW9SXn8hX4OV4eBulj-W5zaFJKCCWnSjWC2W9OmjlwA/s1600/btrix-mysql.png" /> </a> </li>
<li> <a href="#"> <span class="aname"> Html</span> <img src="https://blogger.googleusercontent.com/img/b/R29vZ2xl/AVvXsEi1ZMLqVu6UlnLxHbGWlYyMPzXadA43KFZnipUWQXlSKrFQP-4lwiBbP2gW_gg3z8rGUidqafQSfhAkb0TYcvLHcxv_CyF05vwV7BwM0kmzP0RxndXFMtuYyf_QaijaGo1S1O6b059T9M8/s1600/Btrix-html.png" /> </a> </li>
<li> <a href="#"> <span class="aname">Contact</span> <img src="https://blogger.googleusercontent.com/img/b/R29vZ2xl/AVvXsEhcgud-A5UmquU7qiawv7tzzWukedXMYcCZqf_FCEyZpn9midmuhb1vOVUuIbnw-WQKNbMWowucJ73EnM2xEG71UXFlDEvL7DhqoUi2xLwQP1_oNvKotE_ObbHeIlvS2Qimsg5OVzs0G34/s1600/btrix-contact.png" /> </a> </li> </div>
Replace # with your links.

8. Now save your HTML/Javascript'.

You are done. If you have any problem related to this Css Icon Hover Effect Navigation Bar. Just leave a comment.I will help to you.
Read More

Wednesday, August 14, 2013

Top 10 Tips To Make Your Visitors Glad And Improve Conversion

The web owners do think that only the search engine optimization is important for a business.They do not care about the conversion with their clients and customers are going. They do not understand the fact that the conversions are more important than the search engines ranks. The conversion optimization is must and it takes time to test the results. Some of the  optimization ideas can work for specific and not for others. However, we have some common conversion optimization techniques that are applicable to all sites. Just have a look here to know what are they.

  Read: Useful SEO Techniques to Achieve High Results

Visitors+Glad++And+Improve+Conversion

Visible Phone Number To Customers


Most of the customers believe that you are reliable only when they can have traditional communication with you. They want you to communicate via phone, through which they can develop trust on you. It might be irritating for you to receive phone calls daily from the customers even for some silly reasons. It is not that every customer will call you, but displaying your number openly on the site will develop more confidence and trust on you.

Respond To The Mails And Phone Calls


Most of the times, it happens that the business owners do not respond to the call or email of the customers. The phone calls are mostly missed ending up in voicemail. This makes  the customers too irritated and develops a bad impression about you. If you respond to your  customer’s calls, then they will be highly pleasured and excited. Therefore, do make it as a habit to be in touch with your customers.

Avoid Grammatical Errors On website Content

Your website replicates what you are. If you do any spelling mistakes or typos, then it is such an amateur thing for a business owner. The customers will certainly lose confidence on you,  if there are typos and spelling mistakes on your website content. It may sound silly, but it do  have a great impact on your website’s performance.

Give A Detailed Information On Cost And Shipping Details


The customers will decide to buy a product based on so many different features, but the cost of the products is a significant one. It plays a major role in deciding whether to transact  or not. If you do not provide price information on your site, then it is more likely that the  customers will move on to other site. Similarly, be open with the shipping costs. Do not let  your customers wait to reach end of the shopping process to know the total amount they have to pay.

Include ‘About Us’ Page to Your Site


Do take time to express about yourself in the ‘About us’ page. It gives a chance to the customers to have some personal information about yourself, which in turn build confidence on yourself as you share about yourself with your customers. Generally, many customers want to visit the ‘About us’ page to know about your personal and business details. A  perfect ‘About us’ page can yield you more visitors.

Highlight Your Links On site


Make your links stand out of the crowd. You can achieve it many ways. Change the font, colour, style, highlight etc. If you do not present your links in proper way, then the customers will misunderstand it as normal text. The links are just for navigating to other links. Make the links clear to the visitors.

Develop An Error Page in Your Site


There are always chances for the presence of broken links on the webpage. If the customers click on a broken link and redirect to a page that they do not understand or have no further options, then you have a chance to lose them. If you create a customized error 404 page, then the customers know what they have to do and will decide to stay on your page.

Repair Broken Links In your Site


Though it is said that the broken links are common in websites, it is must to take care of them. You must try to repair the broken links for better customer satisfaction. It is mandatory to check all your internal links regularly. You have to make sure the internal links are updated all the time.

Include Links In Your Web Content


Make it as a practice to include necessary links on your website to make people stay within your website. If there are not links present in your website and when people reach the end of the content, they think that they can leave the site. If links are there like links to testimonials,links to about us page etc. then the customers will be motivated to stay further on your site.

Include CTA (Call To Action)


Do include this on your website to instruct the users about what they have to do next on yourwebsite. Some examples are ‘buy now, add to cart, contact us, click to view testimonials, sign up, check out, follow us’ etc.  All these will let the user know what to do further on your site letting them stay on your site for long.

Author Bio: This is a guest post by Janice Noel. Janice is a freelance writer and wallpaper enthusiast. She loves to collect various wallpapers for her free wallpaper blogs cullogo.com and wallpaphd.com
  If you would like to write for bloggertrix, check our guest posting guidelines
Read More

Monday, August 12, 2013

Image Swap Animation with Using CSS Keyframes

Few weeks ago I posted a tutorial about Awesome Jquery Rotate Effect For Blogger Images. Actually you can add that image rotating to your side bar with some special image, who want to make their blog attractive.Anyway,Today im gonna explain about,Make Image swap animation with using CSS key-frames. Most of every new browsers are support with this effect. You can add this to blogger side bar by resizing images.Im just using CSS for this swapping effect. CSS code is too long for this widgets.Hope you can understand it.if you have any problem regarding to this tutorial let me know. Use below button for demo.


Image+swap+animation


You may like these articles
Css3 Peel Image Effect For Blogger
Stylish Sliding Up Image Description
Stylish jQuery Photo Gallery With Description

Make Image swap animation with using CSS


1. Log in to blogger account and Click drop down.
blog-post-option
2. Now select "Layout" Like Below.

3. Click Add Gadget and select 'HTML/Javascript

4. Paste below code. (You can add any Names for Title )

<style>
.btcontainer {
position: relative;margin: 30px;height: 250px;width: 550px;float: left;}
/*Photo Border*/
.imagebt1, .imagebt2 {
border: 5px solid #fff;border-radius: 3px;height: 200px;margin: 20px;position: absolute;width: 300px;
-webkit-box-shadow: 3px 3px 3px rgba(0,0,0,0.3);
box-shadow: 3px 3px 3px rgba(0,0,0,0.3);}
.imagebt1 {
-webkit-transform: rotate(-7deg);-moz-transform: rotate(-7deg);-o-transform: rotate(-7deg);-ms-transform: rotate(-7deg);transform: rotate(-7deg);}
.imagebt2 {
  left: 100px;-webkit-transform: rotate(7deg);-moz-transform: rotate(7deg);-o-transform: rotate(7deg);-ms-transform: rotate(7deg);transform: rotate(7deg);}
/*HOVERS*/
.btcontainer:hover {
  cursor: pointer;}
.btcontainer:hover .imagebt1 {
  -webkit-animation: imagebt1 1.5s 2 alternate;-moz-animation: imagebt1 1.5s 2 alternate;-ms-animation: imagebt1 1.5s 2 alternate;-o-animation: imagebt1 1.5s 2 alternate;animation: imagebt1 1.5s 2 alternate;
}
.btcontainer:hover .imagebt2 {
  -webkit-animation: imagebt2 1.5s 2 alternate;
     -moz-animation: imagebt2 1.5s 2 alternate;
      -ms-animation: imagebt2 1.5s 2 alternate;
       -o-animation: imagebt2 1.5s 2 alternate;
          animation: imagebt2 1.5s 2 alternate;}
@keyframes "imagebt1" {
 0% {-webkit-transform: rotate(-7deg);-moz-transform: rotate(-7deg);-o-transform: rotate(-7deg);-ms-transform: rotate(-7deg);transform: rotate(-7deg);
 }
 50% {-webkit-transform: rotate(-14deg);-moz-transform: rotate(-14deg);-o-transform: rotate(-14deg);-ms-transform: rotate(-14deg);transform: rotate(-14deg);
 }
 100% {-webkit-transform: rotate(-7deg);-moz-transform: rotate(-7deg);-o-transform: rotate(-7deg);-ms-transform: rotate(-7deg);transform: rotate(-7deg);
 }}
@-moz-keyframes imagebt1 {
 0% {
   -moz-transform: rotate(-7deg);transform: rotate(-7deg);
 }
 50% {
   -moz-transform: rotate(-14deg);transform: rotate(-14deg);
 }
 100% {
   -moz-transform: rotate(-7deg);transform: rotate(-7deg);
 }
}
@-webkit-keyframes "imagebt1" {
 0% {
   -webkit-transform: rotate(-7deg);transform: rotate(-7deg);
 }
 50% {
   -webkit-transform: rotate(-14deg);transform: rotate(-14deg);
 }
 100% {
   -webkit-transform: rotate(-7deg);transform: rotate(-7deg);
 }
}
@-ms-keyframes "imagebt1" {
 0% {-ms-transform: rotate(-7deg);transform: rotate(-7deg);
 }
 50% {-ms-transform: rotate(-14deg);transform: rotate(-14deg);
 }
 100% {-ms-transform: rotate(-7deg);transform: rotate(-7deg);
 }
}
@-o-keyframes "imagebt1" {
 0% {-o-transform: rotate(-7deg);transform: rotate(-7deg);
 }
 50% {-o-transform: rotate(-14deg);transform: rotate(-14deg);
 }
 100% {-o-transform: rotate(-7deg);transform: rotate(-7deg);
 }
}
@keyframes "imagebt2" {
 0% {
    left: 100px;z-index: 1;-webkit-transform: rotate(7deg);-moz-transform: rotate(7deg);-o-transform: rotate(7deg);-ms-transform: rotate(7deg);transform: rotate(7deg);
 }
 49% {
    left: 350px;z-index: 1;-webkit-transform: rotate(20deg);-moz-transform: rotate(20deg);-o-transform: rotate(20deg);-ms-transform: rotate(20deg);transform: rotate(20deg);
 }
 50% {
    left: 350px;z-index: -3;-webkit-transform: rotate(20deg);-moz-transform: rotate(20deg);-o-transform: rotate(20deg);-ms-transform: rotate(20deg);transform: rotate(20deg);
 }
 100% {
    left: 100px;z-index: -3;-webkit-transform: rotate(7deg);-moz-transform: rotate(7deg);-o-transform: rotate(7deg);-ms-transform: rotate(7deg);transform: rotate(7deg);
 }
}
@-moz-keyframes imagebt2 {
 0% {left: 100px;z-index: 1;-moz-transform: rotate(7deg);transform: rotate(7deg);
 }
 49% {
   left: 350px;z-index: 1;-moz-transform: rotate(20deg);transform: rotate(20deg);
 }
 50% {
   left: 350px;z-index: -3;-moz-transform: rotate(20deg);transform: rotate(20deg);
 }
 100% {
   left: 100px;z-index: -3;-moz-transform: rotate(7deg);transform: rotate(7deg);
 }
}
@-webkit-keyframes "imagebt2" {
 0% {left: 100px;z-index: 1;-webkit-transform: rotate(7deg);transform: rotate(7deg);
 }
 49% {
   left: 350px;z-index: 1;-webkit-transform: rotate(20deg);transform: rotate(20deg);
 }
 50% {left: 350px;z-index: -3;-webkit-transform: rotate(20deg);transform: rotate(20deg);
 }
 100% {left: 100px;z-index: -3;-webkit-transform: rotate(7deg);transform: rotate(7deg);
 }
}
@-ms-keyframes "imagebt2" {
 0% {left: 100px;z-index: 1;-ms-transform: rotate(7deg);transform: rotate(7deg);
 }
 49% {left: 350px;z-index: 1;-ms-transform: rotate(20deg);transform: rotate(20deg);
 }
 50% {left: 350px;z-index: -3;-ms-transform: rotate(20deg);transform: rotate(20deg);
 }
 100% {left: 100px;z-index: -3;-ms-transform: rotate(7deg);transform: rotate(7deg);
 }
}
@-o-keyframes "imagebt2" {
 0% {left: 100px;z-index: 1;-o-transform: rotate(7deg);transform: rotate(7deg);
 }
 49% {left: 350px;z-index: 1;-o-transform: rotate(20deg);transform: rotate(20deg);
 }
 50% {left: 350px;z-index: -3;-o-transform: rotate(20deg);transform: rotate(20deg);
 }
 100% {left: 100px;z-index: -3;-o-transform: rotate(7deg);transform: rotate(7deg);
 }
}
</style>

<div class="btcontainer">
  <img class="imagebt1" src="https://blogger.googleusercontent.com/img/b/R29vZ2xl/AVvXsEgBHHrABTfdslR3s_z_0iSPt1mxwYDGSiOp6FYlHq-IJy_KWTzQKPX4RoMFiQl-pxNRj029dDNml_mlK8t1WFrCN1Xp-ojdG5RImcaZ71OTQAix5ewiGQ4e8dw1AdjNPnboVIbKaZtVFTs/s1600/image1bt.jpg" alt="">
  <img class="imagebt2" src="https://blogger.googleusercontent.com/img/b/R29vZ2xl/AVvXsEikPjLclBAEbxNAfMfP-R3HyIIBWMJpaPrwhaz4CWSfnSSt1naR2q8lok_A_q2LkNI7TR60DfE0nmPv9pcu35H9H2jinJQQYjkcxrvkyh0RpVgnaxG1MbGtaRQF5BqxvawfbOH6cI4YazU/s1600/image2bt.jpg" alt="">
</div>
You can change above two urls for changing your images.

5. Now save your HTML/Javascript'. You are done...
If you need any help for Image Swap Animation Widget, Just leave a comment.
Read More

Saturday, August 10, 2013

Css3 Dark Blue Navigation Bar For Blogger

Navigation bar is very important in websites. It helps to navigate important page easily.So, your audience can find important pages.Other things is, Everyone can add navigation bar for their blogs.
But you have to add attractive menu for your blogs.It will give nice looks to your blogs and helps to attractive your audience too.In this tutorial im gonna explain how to add Css3 dark blue navigation bar for your blog.Every steps explained well to understand newbies.Just give a try to add Css3 Dark color navigation bar.

How to add Css3 Dark Blue Navigation Bar


Css3+Dark+Blue+Navigation+Bar


1. Log in to blogger account and Click drop down.
blog-post-option
2. Now select "Template" Like Below.

Select-template

3. Now you can see Live on blog, Click EDIT HTML Button"

4. Find this tag by using Ctrl+F    ]]></b:skin>

5. Paste below code Before ]]></b:skin> tag

/* The CSS Code for the menu starts here bloggertrix.com */

#navigation1 { width:900px;height: 45px; background: url(https://blogger.googleusercontent.com/img/b/R29vZ2xl/AVvXsEhHHXKDQgIK-t0wBT7aH2fb-EKubChFTAyGKGjKL1j48kcG5mmVybsvMpFW0hatYFElVncPdaD5HSvCkVWAzQVIfBI_6twSokDfR7drffbG1MGaMjCVqm3UnLzfzPt1MYrLppNQZI4xB7o/s1600/nav-bg.gif) repeat-x 0 0;
border:inherit 2px #000000;
-moz-border-radius-topleft: 10px;-moz-border-radius-topright:10px;-moz-border-radius-bottomleft:10px;-moz-border-radius-bottomright:10px;-webkit-border-top-left-radius:10px;-webkit-border-top-right-radius:10px;-webkit-border-bottom-left-radius:10px;-webkit-border-bottom-right-radius:10px;
border-top-left-radius:10px;border-top-right-radius:10px;border-bottom-left-radius:10px;border-bottom-right-radius:10px; }
#navigation1 ul { list-style: none outside; padding: 8px 0 0 8px; }
#navigation1 li { float: left; display: inline; height: 29px; line-height: 29px; text-transform: uppercase; margin-right: 3px }
#navigation1 li.last { margin-right: 0; }
#navigation1 li a,
#navigation1 li a span { float: left; display: inline; height: 29px; padding-left: 10px; background-position: 0 0; color: #919191; }
#navigation1 li a span { padding-left: 0; padding-right: 10px;  background-position: right 0; }
#navigation1 ul.sf-menu li a:hover,
#navigation1 ul.sf-menu li a:hover span { background-image: url(https://blogger.googleusercontent.com/img/b/R29vZ2xl/AVvXsEgqIzOj2nwConNlTZP4IlrZbdeI_o3yzIjDuk1AREhz2mGziyKwwjIKHl40i5jA8tMOqTHk3c6zVuZ1HH8LrxZmOZ8Cff133JJWuB1PsAcdzEtGN43sFUruzgQhYL72nbeHW7WNRF8Mln8/s1600/bt_nav_hover.png); text-decoration: none; color: #fff; }
#navigation1 li a.clicked,
#navigation1 li a.clicked span { background-position: 0 bottom }
#navigation1 li a.clicked span { background-position: right bottom; }

6. Go to blogger and click Layout

7. Click Add Gadget and select 'HTML/Javascript

8. Paste below code.

<div id="navigation1">
<ul class="sf-menu sf-js-enabled sf-shadow">
<li class="cat-item cat-item-29"><a title="Home" href="#"><span>HOME</span></a></li>
<li class="cat-item cat-item-29"><a href="#" title="Graphics"><span>Graphics</span></a></li>
<li class="cat-item cat-item-31"><a href="#" title="Coding"><span>Coding</span></a></li>
<li class="cat-item cat-item-18"><a href="#" title="inspiration"><span>inspiration</span></a> </li>
<li class="cat-item cat-item-1"> <a href="#" title="Photography"><span>Photography</span></a></li>
<li class="cat-item cat-item-30"><a href="#" title="Freebies"><span>Blogger</span></a></li>
<li class="cat-item cat-item-19"><a href="#" title="Wordpress"><span>Wordpress</span></a></li>
<li class="cat-item cat-item-25"><a href="#" title="Logo"><span>Logo</span></a></li>
<li class="cat-item cat-item-22"><a href="#" title="Contact"><span>Contact</span></a>
</li></ul></div>
Replace # with your links.

9. Now save your HTML/Javascript'.

You are done. If you have any problem related to this Css3 Dark blue navigation bar. Just leave a comment.I will help to you.
Read More

Wednesday, August 7, 2013

How Do i Create a Blog For Make Money

What Are Blogs And How Do You Make Money Out Of It


Today many people are making money by having their own blogs. A web blog is a form of a site that is set up by an individual though it can even be run by a company. Here personal opinion can be published, experiences on a certain topic in the form of a journal or one can post updates on certain products or services in such a website as well. Blogs have gained popularity online and many are even able to attract lucrative advertisements on their site. Indeed, that is how the concept of making money through blogs came in. When you aim to make money through blogs, you need to identify certain strategies and utilize them. The first part of these strategies will comprise of attracting the readers to your site. The second part would consist of cashing in on the online traffic that flows into the site. That is the essence behind the process of making money through blogging and it applies to all the successful blogging ventures out there.

blog-making-money

Deciding On The Content


Before you worry about how to get money flowing into your blog, you need to first decide on a content that is unique. Remember that there are endless blogs on every topic imaginable. You can run a search on blogs of the topic you have in mind in order to see what people are writing about it, which blogs seem to gain a lot of traffic and so forth. That will give you an idea of the popularity of the topic and what you need to do in order to get started.

Read:   Five Essential Content Strategies
            How to Create Search Engine Optimized Contents

Choosing A Niche


It is best to identify the topic for your blog by keeping the following points in mind:

•    Decide on the blog topic before you begin
•    The industry niche on which your topic focuses on should be a point of interest for the online
      readers
•    You can research as to the hot topics that are trending these days and cash in on that by writing a
     blog on it
•    It is best to start a blog on a  subject matter you are an expert on or can talk about

     Read : How to Choose a Niche for Your Blog
                 Top 5 Ways To Choose Right Domain Name

Promoting The Blog


Once you have picked up the right niche and the topic, you need to know how to attract the target viewers to your site. They need to know that a blog on the topic has come up and the unique content that it offers. Not only should you incorporate SEO techniques to get your blog noticed by the search engines, you can start writing guest posts on relate blogs, participate in online conversations where the topic is related to you blog and other indirect means of advertising your blog.

Read: 10 Steps to Jump Start Traffic to a New Blog
            Five Killer Ways to Make Money with your Personal Blog
            Content Marketing and Social media tips

How To Cash In On Your Blog


The common way of generating making money from your blog is to attract ads to your blog. You can get started by choosing an advertising tool like AdSense or Clicksor which will direct related ads to your site. The click through rates are higher for these ads and that will ensure more traffic to your site. If you have marketed your site right, you will soon have companies seeking to put up their ads on your site. You may then be selective and have ads that are right for your blog. Many will wish to own advertising blocks on your site.

Read: Tips to Make Money Online with Affiliate Programs 
            How Possible Make Money with Pinterest

In such cases, you need to be prepared with the advertising package that you will offer. With the right ad partners, you will get enough of making money and traffic to your blog.
Hope this helps to make money from your blog.
Read More

Thursday, August 1, 2013

Dynamic Floating Social Bookmark Widget for Blogger

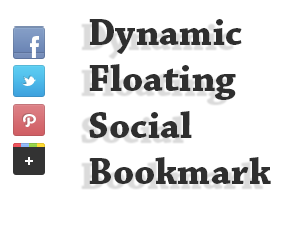
Social media networks always great resource to get traffic.Every bloggers love to get huge traffic for their blog.Therefore we have to be active in social medias site.Because we need  get lot of followers and friends.In this tutorial im gonna explain How to add Dynamic Floating Social Bookmark Widget for Blogger.It helps to increase your followers and friends.This Floating Social Bookmark Widget shows on every pages in bloggers. You can link your social media profile Facebook, Twitter Pinterest and Google plus. It will help to get new followers and friends to your profile.Check below link for demo.
Floating-Social-Bookmark


You may like these articles
How to Add Fixed Social Media Sidebar for Blogger
Awesome 8 tips to Increase Google Plus Followers
Smooth Sliding Social Media Widget For Blogger
Extracting Hover Style Social Media Widget for Blogger

How to Add Unique Rss Subscribe Widget For blogger


1. Log in to blogger account and Click drop down.
blog-post-option
2. Now select "Template"

3. Find this tag by using Ctrl+F   </head>
    Note: First click on template code (anywhere of code), After that press  Ctrl+F

4. Paste below code before </head> tag

<script src='http://ajax.googleapis.com/ajax/libs/jquery/1.3.2/jquery.min.js' type='text/javascript'/> 
<script language='javascript'> 
var name = &quot;#floatMenu&quot;;
var menuYloc = null;
$(document).ready(function(){menuYloc = 
parseInt($(name).css(&quot;top&quot;).substring(0,$(name).css 
(&quot;top&quot;).indexOf(&quot;px&quot;)))
$(window).scroll(function () { offset = menuYloc+$(document).scrollTop()+&quot;px&quot;;$(name).animate({top:offset},{duration:1000,queue:false});});}); 
#floatMenu {
position:absolute;top:150px;float:left;width:45px;}
#floatMenu ul {list-style: none;}
#floatMenu ul li a {-webkit-transform:scale(0.6);-moz-transform:scale(0.6);-o-transform:scale(0.6);-webkit-transition-duration: 0.5s;-moz-transition-duration: 0.5s;-o-transition-duration: 0.5s;opacity: 0.8;}
#floatMenu ul li a:hover {-webkit-transform:scale(1);-moz-transform:scale(1);-o-transform:scale(1);opacity: 1;}
</style>


5. Now again Find this tag by using Ctrl+F   </body>
    Note: First click on template code (anywhere of code), After that press  Ctrl+F

6. Paste below code before </body> tag

<div id='floatMenu'>
<ul>
<li><a href='http://facebook.com/bloggertrix' target='_blank'><img border='0' src='https://blogger.googleusercontent.com/img/b/R29vZ2xl/AVvXsEhqwR17TGn5Yl6scrKBKQQcdKREZwtewY9RKxiBY7_jbX6jAh5DAp38UAhXWgqKdP7JOaggc_CMMKbzHfsha8X7DJnmsRRmNRNgFFGjyJw39DwfGliSBz1TRTHTGoWrxWjXFIFdA_tqTqs/s1600/btrix-facebook.png' style='margin-bottom: 3px;' title='Follow Me On  Facebook'/></a></li>
<li><a href='http://twitter.com/bloggertrix' target='_blank'><img border='0' src='https://blogger.googleusercontent.com/img/b/R29vZ2xl/AVvXsEi8K2psjJGZB4ATwBfJYAyR6MyN3W2sD_phBXDcx4poLp3jrwJLa0yjr5Qv1Pys6MiEURy7sCVGwPx09AyUIcBgVupqivenpgbnz4UkFn33u6N03WeQVS2V9PFUStyj45xVhaOgFt4g_zE/s1600/btrix-twitter.png' style='margin-bottom: 3px;' title='Follow Me On  Twitter'/></a></li>
<li><a href='http://pinterest.com/bloggertrix/' target='_blank'><img border='0' src='https://blogger.googleusercontent.com/img/b/R29vZ2xl/AVvXsEgK-RfZdj-qITGC2OAKBuEeZKPzx2XftqghzDxaWqBE_jKUzDwdNGnonEy9CcCQ23ctRQ_L2tyXLTiVoyxUvz19M9toNBhyphenhyphenholFzeSp824HX4ij5FrzSC4mDlaKemzBTwxs98nW27YKZWs/s1600/btrix-pinterest.png' style='margin-bottom: 3px;' title='Follow Me On  Pinterest'/></a></li>
<li><a href='https://plus.google.com/107955298793879607964' target='_blank'><img border='0' src='https://blogger.googleusercontent.com/img/b/R29vZ2xl/AVvXsEh0uZjN_lXeXOKkle3Q8m7tCVze4FMX03NUm_H6WQdM2ADoVbvPjDu2DXYgExzOAJ2VU38NPFmaTvGkBPevcw4ESDW19dtGQ8Q01xcWhWOx028n9eBaHfElfTNhYgS_MPGZGtdgfnHYjA8/s1600/btrix-googleplus.png' style='margin-bottom: 3px;' title='Add Me your Circle'/></a></li>
</ul></div>

Replace bloggertrix with your Facebook username
Replace bloggertrix with your Twitter Username
Replace bloggertrix with your Pinterest Username
Replace 107955298793879607964 with your Google plus id Username

7. Now click Save Template You are done...
If you need any help for Dynamic Floating Social Bookmark Widget, Just leave a comment.
Read More