This is a unique tutorial.In this post im gonna explain How to add 3 in 1 Css3 navigation bar. It
include Social network profile like Facebook, twitter and Rss with Google custom Search box.
This Css3 navigation work fine with every modern internet browsers.You can link with your main pages by using this Css3 navigation bar.Im using Css3 and HTML Just check out demo.Its easy to add to blogger.lets give a try.

1. Log in to blogger account and Click drop down.
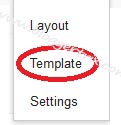
 2. Now select "Template" Like Below.
3. Now you can see Live on blog, Click EDIT HTML Button"
4. Find this tag by using Ctrl+F ]]></b:skin>
5. Paste below code Before ]]></b:skin> tag
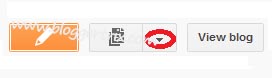
6. Go to blogger and click Layout
7. Click Add Gadget and select 'HTML/Javascript
8. Paste below code.
Replace bloggertrix with your Feedburner ID
Replace bloggertrix with your Facebook username
Replace bloggertrix with your Twitter Username
9. Now save your HTML/Javascript'. You are done.
Hope this Css3 Navigation Bar helps to make your blog attractive.Leave a comment, if you need any help regarding this menu.
Read More
include Social network profile like Facebook, twitter and Rss with Google custom Search box.
This Css3 navigation work fine with every modern internet browsers.You can link with your main pages by using this Css3 navigation bar.Im using Css3 and HTML Just check out demo.Its easy to add to blogger.lets give a try.
Add Css3 Navigation Bar With Google Custom Search Box
1. Log in to blogger account and Click drop down.
3. Now you can see Live on blog, Click EDIT HTML Button"
4. Find this tag by using Ctrl+F ]]></b:skin>
5. Paste below code Before ]]></b:skin> tag
#btrix1nav{border:none 5px #000000;
-moz-border-radius-topleft: 15px;-moz-border-radius-topright:14px;-moz-border-radius-bottomleft:14px;-moz-border-radius-bottomright:14px;-webkit-border-top-left-radius:15px;-webkit-border-top-right-radius:14px;-webkit-border-bottom-left-radius:14px;-webkit-border-bottom-right-radius:14px;
border-top-left-radius:15px;border-top-right-radius:14px;border-bottom-left-radius:14px;border-bottom-right-radius:14px;-moz-box-shadow: 2px 3px 5px #000000;-webkit-box-shadow: 2px 3px 5px #000000;box-shadow: 2px 3px 5px #000000;
        width:900px;
 margin: 0 0 0 0px;
 padding: 12px 0 8px 0;
 clear: both;
 background: #696969 left bottom no-repeat; }
#btrix1nav .catList{padding: 4px 0 0 35px;float: left;margin-top:-3px; }
#btrix1nav .pageList{padding: 8px 0px 0 0;float: right; }
#btrix1nav ul li{float: left;margin: 0 18px 0 0 ;}
#btrix1nav a{color: #fff;list-style:none;text-decoration: none;}
#btrix1nav a:hover{color: #919191;}
#btrix1nav li {list-style:none;text-decoration:none;}
#search{margin: -2px 20px 0 0;float: right;  }
#updatesBox { margin-left: 100px; }
6. Go to blogger and click Layout
7. Click Add Gadget and select 'HTML/Javascript
8. Paste below code.
<div class="clearfix" id="btrix1nav"> <ul class="catList"> <li class="cat-item cat-item-5"><a href="#">Home</a></li> <li class="cat-item cat-item-3"><a href="#">Downloads</a></li> <li class="cat-item cat-item-6"><a href="#">Tools</a></li> <li class="cat-item cat-item-4"><a href="#">Css3</a></li> <li class="cat-item cat-item-4"><a href="#">HTML</a></li> <li class="cat-item cat-item-4"><a href="#">Tips</a></li> <li class="cat-item cat-item-31"><a href="#">About</a></li> <li class="cat-item cat-item-11"><a href="#">Contact Us</a></li> </ul> <div id="search"> <form action="http://www.google.com/cse" id="cse-search-box" target="_blank"> <div> <input name="cx" type="hidden" value="004972222991511809341:kobh4_l5t3m" /> <input name="ie" type="hidden" value="ISO-8859-1" /> <input class="googleSearchField" name="q" size="20" style="background-color: white; background-image: url(http://www.google.com/cse/intl/en/images/google_custom_search_watermark.gif); background-position: 0% 50%; background-repeat: no-repeat no-repeat; border: 1px solid rgb(126, 157, 185); padding: 2px;" type="text" /> <input class="button" name="sa" type="submit" value="Search" /></div> <input name="siteurl" type="hidden" value="bloggertrix.com/" /><input name="ref" type="hidden" value="" /><input name="ss" type="hidden" value="" /></form> <script src="http://www.google.com/cse/brand?form=cse-search-box&lang=en" type="text/javascript"></script> </div> <div id="updatesBox"> <a alt="Subscribe to RSS" class="updatesIcon" href="http://feeds.feedburner.com/bloggertrix" target="_blank" title="Subscribe to RSS" style="margin-left: 80px;"><img src="https://blogger.googleusercontent.com/img/b/R29vZ2xl/AVvXsEho6kLt8ez1RoTv2Afn5b-fQtNj0uu_TSyhaGgnKDBsr3LGhwwdrIUQmrFGNiyEe1Ruy_4dZd10Y2AxqrpwdEWsbfR5Vf3KgRhw6REJQD8OpOMbF0aSr2bA9ha0aOyx5sF1sYnlTVoynbw/s1600/btrix_RSS-icon.png" style=""></a> <a alt="Follow Us" class="updatesIcon" href="http://twitter.com/bloggertrix" target="_blank" title="Follow Us"><img src="https://blogger.googleusercontent.com/img/b/R29vZ2xl/AVvXsEioTpRIs6vkvbvvzOpPXCxiVj4UXh1fGCRUlfs0mmG8daYrvo8AZ8UvZgTXauMAQDyLf38JaZOER2ju93oqVHd7M7z5eNyvGBv5vUHW7gz7HnoeS8dNpNHBLM8B8_e7UVpMpK3O6mHQgh8/s1600/btrix-twitter-icon.png" /></a> <a alt="Become a Fan" class="updatesIcon" href="http://www.facebook.com/bloggertrix" target="_blank" title="Become a Fan"><img src="https://blogger.googleusercontent.com/img/b/R29vZ2xl/AVvXsEjMikDcVaLCff7t2hCmN65LFF-INwGUp4WVEFjznUpn5s6BfDAjAE0tKNYiLD6NdAGKE_wkH3Gsa-8DIJbQj9WJ1B1QTUyKCPQfAfumvEXRtOvy5Qtk135YEUl7IZ0G7SCfmXL4V_oYy3k/s1600/btrix-facebook-icon.png" /></a></div> </div>Replace # with your links.
Replace bloggertrix with your Feedburner ID
Replace bloggertrix with your Facebook username
Replace bloggertrix with your Twitter Username
9. Now save your HTML/Javascript'. You are done.
Hope this Css3 Navigation Bar helps to make your blog attractive.Leave a comment, if you need any help regarding this menu.