Monday, December 31, 2012

Using Right Background Images For Your Website

It is important  that  the look  and feel of our websites strike a  chord with   the visitors.  If  your visitors are not happy with  your  website   then  they  go  to   the other options that they have. We  always come across sites that have probably a wrong music playing when it opens or might have a  horrible  background image which   acts   as    a huge  turn off.   These   elements become a   hindrance  for   the  visitor   and  leave  a negative impact on them.

Using+Right+Background+Images+For+Your+Website
A website should be able to provide a pleasant user experience, without a pleasant user experience
visitors will not come back to your website. We must have seen many websites that have a background image, but is it really necessary to add such an image to your website? Does it help or harm the website in anyway? We need to consider a few points and do the necessary homework before we actually decide on adding a background image to our website.
A background image should never hamper the user experience in any way. Sometimes background images are too colorful or too dark in a way that it becomes difficult to understand the content on the website. You do not want the image to be the reason for the visitor to leave your website. So the question you first need to ask is whether it will attract or distract your visitor. If you are going to add a background image to your existing website then ask your regular visitors whether its hampering their experience or not. If it is not attracting visitors then it’s better not to have it. You do not want anyone leaving because of a background image.
It’s important that you keep your visitor interested in the content of your website. If your background image is not matching your brand or if doesn’t relate to your target audience then better not have it. Understand your audience or else you will end up hurting yourself. Always use images that relate to your brand and appealing to your visitors.
You see different size backgrounds images on different websites. The size of the image is also an important factor when it comes to background images. If the image utilizes more space than the site will take more time to load and you know that we do not like waiting for the websites to load. The more the websites take time to load the quicker will your visitors leave.
All your content should be easily readable no matter how your background image is. All of your text should be readable over the background image, so any transparencies might sit better if the background is anchored to the top.

You also need to know what kind of device is most used to view your website. The viewing experience is different on a computer and a smartphone. If you're using a repeating background then it won't probably apply because it will expand or contract depending on the screen size of the device.Bottom-line is that if you can still keep your visitor interested with a background image and if he or she is still able to get a great user experience then you do not have any problems.
Author Bio:
Daniel is an experienced web designer who also has a passion in internet marketing and blogging. He
is associated with an offshore web design company. He likes to share his knowledge and experience
through blogging. You can follow him on Facebook @VITEB.
If you would like to write for bloggertrix, check our guest posting guidelines
Read More

Sunday, December 30, 2012

Heart Style Social Sharing Widget For Blogger

Today im gonna explain how to add  Heart Style Social Sharing  Widget For  Blogger with  nice
hover effect.Im using  CSS and HTML  for  this tutorial. Check  below  link  for  demo. You can
get  my  Earlier social network buttons from here

Heart+Style+Social+Sharing+Widget+For+Blogger
Demo

1. Log in to blogger account and Click drop down.
blog-post-option
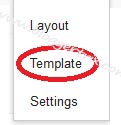
2. Now select "Template" Like Below.

Select-template

3. Now you can see Live on blog, Click EDIT HTML Button"

4. Now click Proceed button.

5.Find this code  by using Ctrl+F  ]]></b:skin>

6.  Paste below code Before ]]></b:skin> code

/* Bloggertrix  */
.bubblewrap{
list-style-type:none;
margin:0;
padding:0;
}
.bubblewrap li{
display:inline;
width: 60px;
height:60px;
}
.bubblewrap li img{
width: 50px; /* width of each image.*/
height: 50px; /* height of each image.*/
border:0;
margin-right: 4px; /*spacing between each image*/
-webkit-transition:-webkit-transform 0.1s ease-in; /*animate transform property */
-o-transition:-o-transform 0.1s ease-in; /*animate transform property in Opera */
}
.bubblewrap li img:hover{
-moz-transform:scale(1.8); /*scale up image 1.8x*/
-webkit-transform:scale(1.8);
-o-transform:scale(1.8);
}

7. Go to blogger  and click drop-down like  1st step and select Layout

8. Click Add Gadget and select 'HTML/Javascript"

9. Paste below code.

<ul class="bubblewrap">

<li><a href="http://www.plus.google.com/107955298793879607964"><img src="https://blogger.googleusercontent.com/img/b/R29vZ2xl/AVvXsEjh9Yrdw3qsZKnzz2hwJzjm5MaHjjPm6FHROg_0ONWlIWUT9BbAazfaV32PGH4lxPvIZ78GlwtxgeBAVq8TU-Ldj_PqXrRYREmkC2OjnegwZOe0h2iMWACZJ06QV37KUwaW0Dxw-8Vcpo8/s1600/bloggertrix-google.png" title="Add to Facebook" /></a></li>

<li><a href="http://www.facebook.com/bloggertrix"><img src="https://blogger.googleusercontent.com/img/b/R29vZ2xl/AVvXsEibb8m3x7N4OD02QyndM-MluBTcPfulnLCgbg59i1cyD_qCXJEclflsNoUAr9bXxB8Qn0OSoNHOiIcz99DnKrIOkTySKjwrEykdMdvrp1iX3Pt03nTwvCuqqzlng4pm_gvM1M27m63110Q/s1600/bloggertrix-facebook.png" title="Add to Facebook" /></a></li>

<li><a href="http://www.Stumbleupon.com/Username"><img src="https://blogger.googleusercontent.com/img/b/R29vZ2xl/AVvXsEgjBJFuj32RE_04TVntctzu12x9oFmplY6IhFG3tNrd61edDksRmEDrvjYb2vdhPP-YYZsxB-qj96vMwJO-eyzIkzWI-3JAaTEhPtRqOJh8ml3LLBzPgz7ha0xffb-6YUWrvj_asLo2Epg/s1600/bloggertrix-stumble.png" title="Add to Digg" /></a></li>

<li><a href="http://www.twitter/bloggertrix"><img src="https://blogger.googleusercontent.com/img/b/R29vZ2xl/AVvXsEijCDj4hE5b6bfKF619xFlYaBhEij8bUBhDpDbnI1DJtMzai1SPvGKFI7L_mKEONyQLKBCQw4o2DLM4VqfweF1C7P3ZZ1Z6oOGnQNVOlH5CT_HzKL853SD2wmjEXghojE0ieR1xFUvRghg/s1600/bloggertrix-twitter.png" title="Add to Twitter" /></a></li>

<li><a href="http://feeds2.feedburner.com/bloggertrix"><img src="https://blogger.googleusercontent.com/img/b/R29vZ2xl/AVvXsEjiNShGkbwu8dhGMRyF4GRZ-Nv76LDYco172CNzKixCHKRFT2Evi4WoWQR9vlFX4bltco2RWvQMoMB-mrqDHy7m4x-J-21Siwn1lgKUfgpj-uaLs-r0ODjwFvaqTQMKu7PSOwxh42lVTjM/s1600/bloggertrix-rss.png" title="Add RSS Feed" /></a></li>
</ul>
 *Replace urls as your like.

10. Now save your template. You are done.
Read More

Saturday, December 29, 2012

CSS3 3D Style Verticle Menu For Blogger

In this post,  im gonna  explain how  to add  vertical drop down menu for your blog. This  vertical  menu look like 3D style.Check below demo link. you can see the nice drop down style.So you  can  link  with pages or  categories. Im sing  Css3 and   HTML for this tutorial.You can get my all vertical here
CSS3+3D+Style+Verticle+Menu+For+Blogger
Demo

1. Log in to blogger account and Click drop down.
blog-post-option
2. Now select "Template" Like Below.

Select-template

3. Now you can see Live on blog, Click EDIT HTML Button"

4. Now click Proceed button.
   
5. Find this tag by using Ctrl+F    ]]></b:skin>
D
6. Paste below code Before ]]></b:skin> tag

/* The CSS Code for the menu starts here bloggertrix.com */
#nav12,#nav ul {
    background-color: #8899AA;
    list-style: none outside none;
    margin: 0;
    padding: 0;
}
#nav12 {
    display: block;
    padding: 5px;
    position: relative;
    width: 112px;

    -moz-perspective: 200px;
    -ms-perspective: 200px;
    -webkit-perspective: 200px;
    -o-perspective: 200px;
    perspective: 200px;
}
#nav12 ul {
    left: -9999px;
    opacity:0;
    overflow: hidden;
    padding: 5px;
    position: absolute;
    top: -9999px;

    -moz-transform: rotateY(70deg);
    -ms-transform: rotateY(70deg);
    -o-transform: rotateY(70deg);
    -webkit-transform: rotateY(70deg);
    transform: rotateY(70deg);

    -moz-transform-origin: 0 0;
    -ms-transform-origin: 0 0;
    -o-transform-origin: 0 0;
    -webkit-transform-origin: 0 0;
    transform-origin: 0 0;

    -moz-transition: -moz-transform 0.3s linear, opacity 0.3s linear;
    -ms-transition: -ms-transform 0.3s linear, opacity 0.3s linear;
    -o-transition: -o-transform 0.3s linear, opacity 0.3s linear;
    -webkit-transition: -webkit-transform 0.3s linear, opacity 0.3s linear;
    transition: transform 0.3s linear, opacity 0.3s linear;
}
#nav12 li {
    background-color: #FFFFFF;
    position: relative;
}
#nav12 > li {
    -moz-transform-style: preserve-3d;
    -ms-transform-style: preserve-3d;
    -o-transform-style: preserve-3d;
    -webkit-transform-style: preserve-3d;
    transform-style: preserve-3d;
}
#nav12 li a {
    background-color: #AABBCC;
    border-color: #DDDDDD #555555 #555555 #DDDDDD;
    border-style: solid;
    border-width: 1px;
    color: #000000;
    display: block;
    font-size: 15px;
    padding: 8px 10px 8px 5px;
    text-decoration: none;
    width:95px;

    -moz-transition: all 0.2s linear;
    -ms-transition: all 0.2s linear;
    -o-transition: all 0.2s linear;
    -webkit-transition: all 0.2s linear;
    transition: all 0.2s linear;
}
#nav12 li:hover > a {
    background-color: #8899AA;
    border-color: #8899AA;
    color: #FFFFFF;
}
#nav12 li:hover ul.subs {
    left: 114px;
    opacity:1;
    top: 0;

    -moz-transition-delay: 0.3s;
    -ms-transition-delay: 0.3s;
    -o-transition-delay: 0.3s;
    -webkit-transition-delay: 0.3s;
    transition-delay: 0.3s;

    -moz-transform: rotateY(0deg);
    -ms-transform: rotateY(0deg);
    -o-transform: rotateY(0deg);
    -webkit-transform: rotateY(0deg);
    transform: rotateY(0deg);
}
#nav12 ul li {
    width: 100%;
}

7. Go to blogger and click Layout

8. Click Add Gadget and select 'HTML/Javascript

9. Paste below code.

<div class="container">
    <ul id="nav12">
        <li><a href="http://www.bloggertrix.com/">Home</a></li>
        <li><a href="#">Menu 1</a>
            <ul class="subs">
                <li><a href="#">Submenu 1</a></li>
                <li><a href="#">Submenu 2</a></li>
                <li><a href="#">Submenu 3</a></li>
                <li><a href="#">Submenu 4</a></li>
                <li><a href="#">Submenu 5</a></li>
            </ul>
        </li>
        <li><a href="#">Menu 2</a>
            <ul class="subs">
                <li><a href="#">Submenu 2-1</a></li>
                <li><a href="#">Submenu 2-2</a></li>
                <li><a href="#">Submenu 2-3</a></li>
                <li><a href="#">Submenu 2-4</a></li>
                <li><a href="#">Submenu 2-5</a></li>
                <li><a href="#">Submenu 2-6</a></li>
                <li><a href="#">Submenu 2-7</a></li>
                <li><a href="#">Submenu 2-8</a></li>
            </ul>
        </li>
        <li><a href="#">Menu 3</a>
            <ul class="subs">
                <li><a href="#">Submenu 3-1</a></li>
                <li><a href="#">Submenu 3-2</a></li>
                <li><a href="#">Submenu 3-3</a></li>
                <li><a href="#">Submenu 3-4</a></li>
                <li><a href="#">Submenu 3-5</a></li>
            </ul>
        </li>
        <li><a href="#">Menu 4</a></li>
        <li><a href="#">Menu 5</a></li>
        <li><a href="#">Menu 6</a></li>
        <li><a href="http://www.bloggertrix.com/">Add This</a></li>
    </ul>

</div>
Replace # with your links.

10. Now save your HTML/Javascript'.

    You are done...
Read More

Friday, December 28, 2012

Reaching Out to Users with Search Engine Optimized Content

One   of the  things  that  users are having to learn about  search  engine  optimization  these days is
that it's  greatly based  in how  useful  a site is  to a visitor.  In    order  to  properly  search    engine optimize  your  site,  you  have  to  make  certain that you are  providing   good content   that users
will want  to read.  You  also   have to  promote it to the search engines, of course, and that requires that you do everything you can to make it easy for those  search  engines  to  understand    what your
content is, what it's about  and  why  users should read it.

SEO-content-writing

Archives

Professional  premium WordPress themes typically have archiving features built into them. These archiving features play a vital role in search engine optimizing your site. In fact, they allow you to easily transform your site into a tremendously detailed resource for all different types of users. Users can explore your new content, which they are more likely to find on the search engines, and then
utilize your tags and links to find older content in your archives.

Make sure your archive is something that users will want to explore. Every once in a while, go through it and clean it out. On a professional WordPress theme, it's generally pretty easy to go through your archived content and to start deleting articles that don't make the grade for your site anymore.

Add Images

Adding images to posts is a great way to get some search engine optimization benefit. If you're using a professional theme, the theme will generally make it very easy to add images and to tag them correctly so that they, too, can be provided with the keywords that you're trying to promote for. Remember that keywords aren't everything anymore but, in an image, there's really no reason that you shouldn't have a tag that utilizes good keywords.

Take a good look at your content and make sure that it is visually, intellectually and topically interesting. If it is, there's a good chance that you're doing a great job at search engine optimizing your site. The search engines are really looking for good content these days. With a good theme, WordPress is a tremendously useful platform for making certain that all of the good content that you worked so hard to get online gets noticed and that it attracts readers, whether you're trying to attract them for business purposes or not.

About author

Olga Ionel is a creative writer at ThemeFuse.com – a top provider of  premium WordPress themes. She is passionate about studying online marketing industry and sharing informative tips.
If you would like to write for bloggertrix, check our guest posting guidelines
Read More

Thursday, December 27, 2012

Dark Style Css Drop Down Vertical Menu For Blogger

Today im gonna explain how to add add dark style vertical menu with drop down.Its easy to add to your blog. You can link with your post categories.because you can add huge menu list with drop down.I'm using Css and HTML for this tutorial. you can check this vertical menu before add to your blog by blow demo link.You can get my all vertical here

Demo

1. Log in to blogger account and Click drop down.
blog-post-option
2. Now select "Template" Like Below.

Select-template

3. Now you can see Live on blog, Click EDIT HTML Button"

4. Now click Proceed button.
   
5. Find this tag by using Ctrl+F    ]]></b:skin>

6. Paste below code Before ]]></b:skin> tag

/* The CSS Code for the menu starts here bloggertrix.com */
#bloggertrix_box_menu{padding:0;margin:0;width:245px;list-style:none outside none}
#bloggertrix_box_menu li{background:#252525;position:relative;border-bottom:1px solid #110f0e;border-top:1px solid #3d3732;}
#bloggertrix_box_menu li ul{position:absolute;padding:0;margin:0;left:245px;top:-1px;display:none;width:160px;list-style:none outside none;z-index:9990;background:#00CC33}
#bloggertrix_box_menu li a{background:url(http://4.bp.blogspot.com/-Z2rx2h9tJd8/UNv6FN_L0II/AAAAAAAAGFQ/ty4e9b5auHQ/s1600/bt-arrow-right-icon.png) no-repeat 5px 10px;display:block;min-height:30px;line-height:30px;margin:0;padding:0 5px 0 25px;text-decoration:none;color:#777;color:#b69786;font-size:14px;border-right:4px solid #35322c;cursor:pointer;transition:all 400ms ease-in-out;-webkit-transition:all 400ms ease-in-out;-moz-transition:all 400ms ease-in-out;-o-transition:all 400ms ease-in-out;-ms-transition:all 400ms ease-in-out}
#bloggertrix_box_menu li a:hover{border-right-color:#665d54;text-decoration:none;color:#ddd;background:#38332d url(http://4.bp.blogspot.com/-Z2rx2h9tJd8/UNv6FN_L0II/AAAAAAAAGFQ/ty4e9b5auHQ/s1600/bt-arrow-right-icon.png) no-repeat 5px 10px;}
#bloggertrix_box_menu li:hover ul, #bloggertrix_box_menu li.over ul{display:block}

7. Go to blogger and click Layout

8. Click Add Gadget and select 'HTML/Javascript

9. Paste below code.

<ul id="bloggertrix_box_menu">
    <li><a href="#">Menu List 1</a>
        <ul>
              <li><a href="#">Menu List 1.1</a></li>
              <li><a href="#">Menu List 1.2</a></li>
              <li><a href="#">Menu List 1.3</a></li>
              <li><a href="#">Menu List 1.4</a></li>
        </ul>
    </li>
    
    <li><a href="#">Menu List 2</a>
        <ul>
              <li><a href="#">Menu List 2.1</a></li>
              <li><a href="#">Menu List 2.2</a></li>
              <li><a href="#">Menu List 2.3</a></li>
              <li><a href="#">Menu List 2.4</a></li>
              <li><a href="#">Menu List 2.5</a></li>
              <li><a href="#">Menu List 2.6</a></li>
        </ul>
    </li>
    
    <li><a href="#">Menu List 3</a>
        <ul>
              <li><a href="#">Menu List 3.1</a></li>
              <li><a href="#">Menu List 3.2</a></li>
        </ul>
    </li>
    
    <li><a href="#">Menu List 4</a>
        <ul>
            <li><a href="#">Menu List 4.1</a></li>
              <li><a href="#">Menu List 4.2</a></li>
              <li><a href="#">Menu List 4.3</a></li>
              <li><a href="#">Menu List 4.4</a></li>
              <li><a href="#">Menu List 4.5</a></li>
              <li><a href="#">Menu List 4.6</a></li>
        </ul>
    </li>
    
    <li><a href="#">Menu List 5</a>
          <ul>
            <li><a href="">Menu List 5.1</a></li>
              <li><a href="">Menu List 5.2</a></li>
              <li><a href="">Menu List 5.3</a></li>
              <li><a href="">Menu List 5.4</a></li>
              <li><a href="">Menu List 5.5</a></li>
              <li><a href="">Menu List 5.6</a></li>
              <li><a href="">Menu List 5.7</a></li>
              <li><a href="">Menu List 5.8</a></li>
        </ul>
    </li>
    
    <li><a href="#">Menu List 6</a>
        <ul>
            <li><a href="#">Menu List 6.1</a></li>
              <li><a href="">Menu List 6.2</a></li>
              <li><a href="#">Menu List 6.3</a></li>
              <li><a href="#">Menu List 6.4</a></li>
              <li><a href="#">Menu List 6.5</a></li>
              <li><a href="#">Menu List 6.6</a></li>
              <li><a href="#">Menu List 6.7</a></li>
              <li><a href="#">Menu List 6.8</a></li>
        </ul>
    </li>
    
    <li><a href="#">Menu List 7</a>
        <ul>
            <li><a href="#">Menu List 7.1</a></li>
              <li><a href="#">Menu List 7.2</a></li>
              <li><a href="#">Menu List 7.3</a></li>
              <li><a href="#">Menu List 7.4</a></li>
              <li><a href="#">Menu List 7.5</a></li>
              <li><a href="#">Menu List 7.6</a></li>
              <li><a href="#">Menu List 7.7</a></li>
              <li><a href="#">Menu List 7.8</a></li>
        </ul>
    </li>
    
    <li><a href="#">Menu List 8</a>
             <ul>
            <li><a href="#">Menu List 8.1</a></li>
              <li><a href="#">Menu List 8.2</a></li>
              <li><a href="#">Menu List 8.3</a></li>
              <li><a href="#">Menu List 8.4</a></li>
              <li><a href="#">Menu List 8.5</a></li>
              <li><a href="#">Menu List 8.6</a></li>
        </ul>
    </li>
    
    
</ul>
Replace # with your links.

10. Now save your HTML/Javascript'.

    You are done...
Read More

Wednesday, December 26, 2012

Top 5 Tips for Professional Bloggers

One of the popular SEO  techniques ever is  blogging. Blogging helps one’s website to bring traffic and also it  helps  in  increasing  the  ranking   of  the  website. Writing blogs is not a big task  which people  think it is a hard task job. By following simple steps, you can be a professional blogger.
Top+5+Tips+for+Professional+Bloggers
1. Using a simple and clear language is the primary key for the blog posts:
This is a simple tip, which one can follow in writing blogs. One can use everyday words and
everyday life as the basis while writing the blog posts. Just need to have a clear idea of
what has to be represented and had to set up points relating it with the brand or the
products which makes easier to write and frame it in your own words. Don’t always opt
for big words and unknown words as they can sound difficult to any user while reading.
The blogs should be with a friendly tone in simple words, easy to understand.

2. Don’t be literal; give importance to your blog readers:
It’s not always correct being so formal and literal in the business field. In today’s era business blogs sound in a humorous format. It’s better to use active voice for the blog posts but at the same time
see to that it won’t sound like a rule book. You can always note down the basic points
clearly without containing any grammatical errors and spelling errors. Avoid inflated
language at the same time; be interactive with a friendly tone.

3. Do a bit of Research about the keyword:
Always stick to researching about various things which are involved in your writing, mostly the keywords, which are the main source for SEO. Writing blog is easier but reflecting it with the products and brands is very important. It’s always better to do a brief research about the keywords which you’re using and then you can proceed with the following in your blog. Use the keywords in a
proper way so that it doesn’t interrupt the flow of text in any way.

4. Focus on positive aspects and motivation:
Positive aspect is very important in one’s blog as it reflects the mind set of the blogger. By reading any kind of blog posts one must be motivated and they should gain such positive feeling in them. Using a simple and positive language will be very helpful. People get interest in reading and it will be
interactive. Also you can provide links which directs them to your website, so that people
excitedly want to read more about it will come to your site by clicking on the links.

5. Always refer your blog before uploading: After you finish your blog, try to read it loudly, so that if any mistakes or errors you could notice, can make necessary changes to them. Not only its about phrases, punctuation marks and other small things can be rectified at this point of time.

Author Bio: Osho Garg is a blogger who writes for TecheHow. He also offers high quality blogger template designing, SEO, and guest post services at cheap rates.
If you would like to write for bloggertrix, check our guest posting guidelines
Read More

Tuesday, December 25, 2012

How To Make Money Making Blog Posts

It is possible to make money  with a  blog. It is an undeniable fact that people do make money  with
their blogs, but you must understand that they are not making a lot of money. There are no bloggers
who have ever made  millions of  dollars  though their blog.  The people who  promise  you  tips to
earn you hundreds  of  dollars  with your blog are lying to  you. If  you  would  like  to  make  some
money with your blog posts then try the techniques on this article. The techniques  on this article  will
make you  a few  dollars  per month,  therefore, if you want to make more money via your blog posts,
you  will   have  to  find  ways   to  scale-up   your blogging operation.

make-money-blogging-guide

Write them on behalf of a company that pays you

This is a sure fire way of making a positive return on your blog post, which is why it is listed at
the top of the list. Online businesses are always looking for new ways to advertise their website
and their products. If you can prove that your blog is highly attended then there are many
online businesses that will pay you to write things on your blog. Primarily they will want you
to link from your blog post to their website, so may require you to write about a subject that is
related to them without actually mentioning them by name. Otherwise they may simply want
you to write about how great they are and then link to them. These online businesses will be
willing to pay you more if you can prove that you have lots of people attending your blog on a
regular occasion.

Write a review about a product that you affiliate advertise on your blog post

There are affiliate programs that allow you a reasonable amount of control over what adverts
run on your blog. All you need to do is find an affiliate program where you are sure you know
what will appear on each blog post, and then write about those products. For example if you
know that your blog post will run affiliate adverts for kinetic powered generators then you
could write an expose on those types of generators, or a review on those types of generators.
That way you will attract people who are looking for information on that particular product.
It means that they are highly likely to look at adverts for the product after they have finished
reading your blog. If you get people to click on the adverts then you are paid via your chosen
affiliate system.

Write blog posts that gain a great PageRank and charge people for links from it

People really want links from websites that have a high PageRank, because they have a more
beneficial effect on the websites that they link to. So all you need to do is build up your
blogs ranking and then sell links from it. Be careful that you do not advertise your link selling
service online, because if Google finds out that you are selling links (instead of creating them
organically) then they will punish your blog, and may even ban you from appearing on the
Google search engine results.

Make it a big advert for your ecommerce products that you link to via the blog post


This is a cheap trick but is used by a lot of people. Write blog posts about the products on your
ecommerce website and then link your blog post to them. The idea is that people look at the
blog post about your products, and are so bowled over by the blog post that they follow the
link t your ecommerce website and buy the product. It is does generate some sales but as you
can imagine the sales are few and far between (unless you happen to be an expert blog post
marketer).

Author’s bio:
My name is Sonia Jackson. I represent the web-site essay-land.com. We’ll help you
to solve all problems with writing different essays and research papers in a short time; we’ll
answer all your questions and give you useful advice.
If you would like to write for bloggertrix, check our guest posting guidelines
Read More

Monday, December 24, 2012

Web Hosting Tips to Improve Your SEO

When it comes  to SEO, most  webmaster's  concerns revolve around creating  effective in-bound links and high   quality  and    authoritative   content.  All these features are important for a successful SEO campaign. however  without  having  an  optimal web   hosting service  provider all   these  efforts  become  null and void. In    essence,    your  choice  of a   web   hosting company can actually break or  make  your SEO  and Internet    marketing    initiatives.   Some    of the web- hosting    tips    that can   help     improve your   SEO initiatives include.

web hosting seo
1. Administrative Panel

An important starting point when choosing a web hosting service should be on the features and quality of its administrative panel. An administrative panel is basically a control panel with multiple features and tools developed to promote SEO. Great web-hosting services come with an administrative panel that formats the sites code to appeal to SEO bots, consequently improving site rank.
In addition, administrative panels offer open source content management tools and features that seamlessly integrate with external search engine optimization applications. It is recommended that the web hosting service of choice should come with features that automatically insert title tags and meta tags on each website page. Additionally, SEO web applications that are compatible with the administrative panel can be easily downloaded to automate your SEO strategy. For instance, you can install web applications that allow you to simultaneously post your website content to social bookmarking platforms. This has the effect of generating valuable in-bound links that inevitably increase your page rankings.

2. Shared vs Single Hosting Services

Most website hosting provider's offer shared web hosting services that allow a multitude of users with unique domain names to feature on a single IP address, while still sharing the same bandwidth and data storage space. Hosting services that attach single domains to an IP address are more effective for SEO purposes. This is because search engines algorithms, such as Google, factor in page loading speeds and site performance when assigning page ranking. Nevertheless this feature is more important to ecommerce sites and domains that require huge data storage space to accommodate their multimedia features. On the other hand, sharing an IP address that hosts spammer websites can have a negative effect on your SEO campaign. The effects are more adverse especially in instances where your website shares an IP address with numerous spammer or non-legitimate sites.

3. Server Reliability

A web hosting with a server that frequently experiences downtime can have disastrous effects to you SEO campaign. During downtime periods, potential site visitors are hampered from accessing your site - similar situation occurs for search engine bots. It is important to note that in case server downtime occurs occasionally, it may have limited effect on your site ranking. However, in instances where search engine bots repeatedly experience site downtime, your search engine rankings are bound to drop significantly since your site is viewed as unreliable.

4. Geographical Location of Hosting Company's Servers

As earlier pointed out, the domain assigned by your web hosting company is attached to an IP address. An IP address indicates the location of the FTP hosting server. For instance, if your web hosting provider server is located in England, Google will assume that your website caters primarily to England's Internet users. Nevertheless other factors, such as language utilized on the site, have an influence on how Google prioritizes search engine results based on location. On the other hand this problem can be easily solved by optimizing your content with geo-tags. Geo tagging involves the process of inserting your web content with geographical keywords.

Conclusion

When it comes to SEO campaigns, the choice of your web hosting service provider determines your success rate. Nevertheless, web hosting SEO services should complement other external SEO strategies, for instance content optimization, not override them. All in all, the benefits of web hosting service to a webmaster when it comes to SEO should never be underestimated.

Erik Gaandt is a freelance tech writer and SEO enthusiast. He understands the importance web hosting has on a sites search engine rank. He enjoys sharing his insights on various blogs. If you would like to find out what host a site is using, you can use the WhoIsHostingThis.com search engine, visit the website to learn more.

If you would like to write for bloggertrix, check our guest posting guidelines
Read More