Saturday, June 30, 2012

5 Tips To Keep Your Visitors Longer On Your Blog

When  people are Reading your blog. Do you
like to keep them longer on your blog? Who
don't like it.So you have to do something for it.
Actually one person view more pages, it helps to
increase your page views per visitor.So, there
are some points about your blog which you can
focus on.

blog traffic

Add Picture to your Every post
Actually picture is worth a hundred of words.Because, it can say money thing than words.
If you write long post, break it in to graph and add some pictures. But don't forget to add
law resolution picture. Because if not  it will take more time to load.For example, if you writing post about
Seo,you must add some seo related picture for your blog.how to add Thumbnail related post to blogger

Focus to your visitors readability.
Make sure your visitors reading your blog.make feel them comfort.They don't like long post. just give the exact point what you trying to give.Make sure they can understand your article.Add some awesome content when you writing post.

Add Related post Option to blogger.
You have to add related post option to your post, because it will show related post which similar to article that reading.For example. Actually , This is technique for keep your readers hang around the blog .

Link to your Other Post.
This is call Interlinking and  important for search engine optimization.When you writing about article.
check if there have old post which similar to new post. So you don't want to describe about that point.
Just use some good keyword and link to that post. So,visitors will surely keep reading that post too.

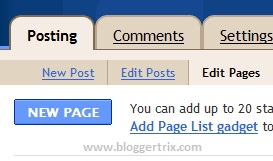
Create helper Page for your blog.
If you have helper page it will helpful to new visitors. its just like this."New to here" ,"Need Help", "Get Started.". it will really helpful to them,Because it will helps to guide visitors about your blog.
When they have any problem they can contact you.

Hope this help you to keep your visitors longer on your blog.This the basic ideas.I hope your visitors stay longer.
Read More

Friday, June 29, 2012

Add Cool Drop Down Menu For Blogger

Drop down menu helps to keep your blog attractive
You can link main page for it.Like contact us page
about us page.So, this menu bar like classic.
Earlier i made a post Attractive Css Drop Down Menu
Bar For Blogger
. It also nice menu-bar. I provide demo
link for it. so you can check it before add to your blog.
you can add it to your blog with easy steps. Follow
these steps to add it your blog.

cool Menubar

DEMO

1. Log in to blogger account and Go to Design >> Edit HTML
    (make sure backup your template first)

2. Put checked marked in Expand Widget Templates

3. Find this tag by using Ctrl+F    ]]></b:skin>

4. Paste below code Before ]]></b:skin> tag

<style>
#pcm{display:none;}
ul.pureCssMenu ul{display:none}
ul.pureCssMenu li:hover>ul{display:block}
ul.pureCssMenu ul{position: absolute;left:-1px;top:98%;}
ul.pureCssMenu ul ul{position: absolute;left:98%;top:-2px;}
ul.pureCssMenu,ul.pureCssMenu ul {
margin:0px;
list-style:none;
padding:0px 3px 3px 0px;
background-color:#414141;
background-repeat:repeat;
border-color:#CECECE;
border-width:4px;
border-style:ridge;
}
ul.pureCssMenu table {border-collapse:collapse}ul.pureCssMenu {
display:block;
zoom:1;
position:absolute;
z-index: 1000;
left: 100;
top: 200;
}
* HTML ul.pureCssMenu {position:absolute}
ul.pureCssMenu ul{
width:103.95px;
}
ul.pureCssMenu li{
display:block;
margin:3px 0px 0px 3px;
font-size:0px;
}

ul.pureCssMenu a:active, ul.pureCssMenu a:focus {
outline-style:none;
}
ul.pureCssMenu a, ul.pureCssMenu li.dis a:hover, ul.pureCssMenu li.sep a:hover {
display:block;
vertical-align:middle;
background-color:#414141;
border-width:1px;
border-color:#414141;
border-style:solid;
text-align:left;
text-decoration:none;
padding:4px;
_padding-left:0;
font:14px Verdana;
color: #FFFFFF;
text-decoration:none;
cursor:pointer;
}

ul.pureCssMenu span{
overflow:hidden;
}
ul.pureCssMenu li {
float:left;
}
ul.pureCssMenu ul li {
float:none;
}
ul.pureCssMenu ul a {
text-align:left;
white-space:nowrap;
}
ul.pureCssMenu li.sep{
text-align:left;
padding:0px;
line-height:0;
height:100%;
}
ul.pureCssMenu li.sep span{
float:none; padding-right:0;
width:3;
height:100%;
display:inline-block;
background-color:#CECECE; background-image:none;}
ul.pureCssMenu ul li.sep span{
width:100%;
height:3;
}
ul.pureCssMenu li:hover{
position:relative;
}
ul.pureCssMenu li:hover>a{
background-color:#A3A3A3;
border-color:#FFFFFF;
border-style:solid;
font:14px Verdana;
color: #FFFFFF;
text-decoration:none;
}
ul.pureCssMenu li a:hover{
position:relative;
background-color:#A3A3A3;
border-color:#FFFFFF;
border-style:solid;
font:14px Verdana;
color: #FFFFFF;
text-decoration:none;
}
ul.pureCssMenu li.dis a {
color: #AAAAAA !important;
}

ul.pureCssMenu img {border: none;float:left;_float:none;margin-right:4px;width:24px;
height:24px;
}

ul.pureCssMenu ul img {width:16px;
height:16px;
}
ul.pureCssMenu img.over{display:none}
ul.pureCssMenu li.dis a:hover img.over{display:none !important}
ul.pureCssMenu li.dis a:hover img.def {display:inline !important}
ul.pureCssMenu li:hover > a img.def  {display:none}
ul.pureCssMenu li:hover > a img.over {display:inline}
ul.pureCssMenu a:hover img.over,ul.pureCssMenu a:hover ul img.def,ul.pureCssMenu a:hover a:hover ul img.def,ul.pureCssMenu a:hover a:hover a:hover ul img.def,ul.pureCssMenu a:hover a:hover img.over,ul.pureCssMenu a:hover a:hover a:hover img.over,ul.pureCssMenu a:hover a:hover a:hover a:hover img.over{display:inline}

ul.pureCssMenu a:hover img.def,ul.pureCssMenu a:hover ul img.over,ul.pureCssMenu a:hover a:hover ul img.over,ul.pureCssMenu a:hover a:hover a:hover ul img.over,ul.pureCssMenu a:hover a:hover img.def,ul.pureCssMenu a:hover a:hover a:hover img.def,ul.pureCssMenu a:hover a:hover a:hover a:hover img.def{display:none}

ul.pureCssMenu a:hover ul,ul.pureCssMenu a:hover a:hover ul,ul.pureCssMenu a:hover a:hover a:hover ul{display:block}
ul.pureCssMenu a:hover ul ul,ul.pureCssMenu a:hover a:hover ul ul{display:none}
ul.pureCssMenu span{
display:block;
background-image:url(http://purecssmenu.com/ssc-data/templates/ways-showing-submenus/images/arrow_sub5.gif);
background-position:right center;
background-repeat: no-repeat;
padding-right:14px;}
ul.pureCssMenu ul span,ul.pureCssMenu a:hover table span{background-image:url(http://purecssmenu.com/ssc-data/templates/ways-showing-submenus/images/arrow_sub5.gif)}

ul.pureCssMenu ul li:hover > a span{ background-image:url(http://purecssmenu.com/ssc-data/templates/ways-showing-submenus/images/arrow_sub5.gif);}
<style>
#pcm{display:none;}
ul.pureCssMenu ul{display:none}
ul.pureCssMenu li:hover>ul{display:block}
ul.pureCssMenu ul{position: absolute;left:-1px;top:98%;}
ul.pureCssMenu ul ul{position: absolute;left:98%;top:-2px;}
ul.pureCssMenu,ul.pureCssMenu ul {
margin:0px;
list-style:none;
padding:0px 3px 3px 0px;
background-color:#414141;
background-repeat:repeat;
border-color:#CECECE;
border-width:4px;
border-style:ridge;
}
ul.pureCssMenu table {border-collapse:collapse}ul.pureCssMenu {
display:block;
zoom:1;
position:absolute;
z-index: 1000;
left: 100;
top: 200;
}
* HTML ul.pureCssMenu {position:absolute}
ul.pureCssMenu ul{
width:103.95px;
}
ul.pureCssMenu li{
display:block;
margin:3px 0px 0px 3px;
font-size:0px;
}

ul.pureCssMenu a:active, ul.pureCssMenu a:focus {
outline-style:none;
}
ul.pureCssMenu a, ul.pureCssMenu li.dis a:hover, ul.pureCssMenu li.sep a:hover {
display:block;
vertical-align:middle;
background-color:#414141;
border-width:1px;
border-color:#414141;
border-style:solid;
text-align:left;
text-decoration:none;
padding:4px;
_padding-left:0;
font:14px Verdana;
color: #FFFFFF;
text-decoration:none;
cursor:pointer;
}

ul.pureCssMenu span{
overflow:hidden;
}
ul.pureCssMenu li {
float:left;
}
ul.pureCssMenu ul li {
float:none;
}
ul.pureCssMenu ul a {
text-align:left;
white-space:nowrap;
}
ul.pureCssMenu li.sep{
text-align:left;
padding:0px;
line-height:0;
height:100%;
}
ul.pureCssMenu li.sep span{
float:none; padding-right:0;
width:3;
height:100%;
display:inline-block;
background-color:#CECECE; background-image:none;}
ul.pureCssMenu ul li.sep span{
width:100%;
height:3;
}
ul.pureCssMenu li:hover{
position:relative;
}
ul.pureCssMenu li:hover>a{
background-color:#A3A3A3;
border-color:#FFFFFF;
border-style:solid;
font:14px Verdana;
color: #FFFFFF;
text-decoration:none;
}
ul.pureCssMenu li a:hover{
position:relative;
background-color:#A3A3A3;
border-color:#FFFFFF;
border-style:solid;
font:14px Verdana;
color: #FFFFFF;
text-decoration:none;
}
ul.pureCssMenu li.dis a {
color: #AAAAAA !important;}
ul.pureCssMenu img {border: none;float:left;_float:none;margin-right:4px;width:24px;
height:24px;}
ul.pureCssMenu ul img {width:16px;height:16px;}ul.pureCssMenu img.over{display:none}
ul.pureCssMenu li.dis a:hover img.over{display:none !important}
ul.pureCssMenu li.dis a:hover img.def {display:inline !important}
ul.pureCssMenu li:hover > a img.def  {display:none}
ul.pureCssMenu li:hover > a img.over {display:inline}
ul.pureCssMenu a:hover img.over,ul.pureCssMenu a:hover ul img.def,ul.pureCssMenu a:hover a:hover ul img.def,ul.pureCssMenu a:hover a:hover a:hover ul img.def,ul.pureCssMenu a:hover a:hover img.over,ul.pureCssMenu a:hover a:hover a:hover img.over,ul.pureCssMenu a:hover a:hover a:hover a:hover img.over{display:inline}
ul.pureCssMenu a:hover img.def,ul.pureCssMenu a:hover ul img.over,ul.pureCssMenu a:hover a:hover ul img.over,ul.pureCssMenu a:hover a:hover a:hover ul img.over,ul.pureCssMenu a:hover a:hover img.def,ul.pureCssMenu a:hover a:hover a:hover img.def,ul.pureCssMenu a:hover a:hover a:hover a:hover img.def{display:none}
ul.pureCssMenu a:hover ul,ul.pureCssMenu a:hover a:hover ul,ul.pureCssMenu a:hover a:hover a:hover ul{display:block}
ul.pureCssMenu a:hover ul ul,ul.pureCssMenu a:hover a:hover ul ul{display:none}
ul.pureCssMenu span{display:block;background-image:url(http://purecssmenu.com/ssc-data/templates/ways-showing-submenus/images/arrow_sub5.gif);
background-position:right center;
background-repeat: no-repeat;padding-right:14px;}ul.pureCssMenu ul span,ul.pureCssMenu a:hover table span{background-image:url(http://purecssmenu.com/ssc-data/templates/ways-showing-submenus/images/arrow_sub5.gif)}
ul.pureCssMenu ul li:hover > a span{ background-image:url(http://purecssmenu.com/ssc-data/templates/ways-showing-submenus/images/arrow_sub5.gif);}
ul.pureCssMenu table a:hover span,ul.pureCssMenu table a:hover a:hover span,ul.pureCssMenu table a:hover a:hover a:hover span{background-image:url(http://purecssmenu.com/ssc-data/templates/ways-showing-submenus/images/arrow_sub5.gif)}
ul.pureCssMenu table a:hover table span,ul.pureCssMenu table a:hover a:hover table span{background-image:url(http://purecssmenu.com/ssc-data/templates/ways-showing-submenus/images/arrow_sub5.gif)}
</style>

5. Now Find this code  by using Ctrl+F <div id='content-wrapper'>

6.  Paste below code Before <div id='content-wrapper'> code

<ul class="pureCssMenu pureCssMenum">

<li class="pureCssMenui"><a class="pureCssMenui" href="YOUR URL HERE" target="_blank">Home</a></li>

<li class="pureCssMenui"><a class="pureCssMenui" href="YOUR URL HERE" target="_blank"><span>Link</span><![if gt ie 6]></![if></a><![endif]><!--[if lte IE 6]><table><tr><td><![endif]-->

<ul class="pureCssMenu">

  <li class="pureCssMenui"><a class="pureCssMenui" href="#" target="_blank">Links 1</a></li>

  <li class="pureCssMenui"><a class="pureCssMenui" href="#" target="_blank">Links 2</a></li>

  <li class="pureCssMenui"><a class="pureCssMenui" href="#" target="_blank">Links 3</a></li>

 </ul>

<!--[if lte IE 6]></td></tr></table></a><![endif]--></![endif]></li>

<li class="pureCssMenui"><a class="pureCssMenui" href="#" target="_blank">Data</a></li>

<li class="pureCssMenui"><a class="pureCssMenui" href="#" target="_blank">About</a></li>

<li class="pureCssMenui"><a class="pureCssMenui" href="#" target="_blank">Cart</a></li>

<li class="pureCssMenui"><a class="pureCssMenui" href="#" target="_blank">Download</a></li>

<li class="pureCssMenui"><a class="pureCssMenui" href="#" target="_blank">Categoris</a></li>

<li class="pureCssMenui"><a class="pureCssMenui" href="#" target="_blank">Helps</a></li>
<li class="pureCssMenui"><a class="pureCssMenui" href="#" target="_blank">About Us</a></li><li class="pureCssMenui"><a class="pureCssMenui" href="http://www.bloggertrix.com/" target="_blank">Add</a></li>
</ul>

*Replace # With your URL
*Replace Name with as your like.

7. Now save your template
 you are done.
Read More

Thursday, June 28, 2012

How To Create Drop Down Label Widget For Blogger

This is also great tip those who are looking for
drop-down label menu.If your blog don't have
much space or want to reduce home page
size, this will help to you.So this drop-down
menu display your post categories,and labels
are link with them.So, each category post are
counting too.you can adjust size of the 
drop-down. follow these steps to add it to your
blog.


1. Log in to blogger account and Go to Design >> Edit HTML

2. Make sure you don't put check mark in  Expand Widget Templates

3. Find below code by using Ctrl+F  

<b:widget id='Label1' locked='false' title='Labels' type='Label'/>
4. Now replace above line (where you found) with below code.

<b:widget id='Label1' locked='false' title='Categories' type='Label'> 
<b:includable id='main'> 
<b:if cond='data:title'> 
<h2><data:title/></h2> 
</b:if> 
<div class='widget-content'> 
<select style='width:100%' onchange='location=this.options[this.selectedIndex].value;'> 
<option>Choose a Category</option> 
<b:loop values='data:labels' var='label'> 
<option expr:value='data:label.url'><data:label.name/> 
(<data:label.count/>) 
</option> 
</b:loop> </select> <b:include name='quickedit'/> </div> </b:includable> 
</b:widget>

*You can change the wdth of drop-down by chaning   100%
*You can change   Choose a Category  as your like, if you want.
*If you want to hide the post counter so delete this code.  (<data:label.count/>)

5. Save your Template you are done.
Read More

Wednesday, June 27, 2012

How To Get Approved Google Adsense Easily

Actually, Google Adsense is the best free way
to earn lot of money.because it easy to use and
owners can keeping target ads from  Google ads and
getting earning by every clicks. If you have quality
and unique content in your blog, you can earn more.
There have lot of advertising campaigns, but in my
opinion Adsense easy and best.  you can see other
advertisers from here


Google Adsense


Adsense Tips for getting approval.

Your website must good quality unique contents
First we have focus to quality of your content.if you don't have quality content, keep writing quality content. don't copy paste articles from other sites.don't include any program  that violate Adsense program.Try to apply Adsense with 50 quality post.

Buy a Top Level domain.
Buy a top level domain for your blog,Its another requirement to approve Adsense. So try to buy top level domain like .com domain.

Get more quality traffic to your blog.
Before applying Adsense you must ensure about how much you get traffic. don't use any click exchange programs or payed traffic services. Just try to get natural traffic.here is very best method to get traffic.

Create Privacy policy page.
You can create privacy policy page for your site. There have lot of site help you to create privacy policy page.
try with it and create new page and link with menu-bar.

Your website must fully launched.
Before applying adsense , you have to make sure your website gadget,widgets and other pages are arrange neatly.please ensure that before applying its live and functioning properly.

Use Real Personal Details
When you applying Adsense always use your real personal details.Some time Google Adsense team checking your domain Whois database with your personal details.Use your real name to payee name , because if you get approved Adsense then your payment cheques come with your payee name.If you used other name
you cannot change your cheque.

I think you got some idea about approving Adsense.This is my ideas.you can try it. It is easy way to earn money. If you got approved you can add ads to your website. Here is great adsense tips for increase your earning. Hope this help.
Read More

Cool Css Button With Hover Style For Blogger

This is Cool Css button. It include with cool
hover style.you can add this button any where
in your blog with this code.Follow these steps
to add it to your blog.


Demo

1. Log in to blogger account and Go to Design >> Edit HTML

2. Find this tag by using Ctrl+F    ]]></b:skin>

3. Paste below code Before ]]></b:skin> tag


.hb-buttons{
background-color:#4b3f39;
font-family: 'Verdana', sans-serif;
font-size:12px;
text-decoration:none;
color:#fff;
position:relative;
padding:10px 20px;
padding-right:50px;
background-image: linear-gradient(bottom, rgb(62,51,46) 0%, rgb(101,86,78) 100%);
border-radius: 5px;
box-shadow: inset 0px 1px 0px #9e8d84, 0px 5px 0px 0px #322620, 0px 10px 5px #999;
}

.hb-buttons:active {
top:3px;
background-image: linear-gradient(bottom, rgb(62,51,46) 100%, rgb(101,86,78) 0%);
box-shadow: inset 0px 1px 0px #9e8d84, 0px 2px 0px 0px #322620, 0px 5px 3px #999;
}

.hb-buttons:before {
background-color:#322620;
background-image:url(https://blogger.googleusercontent.com/img/b/R29vZ2xl/AVvXsEhYuQ1xChLzVaGeJXK9iWAGwanNdVE9f4Krx0xuxCVZQglkdXyv7hfp2MJycPYj7reDhqTHusd95r_LGG0nuz2CutxjyK1BqHpI2C-EyICEFI0210OHv5iQuDCTjLI729VTOZLSCxoWh84/h80/helper-blogger-right-arrow.png);
background-repeat:no-repeat;
background-position:center center;
content:"";
width:20px;
height:20px;
position:absolute;
right:15px;
top:50%;
margin-top:-9px;
border-radius: 50%;
box-shadow: inset 0px 1px 0px #19120f, 0px 1px 0px #827066;
}

.hb-buttons:active::before {
top:50%;
margin-top:-12px;
box-shadow: inset 0px 1px 0px #827066, 0px 3px 0px #19120f, 0px 6px 3px #382e29;
}

Now you can save your Template.
When you want to add it to your blog. Use Like below


<a href="YOUR LINK " class="hb-buttons">Button name</a>

When you want to add button use above link and.
* Replace YOUR LINK With your URL
*Replace Button name With any name you want.

Done, Cheers.
Read More

Tuesday, June 26, 2012

How To Add Contact Us Page Easily For Blogger

Adding Contact Us page is help to connect with
visitors.Actually Its important with communicate
with your visitors.Its not only help, you can do
service by using it.There have more advantage of it.
Unfortunately bloggers not provide this feature yet.
so we have to make it own. Earlier i made a post
How to make "Contact Me Page" JQuery  But
this is more easy than it. Lets give a try.

contact-us-page

Setting Up
First Of all you have to go http://www.foxyform.com/  Now you will get a field like below.
Eg, Name,Title, Subject etc. You can put a check mark if you want to display that field

contact-us-page
Now Advance setting.
You can change background ,font color, what you want.you can use hex color here
you can choose same color like your blog background.

davance-Setting

Target Email Address.
In this field you have to add email that you ever use to contact us page.
person who contact via contact us page, that massage will send in to this email address.
After add it click Create Formular

adding+email.jpg

Now you will get a HTML code like below.

Contact-us-html-code

How to add it to your blog.
Log in to blogger account and Go to Posing>> Edit Page >> Create Page
Now paste code where you get earlier and add Any title you want.
Click Publish Post  you are done.


Tip: After publish it, you can get  URL of your contact us page. So you can add it to your
menu bar,its more relevant, because your visitors can easily get it.you can get nice menubar here
Cheers.
Read More

Monday, June 25, 2012

How To Add Pinterest Follow Me Button To Blogger

Pinterest is latest social bookmaking site. It
attracting millions of people now.It also like
Facebook  Google Plus and Twitter. This Site
allow users to Pin any image or feature videos
to there virtual Pinbord. so your followers,
friends can repin it. This social network also
helps you to get traffic.So you can add follow
me button in your blogger. Follow these steps.

Follow me in here
Pinterest button
1. Log in to your blogger account and Go to Design >> Edit HTML

2. Put checked mark in Expand Widget Templates

3. Find this tag by using Ctrl+F    <data:post.body/>

Add Pinterest Below Post Title.

If you want to add it to below post title, add any of below code before <data:post.body/> tag

Add Pinterest End of the Post

If you want to add it end of the post, add any of below code after <data:post.body/> tag

Style 1
Follow Me on Pinterest

<a href="http://pinterest.com/bloggertrix/">
<img src="http://passets-cdn.pinterest.com/images/about/buttons/
follow-me-on-pinterest-button.png" width="169" height="28" alt="Follow Me on Pinterest" /></a>

Style 2
Follow Me on Pinterest

<a href="http://pinterest.com/bloggertrix/">
<img src="http://passets-cdn.pinterest.com/images/about/buttons/pinterest-button.png"
 width="80" height="28" alt="Follow Me on Pinterest" /></a>

Style 3
Follow Me on Pinterest

<a href="http://pinterest.com/bloggertrix/">
<img src="http://passets-cdn.pinterest.com/images/about/buttons/big-p-button.png" 
width="60" height="60" alt="Follow Me on Pinterest" /></a>

Style 4
Follow Me on Pinterest

<a href="http://pinterest.com/bloggertrix/">
<img alt="Follow Me on Pinterest" height="16" src="http://passets-cdn.pinterest.com/images/about/buttons/small-p-button.png" 
width="16" /></a>

* Replace Bloggertrix with your Pinterest username
   Now save your Template. You are done.
Read More

Sunday, June 24, 2012

How To Add Vertical Floating Social Sharing Bar To Blogger

Social Bookmarking helps you to get quick traffic to
your blog.So, you have to keep social bookmark
gadget, where the visitors can get it quickly.SO, they
will force to share it.This gadget is vertical bar. it will
appear on side of your blog.it work with every pages
with home page.Earlier I designed another floating
share buttons to blogger
Follow these steps to add it
to your blog.
Vetical Floating  Social Sharing Bar
1. Log in to blogger account and Go to Design >> Edit HTML
    (make sure backup your template first)

2. Find this tag by using Ctrl+F    </head>

3. Paste below code Before </head> tag
<script type="text/javascript">var switchTo5x=true;</script>
<script type="text/javascript" src="http://w.sharethis.com/button/buttons.js"></script>
<script type="text/javascript" src="http://s.sharethis.com/loader.js"></script>

4. Find this tag by using Ctrl+F   </body>  

5. Paste below code before </body> code
<script>
var options={ "publisher": "ur-449c40c9-a162-33c2-af86-4ab2d3534cb", "position": "left", "ad": { "visible": false, "openDelay": 5, "closeDelay": 0}, "chicklets": { "items": ["facebook", "twitter", "delicious", "email", "sharethis"]}};
var st_hover_widget = new sharethis.widgets.hoverbuttons(options);
</script>
8. Now click Save Template.
   Cheers you are done.
Read More

Awesome 8 Tips To Get More Traffic To Your Blog


Actually most of bloggers trying  to  get more traffic
to their  blog.  Because  all  are  like  to get traffic to
their blog or website.Some  of  don't  know where to
get traffic. Most  of  people  think,   Only way to get
traffic from by doing SEO.Actually its not. You will
get it after  read  this article. Now i  will  give some
ideas to how to get more Traffic for your blog.
More Traffic To Your Blog


Important of Create unique Awesome Content
This is main thing. because people come to your site for reading your post. That's why you have
to write awesome content to your blog.If your Blog have quality and attractive content , people
will come to your site again. If not you will loose your precious visitor.Other thing is people think
that writing more than 1000 words is a quality post. Its absolutely wrong. You have to focus to
point what you have writing.most people are don't like to reading long article. they need to get
the exact point within few line.Im not saying to create small post. I mean you have to write exact
point what you talking.

How to get Traffic From Guest Posting

This is also great way to get free quality traffic. Guest posting is most popular among bloggers
By guest posting you will get Dofollow backlinks. it will helps to rank your blog too.
What Is The Importance Of  Dofollow And Nofollow Links. Most of blogger allow you to submit
guest posting.

Leave comment on other blogs to get Traffic

This is also another main thing,that you have to focus.If you start new website.You almost have
zero blog traffic.And none know it,till you say that exist.So you have to comment on other blog
and leave your site Url. make sure not to make spam comment.

Join Forums To Get Traffic

Most of people thing joining forum is not good method and cant get good traffic. Its absolutely
wrong opinion. because you can get target visitors by joining forums. Most of forums accept
signature links. so you can create signature link with your keyword.. it will helps to get target
quality traffic.You can get more forum sites by searching Google search.I hope to give good
forums list.Keep in touch.

Join Facebook Group

This is the best way to get instant traffic to your blog. If you don't have Facebook account yet,
you can sign up and start searching niche group and join wit it.You can share your article with groups.

How to get traffic from YouTube

More than 4 billion views video in YouTube a day. May be wonder, how to get traffic form
YouTube.The Idea is Create video that similar to your post or niche.So you can add description
below to video. On there you can add your link.So, visitors will click that link after watching
video.So you can get best quality traffic.

How to get traffic from Email Marketing

This is also great method.Im sure all of you are sending emails to your friends and family members.
haven't you tried to send your blog link?. You can start sending emails to friends and asking them to
forward to others.If you have subscriber option. it will helps you to increase subscribers too.If you
not add it yet.how to add feed-burner subscriber gadget to blogger

How to get Traffic from Social Bookmarking

Actually Social bookmarking is the best way to get instant traffic to your bog.you can use Facebook,
twitter, Digg stumbleupon, myspace.. etc.Submit your Every post to social networks.
Submit your post to 250 social bookmark sites with One click. 

Hope you got Good information about getting traffic to your blog.Other thing is try to
make new post everyday.If not ,you will loose your visitors and subscribers.Because
when they visit your blog next time and found you are not updating it.Surely they wont
back to your site.
Read More

Saturday, June 23, 2012

Google Adsense Converter For Blogger

Adsense Ads Converter Convert the adsense
ads andMake it suitable for adding to blogger.
Although This tool can be use for displaying HTML
and other code in your blog post.

This is a Adsense converter tool.

Paste Your Adsense code below and click Encode.After copy that code and paste it where
you want to show the ads in blogger.


Read More

Friday, June 22, 2012

Cool All In One Social Media Sharing With Rss Subscribe Gadget For Blogger

Actually social bookmaking is the easy way to get traffic
to yourblog.Earlier I gave lot of  of social Bookmaking
gadget.So, In this gadget most useful than other gadget.
because It Include Facebook fan page, Twitter follower
button, Google Plus button, Rss subscribe and other all
social networks.I think this is one of best social gadget.
You can install it to your blog with few steps. Try below
Steps to Add it to your blog.


1.  Log in to blogger account > Go to Design >> Page Element

2. Click Add Gadget and select 'HTML/Javascript'

3. Paste below code.

<style> 
/* bloggertrix.com Widget  */ 
 #btrix_all-in-one-bar { 
 border: 0; 
 margin-bottom: 10px; 
 margin: 0 auto; 
 width:300px; 
 } 
.fb-likebox { 
 background: #fff; 
 padding: 10px 10px 0 10px; 
 border: 1px solid #D8E6EB; 
 margin-top: -2px; 
 height:65px; 
 } 
.googleplus { 
 background: #F5FCFE; 
 border-top: 1px solid #FFF; 
 border-bottom: 1px solid #ebebeb; 
 border-right: 1px solid #D8E6EB; 
 border-left: 1px solid #D8E6EB; 
 border-image: initial; 
 font-size: .90em; 
 font-family: "Verdana","Helvetica",sans-serif; 
 color: #000; 
 padding: 9px 15px; 
 line-height: 1px;} 
.googleplus span { 
 color: #000; 
 font-size: 11px; 
 position: absolute; 
 display:inline-block; 
 margin: 9px 70px;} 
.g-plusone {    float: left;} 
.twitter { 
 background: #EEF9FD; 
 padding: 10px; 
 border: 1px solid #C7DBE2; 
 border-top: 0;} 
#mashable { 
 background: #EBEBEB; 
 border: 1px solid #CCC; 
 border-top: 1px solid white; 
 padding: 2px 8px 2px 3px; 
 text-align: right; 
 border-image: initial;} 
#mashable .author-credit {} 
#mashable .author-credit a { 
 font-size:10px; 
 font-weight: bold; 
 text-shadow: 1px 1px white; 
 color: #1E598E; 
 text-decoration:none;} 
#email-news-subscribe .email-box{ 
 padding: 5px 10px; 
 font-family: "Verdana","Helvetica",sans-serif; 
 border-top: 0; 
 border-right: 1px solid #C7DBE2; 
 border-left: 1px solid #C7DBE2;
 border-bottom: 1px solid #C7DBE2; 
 border-image: initial; 
 height:35px;} 
#email-news-subscribe .email-box input.email{ 
 background:#FFFFFF; 
 border: 1px solid #dedede; 
 color: #999; 
 padding: 7px 10px 8px 10px; 
 -moz-border-radius: 3px; 
 -webkit-border-radius: 3px; 
 -o-border-radius: 3px; 
 -ms-border-radius: 3px; 
 -khtml-border-radius: 3px; 
 border-radius: 3px; 
 border-image: initial; 
 font-family: "Verdana","Helvetica",sans-serif;}    
#email-news-subscribe .email-box input.email:focus{color:#333}    
#email-news-subscribe .email-box input.subscribe{ 
 background: -moz-linear-gradient(center top,#FFCA00 0,#FF9B00 100%); 
 background: -webkit-gradient(linear,left top,left bottom,color-stop(0,#FFCA00),color-stop(1,#FF9B00)); 
 background: -moz-linear-gradient(center top,#FFCA00 0,#FF9B00 100%); 
 -pie-background: linear-gradient(270deg,#ffca00,#ff9b00); 
 font-family: "Verdana","Helvetica",sans-serif; 
 border-radius:3px; 
 -moz-border-radius:3px; 
 -webkit-border-radius:3px; 
 border:1px solid #cc7c00; 
 color:white; 
 text-shadow:#d08d00 1px 1px 0; 
 padding:7px 14px; 
 margin-left:3px; 
 font-weight:bold; 
 font-size:12px; 
 cursor:pointer; 
 border-image: initial;} 
#email-news-subscribe .email-box input.subscribe:hover{ 
 background: #ff9b00; 
 background-image:-moz-linear-gradient(top,#ffda4d,#ff9b00); 
 background-image:-webkit-gradient(linear,left top,left bottom,from(#ffda4d),to(#ff9b00)); 
 filter:progid:DXImageTransform.Microsoft.Gradient(startColorStr=#ffffff,endColorStr=#ebebeb);
 outline:0;-moz-box-shadow:0 0 3px #999; 
 -webkit-box-shadow:0 0 3px #999; 
 box-shadow:0 0 3px #999 
 background:-webkit-gradient(linear,left top,left bottom,color-stop(0,#ffda4d),color-stop(1,#ff9b00)); 
 background:-moz-linear-gradient(center top,#ffda4d 0,#ff9b00 100%); 
 -pie-background:linear-gradient(270deg,#ffda4d,#ff9b00); 
 border-radius:3px; 
 -moz-border-radius:3px; 
 -webkit-border-radius:3px; 
 border:1px solid #cc7c00; 
 color:#FFFFFF; 
 text-shadow:#d08d00 1px 1px 0}    
#other-social-bar { 
 background-color: #F5FCFE; 
 box-shadow: 0 1px 1px #FFFFFF inset; 
 padding: 5px; 
 font-family: "Verdana","Helvetica",sans-serif; 
 font-weight:none; 
 overflow: hidden; 
 border: 1px solid #B6D0DA; 
 border-bottom: 1px solid #B6D0DA; 
 height:45px; 
} 

#other-social-bar1 { 
 background-color: #F5FCFE; 
 box-shadow: 0 1px 1px #FFFFFF inset; 
 padding: 5px; 
 font-family: "Verdana","Helvetica",sans-serif; 
 font-weight:bold; 
 overflow: hidden; 
 border-left: 1px solid #B6D0DA; 
 border-right: 1px solid #B6D0DA;  
 border-bottom: 1px solid #B6D0DA; 
 height:10px;}
.addthis_toolbox1{margin-left:8px;margin-top:8px;text-align:center}
.addthis_toolbox1 .custom_images a{width:32px;height:32px;margin:0 2px 0 2px;padding:0}
.addthis_toolbox1 .custom_images a:hover img{opacity:6}
.addthis_toolbox1 .custom_images a img{opacity:0.65}
</style>
<style> 
#email-news-subscribe .email-box input.subscribe{ 
background: #FFCA00; 
} 
</style>
<!--begin of social widget--> <div style="margin-bottom:10px;"> <div id="btrix_all-in-one-bar" >

<div id="other-social-bar">
<div class='addthis_toolbox1'>   
<div class='custom_images'>

<a class='addthis_button_twitter'><img alt='Twitter' height='32' src='https://blogger.googleusercontent.com/img/b/R29vZ2xl/AVvXsEhWbmdloExjN3wkhZ-Rn3JKCEk3mExrF1aJho02y4106uKOr7ts9fLqhbaZcHiDFyvm49Rk8lxXtwdeygJPXcWC8BAtQgHW4ZgcW3mlELrKJpGL8TPRTuIsQWBV6OOo9Nr1dPefvncRPM8/s1600/twitter.png' width='32'/></a>
<a class='addthis_button_delicious'><img alt='Delicious' height='32' src='https://blogger.googleusercontent.com/img/b/R29vZ2xl/AVvXsEiVWK2Faj3WPM__E5g46DQjngMaGXekSCZekPsRjdn8658aXaztj7j6J0EHaoHTX8VlqH1vYaLOD8Z6PnDqSjslbcUEAoO5qBQxV4qWgdz1u2VxYgc3LRD0OI-_0hBvQj_EBcRiU0cgOPw/s1600/delicious.png' width='32'/></a>
<a class='addthis_button_facebook'><img alt='Facebook' height='32' src='https://blogger.googleusercontent.com/img/b/R29vZ2xl/AVvXsEhcY9-9vSxvsVFD_gxVZCzTfBMcyhRjAQzcZ2kFzioYp0JmeN8G-OyAvsxdwbuM-4CnV6OJ_2ghEdm6n4V81pGcebU-1Z38fQYXBlUNs-m1bPuF3xm9kpLj-VANgf6lK5LXAvAedoEBWj4/s1600/facebook.png' width='32'/></a>
<a class='addthis_button_digg'><img alt='Digg' height='32' src='https://blogger.googleusercontent.com/img/b/R29vZ2xl/AVvXsEgaejG3CVuhg6cVI2Ws5NxOnfISYEwKWzF2z21q3AIYf7CTptAWk31N9JggtEX9COKk1XDhHQLoznRmwZclngXWxd1O9NV23uxDgGqohdisaAIULLZFzbDRWTesOo15awkuqJNs9RT9UTM/s1600/digg.png' width='32'/></a>
<a class='addthis_button_stumbleupon'><img alt='Stumbleupon' height='32' src='https://blogger.googleusercontent.com/img/b/R29vZ2xl/AVvXsEgTz2l_xDDfRto_6HTsZEFIQr1GDxYE2mLOaLBxjTOH2eER6mA03itbNmwWLnXxexH_qEEoiIlS2ScG_MsH80tmyq4tN8EbMNgIROZle81Tx37Z6oQL6uJZ97ak_Pgoz_r7WAIBi5HtcMY/s1600/stumbleupon.png' width='32'/></a>
<a class='addthis_button_more'><img alt='More' height='32' src='https://blogger.googleusercontent.com/img/b/R29vZ2xl/AVvXsEhzP5w7XnohpU2hyphenhyphen6U0h0OUYqhfwm7OPO0TpNYmpUPw-GW3_emoZcUh7fdAJJDtyG4wC7j59d2QCL63lHcoB9F-_5eQb5GgdSKAwG2HHwj3Jv4fM-xwphbl_KJUmFAAnkiHI8m4NLgaj6M/s1600/more.png' width='32'/></a><a href='http://www.bloggertrix.com/'><img src='https://blogger.googleusercontent.com/img/b/R29vZ2xl/AVvXsEiW9s6vjff7pWTODTLAvONrKLnpgoqh_iHAoCPBx6mj8QJe7hOInq2m0wqGLDlohGsK7e4ZZHcGuqN5jAEAd6KsvjKhD6R5ymA90On10don0Z_5tM79x4KC4Gc87-Vp3FYUDNXF-BUMow0/s1600/image.png' target='_blank'/></a>
</div></div></div><!-- Facebook -->
<div class="fb-likebox">
<div id="fb-root"></div><script>(function(d, s, id) {
var js, fjs = d.getElementsByTagName(s)[0];
if (d.getElementById(id)) return;
js = d.createElement(s); js.id = id;
js.src = "//connect.facebook.net/en_US/all.js#xfbml=1";
fjs.parentNode.insertBefore(js, fjs);
}(document, 'script', 'facebook-jssdk'));</script>
<div class="fb-like-box" data-href="http://www.facebook.com/bloggertrix" data-width="280" data-height="88" data-show-faces="false" data-stream="false" data-header="false"></div></div>
<div class="googleplus"> <!-- Google --><span>Recommend Us!</span><div class="g-plusone" data-size="medium"></div> <script type="text/javascript" src="https://apis.google.com/js/plusone.js"></script> </div> <div class="twitter"> 
<!-- Twitter --> 
<iframe title="" style="width: 300px; height: 20px;" class="twitter-follow-button" src="http://platform.twitter.com/widgets/follow_button.html#_=1319978796351&amp;align=&amp;button=blue&amp;id=twitter_tweet_button_0&amp;
lang=en&amp;link_color=&amp;screen_name=bloggertrix&amp;show_count=&amp;show_screen_name=&amp;text_color=" frameborder="0" scrolling="no"></iframe> </div><div id="email-news-subscribe"> <!-- Email Subscribe -->
<div class="email-box"><form action="http://feedburner.google.com/fb/a/mailverify" method="post" target="popupwindow" onsubmit="window.open
('http://feedburner.google.com/fb/a/mailverify?uri=bloggertrix', 'popupwindow', 'scrollbars=yes,width=550,height=520');return true"><input class="email" type="text" style="width: 150px; font-size: 12px;" id="email" name="email" value="Your Email Here.." onfocus="if(this.value==this.defaultValue)this.value=&#39;&#39;;" onblur="if(this.value==&#39;&#39;)this.value=this.defaultValue;" />
<input type="hidden" value="bloggertrix" name="uri" /><input type="hidden" name="loc" value="en_US" /><input class="subscribe" name="commit" type="submit" value="Subscribe" />
</form></div></div><!-- Other Social Bar --><div id="other-social-bar1"><a style="margin-top:-5px; float:right; font-size:10px; color:#3B78CD; text-decoration:none;" href="http://bloggertrix.com">Blogger Widget</a>
</div>
</div></div>

Replace bloggertrix with your Facebook fan page Id
Replace bloggertrix with your twitter Username
Replace bloggertrix with your Feedburner Id 
                                 
4. Save HTML/Javascript. you are done.
Read More

How To Add Search Box With Subscriber Gadget For Blogger

This Is also Another Cool Rss Subscription Gadget.
It include with Twitter, Facebook and Rss, You can
add it to your blog.It will make your blog attractive
and helps to increase Facebook fan , Twitter follower
and Rss Subscribers,.Earlier I made similar post
Add Sleek Search Box With Social Buttons For
Blogger
you can Follow these steps.


Search Box With Subscriber


1. Log in to blogger account and Go to Design >> Edit HTML

2. Find this tag by using Ctrl+F    ]]></b:skin>

3. Paste below code Before ]]></b:skin> tag

.Btbox{width:305px;border:0 solid #141414;overflow:hidden}
.addthis_toolbox{padding:15px 0 5px 0;text-align:center:margin-bottom:-30px;}
.addthis_toolbox .custom_images a{width:32px;height:32px;margin:0 4px 0 4px;padding:0}
.addthis_toolbox .custom_images a:hover img{opacity:1}
.addthis_toolbox .custom_images a img{opacity:0.85}
.rssbox{background:#CED8F6;border:1px solid #ccd1d7;padding:5px 10px;margin:10px 0 0 0;-moz-border-radius:10px;-khtml-border-radius:10px;-webkit-border-radius:10px;border-radius:10px;width:125px}
.rssbox:hover{border:1px solid #1014c7}
.rssbox a{color:#7c8a9b;text-transform:uppercase;text-decoration:none;font:bold 12px Arial,Helvetica,Sans-serif}
.rssbox a:hover{color:#1014c7;text-decoration:none}
.emailsbox{background:#CED8F6;border:1px solid #ccd1d7;padding:5px 10px;margin:10px 0 0 0;-moz-border-radius:10px;-khtml-border-radius:10px;-webkit-border-radius:10px;border-radius:10px;width:125px}
.emailsbox:hover{border:1px solid #1014c7}
.emailsbox a{color:#7c8a9b;text-transform:uppercase;text-decoration:none;font:bold 12px Arial,Helvetica,Sans-serif}
.emailsbox a:hover{color:#1014c7;text-decoration:none}
.twitterbox{background:#CED8F6;border:1px solid #ccd1d7;padding:5px 10px;margin:10px 0 0 0;-moz-border-radius:10px;-khtml-border-radius:10px;-webkit-border-radius:10px;border-radius:10px;width:125px}
.twitterbox:hover{border:1px solid #1014c7}
.twitterbox a{color:#7c8a9b;text-transform:uppercase;text-decoration:none;font:bold 12px Arial,Helvetica,Sans-serif}
.twitterbox a:hover{color:#1014c7;text-decoration:none}
.facebookbox{background:#CED8F6;border:1px solid #ccd1d7;padding:5px 10px;margin:10px 0 0 0;-moz-border-radius:10px;-khtml-border-radius:10px;-webkit-border-radius:10px;border-radius:10px;width:125px}
.facebookbox:hover{border:1px solid #1014c7}
.facebookbox a{color:#7c8a9b;text-transform:uppercase;text-decoration:none;font:bold 12px Arial,Helvetica,Sans-serif}
.facebookbox a:hover{color:#1014c7;text-decoration:none}
#search{width:290px;padding:2px 2px;background:#F7F6F6F;border:1px solid #ccd1d7;height:28px;margin-top:0;margin-left:5px;display:inline;float:left;margin-bottom: 0px;}
#search:hover{border:1px solid #1014c7}
#search form{margin:0;padding:0}
#search fieldset{margin:0;padding:0;border:none}
#search p{margin:0;font-size:85%}
#s{width:200px;margin:0 0 0 0;padding:5px 5px 5px 5px;border:none;font:normal 80% &quot;Tahoma&quot;,Arial,Helvetica,sans-serif;color:#000;float:left;background:#f7f6f6;display:inline}
input#searchsubmit{float:right;display:inline;margin:0 0 0 0;height:28px;background:#b2b2b2;color:#000;border:0 solid #222}

4. Now Go to Design >> Page Element

5. Click Add Gadget and select 'HTML/Javascript'

6. Paste  below code.

<div class="btbox">
<div id='search' style='display:inline;'>
<form action='/search' id='searchform' method='get'>
<input id="s" name="q" onblur="if (this.value == &quot;&quot;) {this.value = &quot;Search...&quot;;}" onfocus="if (this.value == &quot;Search...&quot;) {this.value = &quot;&quot;;}" type="text" value="Search..." />
<input id="searchsubmit" type="submit" value="Search" />
</form></div><table><tr><td><div class="rssbox"><a href="http://feeds.feedburner.com/bloggertrix" target="_blank" rel="nofollow"><img src="https://blogger.googleusercontent.com/img/b/R29vZ2xl/AVvXsEhVm_Dr1ve1Qxx9A3FF_OYcdrSaxF4KIiC8pfFgDfMb3_4j3gT47eDPGI5eecKLrRZ8iYU1bKo-hLasej9crHLUhmTBBNaQBlGNv6WJwr1sH6P1iR2Pi2dvptlucL17kSUQRaLt6Rn-pIY/s1600/rss-icon.png"  alt="RSS Feeds" title="RSS Feed" style="vertical-align:middle; margin-right: 5px;border:none;"  /></a>
<a href="http://feeds.feedburner.com/FEEDBURNER-ID" target="_blank" rel="nofollow">RSS Feed</a>
</div></td><td><div class="emailsbox">
<img src="https://blogger.googleusercontent.com/img/b/R29vZ2xl/AVvXsEgoLm0q7aM7DF_BsrtpyCVVFlMVjD6UhMpJ1O2Q19Bvs616S10u2VMccv3syFW-LfXbnm7xYJFDekSuA9a3oSsnigytCMP7FHkiBjgKKfmKzrN2YLwPcqakFMrUuXvB3OwBIDlzK3guci0/s1600/Google-plus-grey-icon.png"  alt="Google Plus" title="Google Plus" style="vertical-align:middle; margin-right: 5px;border:none;"  />
<a href="href="https://plus.google.com/Username
" target="_blank" rel="nofollow"> Google Plus</a>
</div></td></tr><tr><td><div class="twitterbox"><a href="http://twitter.com/bloggertrix" target="_blank" rel="nofollow"><img src="https://blogger.googleusercontent.com/img/b/R29vZ2xl/AVvXsEgsE4o3CYZceV55cpIrI6zpR-S8tD9BQzI1006B6Rv09QeoCcVdChyphenhyphen1ynJUmJNvQiV9pIGUvLBShdRf4IYA55-ZBXnOX9SNmC5x1SHok2Vp-pSVy-bKb_RrA7rel54PrLnZloaVylXwtSg/s1600/twitter-icon.png"  alt="Twitter" title="Twitter" style="vertical-align:middle; margin-right: 5px;border:none;"  /></a>
<a href="http://twitter.com/Twitter-USERNAME" target="_blank" rel="nofollow">Twitter</a>
</div></td><td><div class="facebookbox"><a href="http://www.facebook.com/bloggertrix" target="_blank" rel="nofollow"><img src="https://blogger.googleusercontent.com/img/b/R29vZ2xl/AVvXsEheyUVK6zzYRMmjzwT4QLIUG7vXbsvmMNy0VvZJzAsdRzLzWjetGRRsyYc2KyIP-jo7FsSRFN88n5cSNZOpAzfeXqDpa8AIhcNXPKf1RuqF_rwo0U7mMj_sRvhPVh62jy6xDnR5Mzzg7uw/s1600/social-twitter-box-blue-icon.png"  alt="Facebook" title="Facebook" style="vertical-align:middle; margin-right: 5px;border:none;"  /></a>
<a href="http://www.facebook.com/Facebook-USERNAME" target="_blank" rel="nofollow">Facebook</a>
</div></td></tr></table><p style="display:none;" align="center"><a href="http://bloggertrix.com/" target="_blank"></a></p></div>

*Replace Feedburner-ID With your Feedburner Id
*Replace USERNAME with your Google Plus username
*Replace Twitter-USERNAME with your Google Plus username
*Replace Facebook-USERNAME with your Google Plus username

7. Now save your template
    you are done.
Read More

Wednesday, June 20, 2012

How To Add Google Plus Page Badge To Blogger

Google plus also another great social bookmarks
which helps to get a lot of traffic from there.It will helps
to increase your page views too. Earlier i post about
How To Add Google Plus Profile / Page Tab To
Facebook Fan Page
.So in this tutorial will helps to
how to add Google Plus badge to your blog.Follow
these steps to add it to your blog.
Google plus badge
1.  Log in to blogger account > Go to Design >> Page Element

2. Click Add Gadget and select 'HTML/Javascript'

3. Paste below code.

<!-- Place this tag in the <head> of your document -->
<link href="Your Link" rel="publisher" /><script type="text/javascript" src="https://apis.google.com/js/plusone.js"></script>

<!-- Place this tag where you want the badge to render -->
<g:plus href="Your Link" size="badge"></g:plus>

Replace Your Link with your Google+ Page URL

4. Save HTML/Javascript. you are done.
Read More

Tuesday, June 19, 2012

How To Enable Threaded Commenting For Blogger

In comment system,Blogger announced new feature.
Its support threat commenting. So, your readers can
comment below your post flexibility. Normal comment
system is no more different with replying comment.
but in this feature helps to make different with reply
comment. Let's see how to add it this comment
systems to your blog.

Interface Threaded Commenting For Blogger

 1. Log in  and Go to Setting >> Site Feed


2. Allow Blog Feeds Like below Image

Allow-blog-feed

3. Now click Save Setting

You must have to embedded below post to use this feature.Comment will automatically visible just below post.So you no need to click link to popup window.So, to make setting to embedded comment
do like below.

1. Log in  and Go to Setting >> Comment

2. Choose the Embedded below post Like below image.

embedded-below-post

3. Now click Save setting.  Done.

New Interface Threaded Commenting For Blogger


This is for who are using new blogger interface

1. Log in  and Go to Setting >> Other

2. Allow Blog Feed to Full like below image.

Site-feed-new-interface

Embedded Comments

1. Log in  and Go to Setting >> Post and comments

2. Make your comment Location as  Embedded like below.

Embedded-new-interface
3.  Now save Setting.
   cheers you are done.
Read More

How To Add Automatically Readmore Option To Blogger


This is great  option for  bloggers. earlier i made  tutorial
about manual mode.This will  helps  to  short  your page
with button.With using this option we can  reduce height
of homepage.So this post will important person who care
about home page size. You can  add it  to  your blog with
simple steps.


How To Show Post Title Only On Home page

1. Log in to blogger account and Go to Design >> Edit HTML
  
2. Put checked marked in Expand Widget Templates

3. Find this tag by using Ctrl+F    </head>

4. Paste below code Before </head> tag

<script type='text/javascript'>
var thumbnail_mode = &quot;float&quot; ;
summary_noimg = 230;
summary_img = 140;
img_thumb_height = 100;
img_thumb_width = 100;
</script>
<script src='http://btrixx.googlecode.com/files/btrix.js' type='text/javascript'/>

5. Now Find this code  by using Ctrl+F <data:post.body/>

6.  Replace above code with this code.

<b:if cond='data:blog.pageType == &quot;item&quot;'>
<data:post.body/>
<b:else/>
<div expr:id='&quot;summary&quot; + data:post.id'>
<data:post.body/></div>
<script type='text/javascript'>
createSummaryAndThumbundefined&quot;summary<data:post.id/>&quot;);
</script><div style='clear: both;'/>
<span style='padding-top:5px;;float:right;text-align:right;'><a expr:href='data:post.url' rel='bookmark'><b>Reade More >></b></a></span>
</b:if>

7. Now save your template
 you are done.
Read More

Monday, June 18, 2012

Add Social Media Share Widget With Search Box For Blogger

Social bookmaking is the easy way to get traffic to your
blog.Earlier I gave lot of  of social Bookmaking gadget.In this
tutorial Im helping you to add the Search box and link with Rss,
twitter and Facebook.Earlier i gave Add Sleek Search Box With
Social Buttons For Blogger
. I also same widget with different style.
This gadget will helps you to  grow up  your Rss follower,
Twitter follower and Facebook fans.follow these steps.

Add Social Media Share Widget With Search Box For Blogger

1.  Log in to blogger account > Go to Design >> Page Element

2. Click Add Gadget and select 'HTML/Javascript'

3. Paste below code.

<style type="text/css">
#search{width:268px; border:1px solid #E0DFD9;margin: 0 0 0 0;background:url(https://blogger.googleusercontent.com/img/b/R29vZ2xl/AVvXsEh6SBX3fh5OiR7txLhi6iGefYMS6oYZ1JoPHG7L0pr9jyWret3gJGCE_OlANA1QZ-7dGfgDUtIQN5e_lNgEU3lio2FuTfKY3THHFirC9ZHAlY2MZROCdN7SPwOTRZncokox6SrKsVucLPQ/s1600/search-bgg.png) left top repeat-x;height:32px;padding:0;text-align:left;overflow:hidden} 
#search #s{width:80%; background:none;color:#3F3F3F;border:0;padding:4px;margin:3px 0 0 12px;float:left} 
#search .search-image{border:0;vertical-align:top;float:right;margin:8px 4px 0 2px} 
#search-wrap{padding:15px 0} 
.topsearch #search{margin-top:0;margin-bottom:10px}
.social-connect-widget{background:#FFF;border:1px solid #E7E6DE;padding:10px} 
</style>   
<div class='topsearch'> 
<div class='clerfix' id='search'> 
<form action='/search' id='searchform' method='get'> 
<input id='s' name='q' onblur='if (this.value == &quot;&quot;) {this.value = &quot;Search here...&quot;;}' onfocus='if (this.value == &quot;Search here...&quot;) {this.value = &quot;&quot;}' type='text' value='Search here...'/> 
<input class='search-image' src='https://blogger.googleusercontent.com/img/b/R29vZ2xl/AVvXsEiUGjiGjl7AXM1jnmy1-Rb1SmoGYb7GhiaSUoXbJNQdDwCcRqeMHIYFLXaRNgrc9jxj1Axdtu3tDY6B0PIXWQz63PVB4-sWTHvy3ERPr1NlqUIIOPtCOaUZINj4hWqbQacE9imvgYkeP_w/s1600/searchico.png' title='Search' type='image'/> 
</form> </div> </div> <div style='clear:both;'/>
<div class='social-connect-widget' style='margin-top:0px;margin-bottom:10px;'> 
<img alt='RSS Feed' src='https://blogger.googleusercontent.com/img/b/R29vZ2xl/AVvXsEgGm7LVgyjmqOxbUpOx2l7JhIlL8ju1np7bDr-J0V4bbwSuSTE_P6UmdLLu0D0vbG-_67YV3stiPiQsSYeqd3ik_A-d40cy64mZ0K_kTXlR1Wxf_LF8yTSymq9crZCKoFn2ZGYjsV_XTFg/s1600/social-rss-box-orange-icon.png' title='RSS Feed'/><div class='Widget_text' style='margin-left:45px;margin-top:-30px;margin-bottom:10px;'> 
<a expr:href='data:blog.homepageUrl   &quot;feeds/posts/default&quot;'>Subscribe to our RSS Feeds!</a> </div> 
</div> <div class='social-connect-widget' style='margin-bottom:10px;'> 
<img alt='Follow Us on Twitter!' src='https://blogger.googleusercontent.com/img/b/R29vZ2xl/AVvXsEhCMhd3PTL-seDi_e8IlJhbBQ3XK19y01EuhjdepK1lN2xPG2nuwYLrf1UKdA55f7cmWoeSuwKXdNu-QUgbLCs8O_LnZcJGUbg7MbxI0gXNqKsuxorpSP3sLzuqBVubjFyX4GYln6vADJs/s1600/social-twitter-box-blue-icon.png' title='Follow Us on Twitter!'/>
<div class='Widget_text' style='margin-left:45px;margin-top:-30px;margin-bottom:10px;'> 
<a href='http://twitter.com/USERNAME'>
Follow Us on Twitter!</a> 
</div></div>
<div class='social-connect-widget' style='margin-bottom:10px;'> 
<img alt='Be Our Fan!' src='https://blogger.googleusercontent.com/img/b/R29vZ2xl/AVvXsEjzmIAEl_jVKSoYF9Y3OTqsSboi_C_fyMIXX8OqyRGtgtYM19v-zZFLPGS2gEbop8GgqKV_EdffJVO1pu2r2HRFA0pWYp6fs7tqQi5s32ePes4LwRZTOBJ34_R_7IU-FrN3G6TXQrHqXNg/s1600/social-facebook-box-blue-icon.png' title='Be Our Fan'/>
<div class='Widget_text' style='margin-left:45px;margin-top:-30px;margin-bottom:-10px;'> 
<a href='http://facebook.com/USERNAME'> Follow us on Facebook! </a></div><a href='http://www.bloggertrix.com/'><img src='https://blogger.googleusercontent.com/img/b/R29vZ2xl/AVvXsEiW9s6vjff7pWTODTLAvONrKLnpgoqh_iHAoCPBx6mj8QJe7hOInq2m0wqGLDlohGsK7e4ZZHcGuqN5jAEAd6KsvjKhD6R5ymA90On10don0Z_5tM79x4KC4Gc87-Vp3FYUDNXF-BUMow0/s1600/image.png' target='_blank'/></a></div></div>

Replace UserName with your twitter Username
Replace UserName with your Facebook fan page Id
                                 
4. Save HTML/Javascript. you are done.
Read More

How To Show HTML,Css,Java Script And Other Code in Blogger Post

This is useful for bloggers who posting about codes.
When we posting code, that mean we are providing
codes for users.So, if we can put our codes in specific
place like text box. it will easy to grab the code.
This tutorial will helps to make some attractive to your
code ares background.


1. Log in to blogger account and Go to Design >> Edit HTML

2. Find this tag by using Ctrl+F    ]]></b:skin>

3. Paste below code Before ]]></b:skin> tag

/*--Code View www.bloggertrix.com--------------*/
.post blockquote {
background: #C8EFFF url();
background-position:top left;
background-repeat:repeat-y;
margin: 0 0px;
padding: 10px 20px 10px 5px;
border-top: 2px solid #666;
border-right: 2px solid #666;
border-left: 2px solid #666;
border-bottom: 5px solid #666;
font-size: 1em;
color:#000000;
}
.post blockquote p {
margin: 0;
padding: 0 0 15px;
}
.blockquote {
font: 18px normal  sans-serif,Tahoma;
padding-top: 10px;
margin: 5px;
text-indent: 65px;

}
.blockquote div {
display: block;
padding-bottom:10px;
}
.blockquote p {
margin: 0;
padding-top:10px;


Now when you make new post you can add like below in Edit HTML

* You have start with <blockquote> here your code </blockquote> end.

<blockquote> This is my code </blockquote>

Done, Cheers.
Read More

Sunday, June 17, 2012

How To Add Google Plus Profile / Page Tab To Facebook Fan Page

This is new tricks you can add Google Plus stream
to your Facebook fan page.So it will helps to increase
Google+ followers.There is Facebook Application called
"Google Plus Tab for Pages" So it will helps to add Google+
Stream Button easily. Follow these steps.

1. Go to Google Plus Tab for Pages

2. Now click Go to App Like below. after you clicked it
    It will ask permission to access your Facebook
    Basic Information.


3. Now you Will get window. Click Add Google+To your page.

4. Now it will show fan pages which you are running. So, you can add your fan page.

Now Adding Part is done. Now you have to configure it. Follow these steps to configure it.

How to Configure Google+To your page.

1.  Fist go to your fan page. Go to this  Edit Page  >> Update Info.
     Now click Apps On left side bar. Now you will get Google Plus Tab for Pages on page. So, click it.

2. Now you will get this window like below. now click configure button.

3. You will get Admin setting like below.


Select the correct page and add   Google+ Profile ID Number. You can change "Number of Activities to Show" as your like. After that done. Click Change for save setting. Now configurations also done.

4. you can see the Google plus profile by clicking this Google+  icon

5. Now you are done, cheers
Read More

How To Add "ShareThis" Social Bookmark Buttons To Blogger Post

This is also Nice social Bookmark buttons.it include
with hover effect.So this buttons helps you to get
more visitors by sharing your post. Earlier i posted
about How to add "Add This" Social Bookmark Buttons.
This is more attractive than it. So, in this tutorial also
helps you to add this social bookmark button to
below post title and end of the post.Follow these
steps to add it to your blog.

Add Button Just below to Post Title

1. Log in to blogger account and Go to Design >> Edit HTML
    (make sure backup your template first)

3. Add check mark in Expand Widget Templates. 

4. Find this tag by using Ctrl+F   <data:post.body/>   

5. Paste below code before <data:post.body/> code

<!-- AddThis Button bloggertrix.com -->
<span id="st_finder"></span>
<script type="text/javascript" src="http://w.sharethis.com/widget/stblogger2.js">
</script><script type="text/javascript">var switchTo5x=true;stBlogger2.init("http://w.sharethis.com/button/buttons.js",
 {"facebook":["hcount","Facebook",""],"twitter":["hcount","Tweet",""],"googleplus":["hcount","Google +",""],"sharethis":
["hcount","ShareThis",""]} );var f = document.getElementById("st_finder");var c = f.parentNode.parentNode.childNodes;for 
(i=0;i<c.length;i++) { try { c[i].style.display = "none"; } catch (err) {}}</script>
Add Button To End of the Post

6. Now Find this tag also by using Ctrl+F

                              <div class='post-footer-line post-footer-line-1'>
                                  If cant find above tag try to find below tag
                                <p class='post-footer-line post-footer-line-1'>

7. After found one of above code, paste below code after it

<!-- AddThis Button bloggertrix.com -->
<span id="st_finder"></span>
<script type="text/javascript" src="http://w.sharethis.com/widget/stblogger2.js">
</script><script type="text/javascript">var switchTo5x=true;stBlogger2.init("http://w.sharethis.com/button/buttons.js",
 {"facebook":["hcount","Facebook",""],"twitter":["hcount","Tweet",""],"googleplus":["hcount","Google +",""],"sharethis":
["hcount","ShareThis",""]} );var f = document.getElementById("st_finder");var c = f.parentNode.parentNode.childNodes;for 
(i=0;i<c.length;i++) { try { c[i].style.display = "none"; } catch (err) {}}</script>
8. Now click Save Template.
Cheers you are done.
Read More

Saturday, June 16, 2012

How To Add 3 Column Footer To Blogger

When we searching blogger template, actually we
cant find whats we want.So, we have to customize
template by own.Sometime we cant find 3 column footer
blogger template. In this tutorial will explain how to adding
3 column footer to blogger.adding three column feature is easy.
its not hard like you think. Follow These steps to
add it to your blog.
Add 3 Column Footer To Blogger
1. Log in to blogger account and Go to Design >> Edit HTML
    (make sure backup your template first)

2. Add check mark in Expand Widget Templates.

3. Find this code by using Ctrl + F   <b:section class='footer' id='footer'/>

4. Replace   <b:section class='footer' id='footer'/>    With below code
  
<div id='footer-column-container'>
<div id='footer2' style='width: 30%; float: left; margin:0; text-align: left;'>
<b:section class='footer-column' id='col1' preferred='yes' style='float:left;'/></div>
<div id='footer3' style='width: 40%; float: left; margin:0; text-align: left;'>
<b:section class='footer-column' id='col2' preferred='yes' style='float:left;'/>
</div><div id='footer4' style='width: 30%; float: right; margin:0; text-align: left;'>
<b:section class='footer-column' id='col3' preferred='yes' style='float:right;'/></div>
<div style='clear:both;'/>
<div id='footer-bottom' style='text-align: center; padding: 10px; text-transform: lowercase;'>
<b:section class='footer' id='col-bottom' preferred='yes'><b:widget id='Text2' locked='false' title='' type='Text'/>
</b:section></div><div style='clear:both;'/></div>


5. Now Find this code by using Ctrl + F  ]]></b:skin>

6. Paste  below Before ]]></b:skin>  code

/* Footer by www.bloggertrix.com */
#footer-column-container {clear:both;}
#footer-column-container h2{font-size:18px;text-align:left;color:#ddd;Times New Roman&quot;,Times,serif;
font:normal bold 18px Arial,Georgia,&quot;text-transform:none}
.footer-column {padding: 10px;}

7. Now save your template.After go back page element and add widgets as your like.
    Cheers
Read More

How To Add Twitter Follower Box To Blogger

Twitter also great way to increase your blog traffic.
But Its depend how many followers you have got.So,
This is a great widget for bloggers.because this widget
allow your visitors to follow you without leaving your site.
This is also similar to facebook fan box. you can see
few follower from this widget. This is also simple widget
That you can add it to your blog within few steps.Follow
these few steps to add it to your blog.


1.  Log in to blogger account > Go to Design >> Page Element

2. Click Add Gadget and select 'HTML/Javascript'

3. Paste below code.

<!-- Twitter Follower Box www.bloggertrix.com -->
<script type='text/javascript'>
function fanbox_init(screen_name){document.getElementById('twitterfanbox').innerHTML='\<iframe name=\"fbfanIFrame_0\" frameborder=\"0\" allowtransparency=\"true\" src=\"http://s.moopz.com/connect.html?user='+screen_name+'\" class=\"FB_SERVER_IFRAME\" scrolling=\"no\" style=\"width: 295px; height: 250px; border-top-style: none; border-right-style: none; border-bottom-style: none; border-left-style: none; border-width: initial; border-color: initial; \"\>\<\/iframe\>';}
</script>
<div id="twitterfanbox"></div><script
type="text/javascript">fanbox_init("bloggertrix");</script
type="text>
<!-- End Twitter Follower Box -->

*Replace  bloggertrix  With your twitter username

4. Save HTML/Javascript. you are done.
Read More