Showing posts with label Comments. Show all posts

Monday, August 27, 2012

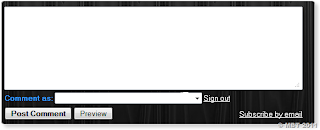
8 Backgrounds For Customize Blogger Comment Box

File Under: 6 comments

In this post, im going help you to customize your blogger comment box with nice backgrounds.Actually this is great those who are trying to make your blog, attractive. Earlier
i posted about this, but today ill give more different styles.

8 Backgrounds For Customize Blogger Comment Box


1. Log in to blogger  Design > Edit HTML.

2. Find this tag by using Ctrl+F   ]]></b:skin>

3. Paste below code Before ]]></b:skin> tag

#mbt-form iframe{ 
background:#ffffff url(
https://blogger.googleusercontent.com/img/b/R29vZ2xl/AVvXsEgQqt8hWF9OwMBjEDNIwdlZcS40-3w1Fs-AxoavuNZg20wIQwzLIAjMcOEclXNXwUdgyjvfO7izqXhQfU6qt3F_pwaWxQoZajsOaXUVNT1ZaEzrr0a_hJ9TJSV0Vd7_GDHjWB7zReVyh6al/s400/11.png) repeat-x; 
border:1px solid #ddd; 
-moz-border-radius:6px; 
-webkit-border-radius:6px; 
box-shadow: 5px 5px 5px #CCCCCC; 
padding:5px; 
font:normal 12pt "ms sans serif", Arial; 
color:#2F97FF; 
width:560px; height:213px !important; 
}
#mbt-form a{ 
color:#fff; 
}

4. Find again this code by using Ctrl+F   <div class='comment-form'>

5.
Now replace <div class='comment-form'> with below code

<div id='mbt-form'>

6.
Now save your Template

Here is other backgrounds. you can change above code URL with below any URL.

https://blogger.googleusercontent.com/img/b/R29vZ2xl/AVvXsEjd5VfxiAOCGTfGOUWNXYnr0mPNS12DxvHq_UFbFI557uNt5zItt9_A4pQA-EIKi_bnOZV-kHVujtdwttd4Vgo6DtsMZPr1zTTyWGgGXVKLYTUowJIos0FGra3x_oA7AtdrPIEuK7Pe8Hde/s1600/form1.JPG


https://blogger.googleusercontent.com/img/b/R29vZ2xl/AVvXsEg4uHOJOhkVDmhOEU5PDtUaB3_e15aGMnEyfo63HhuyqdVIuqZxmocMTlF5dJJxsjdlipOsYvq5t0Pk1xpj6zhTiWROBBFdI0xjoflqdokE6gM_S-VHRu2IIVE4UejgFCfcXnDqAmq9eNeb/s1600/form2.JPG


https://blogger.googleusercontent.com/img/b/R29vZ2xl/AVvXsEiHBI3WgHmywO1fRxUhcjCdIWmypr6q_IpIRA8RYC9Q6yfKTxIW6-b-ccPX8ZoMawEL-F69jmLoI0m9V5tVraLcuIv_tH46bnY0WtT60d7VcNggS4QTND0S90IdF74kh1mqrB2RRqOsAAlA/s1600/form3.JPG


https://blogger.googleusercontent.com/img/b/R29vZ2xl/AVvXsEikpUE9zhuK6I8cTol3HHAhSqn7oqBfr4XfqQhqg2WXY0KZYxAKsXPCTMFQ5MJhl5sMwz9cQO5uKwB-EUmA_VhD6hemVAz8YtOcTRW1lTFO2xkXjLNQFFfPIGiDkWEorZ2gLbuYlhMu9uiZ/s1600/form4.JPG


https://blogger.googleusercontent.com/img/b/R29vZ2xl/AVvXsEiKaVDUe8wAaQtidaSZizP-CaEkbuZYKHWfJgJ0Nu_nCDdfgzOrYbJ7FbtKCF4tZ_5axbhlQfT944EcyeQLUHQxgwaGaRmp_Z5nbktJIpQqxUFIsboUYksk4YzSgG5e9lvhnH51fpsc0YXk/s1600/form5.JPG


https://blogger.googleusercontent.com/img/b/R29vZ2xl/AVvXsEiGyccAF9ushdTdRQBcErwUfUj0bA_bBzTtWKskhLgBX-WV4nyfKAuTOV2ZD5qA9gO5M5SSmp3fcY1ua7g1aJv5rVuB8fktioPhGbvsyzhT7X3uxdW8oVXELHEYrkEPOj1byEYAqruEz5XH/s1600/form6.JPG


https://blogger.googleusercontent.com/img/b/R29vZ2xl/AVvXsEiJJFGwRblDtjjfSSVd1dPZGuDXFgU04pq4RsVc8fp-w0Ys0K6ElpTaoY4OfPaixUTUnUkrt_NiA5pGohe1u6e1naP6EVNE21xoAJ3Z26ve9xoGiioY41e5zO1uz-5pHCb9eYV7IRyJKxND/s1600/form7.JPG


 https://blogger.googleusercontent.com/img/b/R29vZ2xl/AVvXsEg6mGyyi2dUeTyBf9EnzLgR034NE0g_ldYiBHL8uR_vFJJBB9ZaR6_SjN_gJ-BToeFglSfKfqMCgkdAt0PJerv9nM3Ap1cHpPd25rZfwojBlBCJvWB2XcuGaz5O31DXo4OBhOvMCcpnZkd_/s1600/form8.JPG


Read More

Thursday, August 16, 2012

Adding Numbers For Threaded Commenting In Blogger

File Under: , 1 comment

This Post will helps you to add numbers inside  threaded comments.It will appear like 3, 3.a, 3.b, 3.c like that.To add this trick, you have to add threaded comments system for your blog.Im already provide screenshot for it. Follow these steps.

comment-numbers


1. Log in to blogger account & Go to Design >> Edit HTML

2. Find this code  by using Ctrl+F  ]]></b:skin>

3.Paste below code Before ]]></b:skin> code
.comment-thread ol {
    counter-reset: countcomments;
}
 
.comment-thread li:before {
    content: counter(countcomments,decimal);
    counter-increment: countcomments;
    float: right;
    font-size: 22px;
    color: #555555;
    padding-left: 10px;
    padding-top: 3px;
    background: url(https://blogger.googleusercontent.com/img/b/R29vZ2xl/AVvXsEigmnYNuQNQlFuEhgpUsag_0giAYvc0q1suxh7MgtDAtz-cyDZ6Mo6QlImIprcogcgJsz1K2OI_4Q9VEXwosUknaT9QFmU7LIOWJxl1yrqQisJH7bM2eKlCSTJj2uF1omb4hDNj9e8Q-NVR/s1600/commnetbt.png) no-repeat;
    margin-top: 7px;
    margin-left: 10px;
    width: 50px;
    height: 48px;

}
 
.comment-thread ol ol {
    counter-reset: contrebasse;
}
 
.comment-thread li li:before {
    content: counter(countcomments,decimal) "." counter(contrebasse,lower-latin);
    counter-increment: contrebasse;
    float: right;
    font-size: 18px;
    color: #666666;
}

4. Now Click  Save Template.
    You are done...
Read More

Thursday, August 9, 2012

Round Avatars With Top Comment Gadget For Blogger

File Under: , , , 7 comments

This is new style with top commenter gadget,Earlier i posted about How to add  top Commentators gadget to blogger, It just appear link. But this style is developed with thumbnail.And Its round avatars you can try to add it it to your blog.Surly it will great look.Follow these steps to add it to your blog.


1. Log in to blogger  Design > Page Element.

2. Click Add Gadget and select 'HTML/Javascript

3.Now Paste Below code.


<style type="text/css">

.top-commenter-line img {

-webkit-border-radius: 100px;
-moz-border-radius: 100px;
border-radius: 100px;
-webkit-box-shadow: 0 1px 3px rgba(0, 0, 0, .4);
-moz-box-shadow: 0 1px 3px rgba(0, 0, 0, .4);
box-shadow: 0 1px 3px rgba(0, 0, 0, .4);
}

.top-commenter-line {margin: 3px 0;}
.top-commenter-line .profile-name-link {padding-left:0;}
.top-commenter-avatar {vertical-align:middle;}
</style>
<script type="text/javascript">
//
// Top Commentators gadget with avatars, by MS-potilas 2012.
// Gets a list of top commentators from all comments, or specified number of days in the past.
// See http://yabtb.blogspot.com/2012/05/top-commenters-gadget-with-avatars.html
//
// CONFIG:
var maxTopCommenters = 5;   // how big a list of top commentators
var minComments = 1;        // how many comments must top commentator have at least
var numDays = 0;            // from how many days (ex. 30), or 0 from "all the time"
var excludeMe = true;       // true: exclude my own comments
var excludeUsers = ["Anonymous", "someotherusertoexclude"];     // exclude these usernames
var maxUserNameLength = 42; // 0: don't cut, >4: cut usernames
//
var txtTopLine = '<b>[#].</b> [image] [user] ([count])';
var txtNoTopCommenters = 'No top commentators at this time.';
var txtAnonymous = '';      // empty, or Anonymous user name localized if you want to localize
//
var sizeAvatar = 56;
var cropAvatar = true;
//
var urlNoAvatar = "https://blogger.googleusercontent.com/img/b/R29vZ2xl/AVvXsEhYRrHADAaFMNpcm4tWgDSAGCM2NRh_1YieB2XoYRpK0UvBLnz5XjXbPT-h6f6vC20pJUalv2bnW0BZlzlhyGEZTSNB1cDD70Bnd69QvGoY_gnzvVJJRYUXEfFMDI79ax4Kau1zN_epKuE/"+sizeAvatar+"/avatar_blue_m_96.png"; // http://www.blogger.com/img/avatar_blue_m_96.png resizeable
var urlAnoAvatar = 'http://www.gravatar.com/avatar/00000000000000000000000000000000?d=mm&s=' + sizeAvatar;
var urlMyProfile = ''; // set if you have no profile gadget on page
var urlMyAvatar = '';  // can be empty (then it is fetched) or url to image
// config end
// for old IEs & IE modes:
if(!Array.indexOf) {
 Array.prototype.indexOf=function(obj) {
  for(var i=0;i<this.length;i++) if(this[i]==obj) return i;
  return -1;
}}
function replaceTopCmtVars(text, item, position)
{
  if(!item || !item.author) return text;
  var author = item.author;
 
  var authorUri = "";
  if(author.uri && author.uri.$t != "")
    authorUri = author.uri.$t;
 
  var avaimg = urlAnoAvatar;
  var bloggerprofile = "http://www.blogger.com/profile/";
  if(author.gd$image && author.gd$image.src && authorUri.substr(0,bloggerprofile.length) == bloggerprofile)
    avaimg = author.gd$image.src;
  else {
    var parseurl = document.createElement('a');
    if(authorUri != "") {
      parseurl.href = authorUri;
      avaimg = 'http://www.google.com/s2/favicons?domain=' + parseurl.hostname;
    }
  }
  if(urlMyProfile != "" && authorUri == urlMyProfile && urlMyAvatar != "")
    avaimg = urlMyAvatar;
  if(avaimg == "http://img2.blogblog.com/img/b16-rounded.gif" && urlNoAvatar != "")
    avaimg = urlNoAvatar;
  var newsize="s"+sizeAvatar;
  avaimg = avaimg.replace(/\/s\d\d+-c\//, "/"+newsize+"-c/");
  if(cropAvatar) newsize+="-c";
  avaimg = avaimg.replace(/\/s\d\d+(-c){0,1}\//, "/"+newsize+"/");
 
  var authorName = author.name.$t;
  if(authorName == 'Anonymous' && txtAnonymous != '' && avaimg == urlAnoAvatar)
    authorName = txtAnonymous;
  var imgcode = '<img class="top-commenter-avatar" height="'+sizeAvatar+'" width="'+sizeAvatar+'" title="'+authorName+'" src="'+avaimg+'" />';
  if(authorUri!="") imgcode = '<a href="'+authorUri+'">'+imgcode+'</a>';
 
  if(maxUserNameLength > 3 && authorName.length > maxUserNameLength)
    authorName = authorName.substr(0, maxUserNameLength-3) + "...";
  var authorcode = authorName;
  if(authorUri!="") authorcode = '<a class="profile-name-link" href="'+authorUri+'">'+authorcode+'</a>';
 
  text = text.replace('[user]', authorcode);
  text = text.replace('[image]', imgcode);
  text = text.replace('[#]', position);
  text = text.replace('[count]', item.count);
  return text;
}
 
var topcommenters = {};
var ndxbase = 1;
function showTopCommenters(json) {
  var one_day=1000*60*60*24;
  var today = new Date();
 
  if(urlMyProfile == "") {
    var elements = document.getElementsByTagName("*");
    var expr = /(^| )profile-link( |$)/;
    for(var i=0 ; i<elements.length ; i++)
      if(expr.test(elements[i].className)) {
        urlMyProfile = elements[i].href;
        break;
      }
  }
 
  for(var i = 0 ; i < json.feed.entry.length ; i++ ) {
    var entry = json.feed.entry[i];
    if(numDays > 0) {
      var datePart = entry.published.$t.match(/\d+/g); // assume ISO 8601
      var cmtDate = new Date(datePart[0],datePart[1]-1,datePart[2],datePart[3],datePart[4],datePart[5]);
 
      //Calculate difference btw the two dates, and convert to days
      var days = Math.ceil((today.getTime()-cmtDate.getTime())/(one_day));
      if(days > numDays) break;
    }
    var authorUri = "";
    if(entry.author[0].uri && entry.author[0].uri.$t != "")
      authorUri = entry.author[0].uri.$t;
 
    if(excludeMe && authorUri != "" && authorUri == urlMyProfile)
      continue;
    var authorName = entry.author[0].name.$t;
    if(excludeUsers.indexOf(authorName) != -1)
      continue;
 
    var hash=entry.author[0].name.$t + "-" + authorUri;
    if(topcommenters[hash])
      topcommenters[hash].count++;
    else {
      var commenter = new Object();
      commenter.author = entry.author[0];
      commenter.count = 1;
      topcommenters[hash] = commenter;
    }
  }
  if(json.feed.entry.length == 200) {
    ndxbase += 200;
    document.write('<script type="text/javascript" src="http://'+window.location.hostname+'/feeds/comments/default?redirect=false&max-results=200&start-index='+ndxbase+'&alt=json-in-script&callback=showTopCommenters"></'+'script>');
    return;
  }
 
  // convert object to array of tuples
  var tuplear = [];
  for(var key in topcommenters) tuplear.push([key, topcommenters[key]]);
 
  tuplear.sort(function(a, b) {
    if(b[1].count-a[1].count)
        return b[1].count-a[1].count;
    return (a[1].author.name.$t.toLowerCase() < b[1].author.name.$t.toLowerCase()) ? -1 : 1;
  });
 
  // list top topcommenters:
  var realcount = 0;
  for(var i = 0; i < maxTopCommenters && i < tuplear.length ; i++) {
    var item = tuplear[i][1];
    if(item.count < minComments)
        break;
    document.write('<di'+'v class="top-commenter-line">');
    document.write(replaceTopCmtVars(txtTopLine, item, realcount+1));
    document.write('</d'+'iv>');
    realcount++;
  }
  if(!realcount)
    document.write(txtNoTopCommenters);
}  
document.write('<script type="text/javascript" src="http://'+window.location.hostname+'/feeds/comments/default?redirect=false&max-results=200&alt=json-in-script&callback=showTopCommenters"></'+'script>');
</script>


4. Now save 'HTML/Javascript
    You are done...
Read More

Sunday, July 29, 2012

Customize Blogger Comment Box with Nice Background

File Under: 3 comments

This post about how to customize your comment
box back ground.Actually default comment box
isn't attractive.So most are like to change it.This
is the tutorial for it.I made a post about How To
Change Default Anonymous Avatar In Blogger
Comments.
You can follow this easy steps to
add it to your blog.

Customize Blogger Comment Box

1. Log in to blogger  Design > Edit HTML.

2. Find this tag by using Ctrl+F   ]]></b:skin>

3. Paste below code Before ]]></b:skin> tag

#mbt-form iframe{ 
background:#ffffff url(https://blogger.googleusercontent.com/img/b/R29vZ2xl/AVvXsEgQqt8hWF9OwMBjEDNIwdlZcS40-3w1Fs-AxoavuNZg20wIQwzLIAjMcOEclXNXwUdgyjvfO7izqXhQfU6qt3F_pwaWxQoZajsOaXUVNT1ZaEzrr0a_hJ9TJSV0Vd7_GDHjWB7zReVyh6al/s400/11.png) repeat-x; 
border:1px solid #ddd; 
-moz-border-radius:6px; 
-webkit-border-radius:6px; 
box-shadow: 5px 5px 5px #CCCCCC; 
padding:5px; 
font:normal 12pt "ms sans serif", Arial; 
color:#2F97FF; 
width:560px; height:213px !important; 
}
#mbt-form a{ 
color:#fff; 
}

4. Find again this code by using Ctrl+F   <div class='comment-form'>

5.
Now replace <div class='comment-form'> with below code

<div id='mbt-form'>

6.
Now save your Template
You are done...
Read More

Tuesday, June 19, 2012

How To Enable Threaded Commenting For Blogger

File Under: 1 comment

In comment system,Blogger announced new feature.
Its support threat commenting. So, your readers can
comment below your post flexibility. Normal comment
system is no more different with replying comment.
but in this feature helps to make different with reply
comment. Let's see how to add it this comment
systems to your blog.

Interface Threaded Commenting For Blogger

 1. Log in  and Go to Setting >> Site Feed


2. Allow Blog Feeds Like below Image

Allow-blog-feed

3. Now click Save Setting

You must have to embedded below post to use this feature.Comment will automatically visible just below post.So you no need to click link to popup window.So, to make setting to embedded comment
do like below.

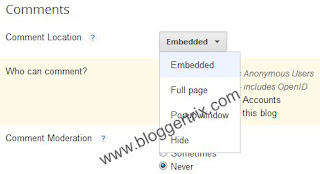
1. Log in  and Go to Setting >> Comment

2. Choose the Embedded below post Like below image.

embedded-below-post

3. Now click Save setting.  Done.

New Interface Threaded Commenting For Blogger


This is for who are using new blogger interface

1. Log in  and Go to Setting >> Other

2. Allow Blog Feed to Full like below image.

Site-feed-new-interface

Embedded Comments

1. Log in  and Go to Setting >> Post and comments

2. Make your comment Location as  Embedded like below.

Embedded-new-interface
3.  Now save Setting.
   cheers you are done.
Read More

Friday, June 15, 2012

How To Change Default Anonymous Avatar In Blogger Comments

File Under: , 4 comments

This is also nice hack for comment system in blogger.
When we allow anonymous comment, everyone can
comment your post without using any Google account.
As a result of it. there are no way to provide diffrent
avatar for commentators.So , bloggers use a default
avatar for every anonymous  commentator.So, in this
Tutorial helps you to change that default avatar,
Follow these steps to add it to your blogger.

How To Change Default Profile Image In Blogger Comments


Those who are not enable anonymous comment
system, follow this.


Log in to blogger account and Go to Setting >> Comments
And make setting like this and click save setting.


How To Change Default Anonymous Avatar In Blogger Comments

1. Log in to blogger account and Go to Design >> Edit HTML
    (make sure backup your template first)

3. Find this tag by using Ctrl+F    </body>

3. Paste below code before   </body>  tag

<script src='http://code.jquery.com/jquery-latest.js'/>
<script>
$("img[src='http://img1.blogblog.com/img/anon36.png']")
.attr('src', 'your-avatar-url-here')
.ssyby('blank')
</script>

*Replace  Your-avatar-url-here  With below URL or any avatar URL

Example URLs
http://4.bp.blogspot.com/-dmYyFEad9ak/T9riPTHY6NI/AAAAAAAABHY/
NN5T-ZJ4t2k/s1600/btrix1.png


http://2.bp.blogspot.com/-3yhvpRp973o/T9riZzwH2CI/AAAAAAAABHg
/SGPBZ0-LE5A/s1600/btrix2.png
https://blogger.googleusercontent.com/img/b/R29vZ2xl/AVvXsEhIEIP2Xrf0XpLIkx7y6oPSgGTBqzjCOeoKQOitTGrbt3r7062tsXq7imOmr8cCuGlGrPkVV2ykshcqYMvtTZnRNiaKW_DNq-6xn8mRtO7q3iAEywBwvfc1hZDDuubkzfyuw9sa23ledk4N/
s1600/btrix4.png


https://blogger.googleusercontent.com/img/b/R29vZ2xl/AVvXsEi9rXKskkG3YpDNz2KIo-sGMy0CY5Wq2Kiz4dyVboDHgxm94_SU0jcdA2M1ChIwORckBDkNVeg1AsOVk-8M7I8cNDuXBw9YPYDHlgxnO1vLsAD7AIj1S0TghDdmHiq_KCyVFhBMk0IsUMOZ/
s1600/btrix3.png

4. Now click Save Template. you are done.
Read More

Wednesday, June 6, 2012

How To Change Default Profile Image In Blogger Comments

File Under: , 4 comments

How to change blogger default image.Always blogger
profile picture showing blogger logo if the user hasn't
change the profile picture. So blue avatar image showing
in blogger. But comment section it appear as blogger
logo like below. So, in this tutorial im going to tell a
simple hack that helps you to change default icon in comment
section.you can use any nice image as default image. follow
these steps to add it to your blog.


blogger-icon-change


1. Log in to blogger account and Go to Design >> Edit HTML
    (make sure backup your template first)

2. Put checked mark in Expand Widget Templates

3. Find this tag by using Ctrl+F      <b:includable id='comments' var='post'>

4. After you found above code. you have to scroll down till you find this code.

                                        </b:includable>

5. You have to pass some more line to find out this, so be patient and find it carefully.
( Tip:  most of time it will place with single line)

6. After you found it, paste below code before </b:includable> tag   

<script type='text/javascript'>
//<![CDATA[
if(document.getElementById("comments-block")) document.getElementById
("comments-block").innerHTML = document.getElementById("comments-block")
.innerHTML.replace
(/http:\/\/img2\.blogblog\.com\/img\/b16-rounded\.gif/g, 
"https://blogger.googleusercontent.com/img/b/R29vZ2xl/AVvXsEhbj9E38cQF-8djJPc4bJGvyqzbRHzTfNANCLpnvqzMTxC2fPvi7gatHLyG9vMJllOnTV3bPsBro97hVwYRK466esNoQJBUCxqy_aLxXQ5xN-zUY_QKpDJiVLVBWmNdkxO70ce-uellckOe/s1600/avatar.png");

7. You can change red color Image link with your own image link.

8. Now click  Save Template, you are done.
Read More

Sunday, November 6, 2011

How To Add Reply Option To blogger Comment

File Under: , 26 comments

This is cool option for your blogger. You can add reply button
to your every blogger comment. so it will help you to reply
to questions easily.

How To Add Reply Option To blogger Comment

1. Log in to your blogger account and Go to Design >> Edit HTML

2. Make sure you put check mark to “Expand Widget Templates

3. Find this tag by using Ctrl+F  <data:commentPostedByMsg/> 

4. Paste  below code After  <data:commentPostedByMsg/> code

<span><a expr:href='&quot;https://www.blogger.com/comment.g?blogID=YOUR-BLOG-ID&amp;postID=&quot; + data:post.id + &quot;&amp;
isPopup=true&amp;postBody=%40%3C%61%20%68%72%65%66%3D%22%23&quot; + data:comment.anchorName + &quot;%22%3E&quot; + data:comment.author + &quot;%3C%2F%61%3E#form&quot;'
 onclick='javascript:window.open(this.href, &quot;bloggerPopup&quot;, &quot;toolbar=0,location=0,statusbar=1,menubar=0,scrollbars=yes,width=450,height=450&quot;); return false;'>
<img alt='Reply To This Comment' src='https://blogger.googleusercontent.com/img/b/R29vZ2xl/AVvXsEhJvE-KqQQHgp4RPW_s9jwHoIb9yNMdwOAjXk85CDmQkMT3L0CcwLAr647FkU835YUYsW3jrH_J0F4SIfz3JX7Qor9ehpN598weVkXlWsMjhG8M_Y1KJWjJy-1cItqK59BrgAoadf8JdFCi/s1600/reply.png'/></a></span>

You can replace YOUR-BLOG-ID with your ID

Go to dashboard and click design, then you can get your blog ID on Address bar.
It looks like below.


You can replace Pink color URL with other image URL if you want.

5. After you did it, you can click Save Template
   You are done.
Read More

Tuesday, May 3, 2011

How to add top Commentators gadget to blogger

File Under: , 24 comments

How to add top Commentators gadget to blogger

This gadget will help you to show who are the top
Commentators on your blogger.Its easy,
Follow these steps.

Commentators,blogger,comment,top Commentator
1. Log in to your blogger account and Go to Design >>page Element

2.Click Add gadget and Select HTML/JavaScript 

3. Now paste paste below code

<script type="text/javascript">
function pipeCallback(obj) {
document.write('<ol>');
var i;
for (i = 0; i < obj.count ; i++)
{
var href = "'" + obj.value.items[i].link + "'";
if(obj.value.items[i].link == "")
var item ="<li>" + obj.value.items[i].title + "</li>";
else
var item = "<li>" + "<a href=" + href + ">" + obj.value.items[i].title + "</a> </li>";
document.write(item);
}
document.write('</ol>');
}
</script>
<script src="http://pipes.yahoo.com/pipes/pipe.run?_render=json&_callback=pipeCallback&_id=a55cb97ebb368bb1b89b7f6bdeb35336&url=http%3A%2F%2F
bloggertrix.com
&num=15
&filter=Blogfuel" type="text/javascript"></script>

<small><div style="font-size:90%; text-align:right; text-shadow:2px 2px 2px #adadad;"><a href="http://bloggertrix.com/2010/05/top-commentators-widget-in-blogger.html" target="_blank" title="widget top commentators">Add this widget to your blog</a></div></small>

 * Replace bloggertrix.com with your URL
 * 15 is how many Commentators show. you can change it as your like.

4. Now save  HTML/JavaScript  


you are done.
Read More

Saturday, March 19, 2011

Add Avatar to costom Blogger Template

File Under: , 3 comments


1. Go to your blogger and click "Design" on your dashboard and click "Edit HTML"

2. Make sure "Expand Widget Templates" checked.

3. Find these tag  by using Ctrl+F    
                                 
                                  <dl id='comments-block'>
                                                   or
                                  <div id='comments-block'>


4. Because some Templates this code will start from <div.

5. Replace above code with this code.

 For  dl code     <dl expr:class='data:post.avatarIndentClass' id='comments-block'>

 For div code   <div expr:class='data:post.avatarIndentClass' id='comments-block'>

6.Now find this code.
                           <a expr:name='data:comment.anchorName'/>

7. Just paste  below code before above code.

<b:if cond='data:comment.favicon'>
<img expr:src='data:comment.favicon' height='35px' width='35px' style='margin-bottom:-2px;' />
</b:if>
<a expr:name='data:comment.anchorName'/>
<b:if cond='data:blog.enabledCommentProfileImages'>
<data:comment.authorAvatarImage/>
</b:if> <a expr:name='data:comment.anchorName'/>

8. Now you are done.click preview and save template.
Read More

Sunday, February 20, 2011

How to Highlight Author comment in blogger post

File Under: , , No comments

1. Log in to your blogger account and Go to Design >> Edit HTML

2.  First of all download your full template.because if you make some wrong
    you can recover it.

3. Put checked marked in Expand Widget Templates

4. Find this tag by using Ctrl+F                  <span class='deleted-comment'>

5. After found it  you will see like this code.

<span class='deleted-comment'><data:comment.body/></span>
<b:else/>
<p><data:comment.body/></p>
<b:include data='comment' name='commentDeleteIcon'/>
</b:if>

6.your template may be different.so don't worry ,
   you have to select tag above code.shown in red

7. Paste below code  between  <span class='deleted-comment'> and  </b:if>
<!--Highlight Author Comments Start-->
<b:if cond='data:comment.author == data:post.author'>
<p class='comment-body-author'><data:comment.body/></p>
<b:else/>
<p><data:comment.body/></p>
</b:if>
<!--Highlight Author Comments End-->

8. your code will show like this.

<span class='deleted-comment'>
<!--Highlight Author Comments Start-->
<b:if cond='data:comment.author == data:post.author'>
<p class='comment-body-author'><data:comment.body/></p>
<b:else/>
<p><data:comment.body/></p>
</b:if>
<!--Highlight Author Comments End-->
</b:if>

9. After find this tag   ]]></b:skin>

10. paste below code before ]]></b:skin> tag

p.comment-body-author {
background: #eeeecc;
border: 2px solid #335577;
padding: 5px;
color:#558866;
}

11. Now click Preview and click save template.you are done.
Read More

Saturday, February 19, 2011

How To Add Comment Counter Button To Blogger Post

File Under: , 4 comments

This Gadget will help you to count your comment as my post.
1. Log in to your Blogger and Go to Design >> Edit HTML

2.First of all download your full template.because if you make some wrong
    you can recover it.

3. Put checked marked in Expand Widget Templates

4.Find this tag by using Ctrl+F                   ]]></b:skin>

5. Before above tag,paste below tag
 
#comments-button {
width : 48px;
height : 48px;
background : 
url(https://blogger.googleusercontent.com/img/b/R29vZ2xl/AVvXsEjp2EF7k_zLDfcawT-cSIOmQVorJ8odY5s19jm0a3fyAUsWDkQcqe1dvixmxjBbdYkZTBJhkkGl2NWmaFcSXZnXOt3d7tcBYzPJ61LzCdiZ4AWF7xtrTHg0JGlBSb2OyXq6yOiUBU7Tnvmr/s200/comment-counter-bubble.png)
 no-repeat;
float : right;
font-size : 18px;
margin-top : -15px;
margin-right : 2px;
text-align : center;
padding-top:10px;
}

6.After  try to find this code.all template are not like same.try to find line one by one.
<b:includable id='post' var='post'>
<div class='post hentry uncustomized-post-template'>
<a expr:name='data:post.id'/>
<b:if cond='data:post.title'>
<h3 class='post-title entry-title'>

7. Paste below code after found above code.
<b:if cond='data:post.allowComments'>
<a 
class='comments-button' expr:href='data:post.addCommentUrl' 
expr:onclick='data:post.addCommentOnclick'><data:post.numComments/></a>
</b:if>

8.Now click Preview and click save template. you are done.


Read More

Thursday, February 10, 2011

how to add Yahoo Smiley Emoticons for Comment Form

File Under: 3 comments

you can add yahoo Smiley Emoticons for your blogger comment.try it,your visitors will like it.

1. Go to blogger dashboard click Design >> Edit Template 
    put checked mark on  Expand Widgets

2. Find this tag by Using Ctrl+F    <p class='comment-footer'>

3.  Paste below code before above tag
  after find it you will see like this code
<p class='comment-footer'>
<b:if cond='data:post.embedCommentForm'>
<b:include data='post' name='comment-form'/>
<b:else/>
<b:if cond='data:post.allowComments'>
<h3><a expr:href='data:post.addCommentUrl'
expr:onclick='data:post.addCommentOnclick'>

<data:postCommentMsg/></a></h3>

</b:if>

</b:if>

</p>

</b:if>

4. After found it, replace with this code.

<p class='comment-footer'>

<b:if cond='data:post.embedCommentForm'>

<div style='-moz-background-clip: -moz-initial; 
-moz-background-origin: -moz-initial; -moz-background-inline-policy: 
-moz-initial; width: 369; text-align: left; border: 1px solid #cccccc; 
padding: 5px; background: #eeeddf; height:86'>

<b>

<img border='0' height='18' src='http://us.i1.yimg.com/us.yimg.com/i/mesg/emoticons7/21.gif' width='18'/> :))

<img border='0' height='18' src='http://us.i1.yimg.com/us.yimg.com/i/mesg/emoticons7/71.gif' width='18'/> ;))

<img border='0' height='18' src='http://us.i1.yimg.com/us.yimg.com/i/mesg/emoticons7/5.gif' width='18'/> ;;)

<img border='0' height='18' src='http://us.i1.yimg.com/us.yimg.com/i/mesg/emoticons7/4.gif' width='18'/> :D

<img border='0' height='18' src='http://us.i1.yimg.com/us.yimg.com/i/mesg/emoticons7/3.gif' width='18'/> ;)

<img border='0' height='18' src='http://us.i1.yimg.com/us.yimg.com/i/mesg/emoticons7/10.gif' width='18'/> :p

<img border='0' height='18' src='http://us.i1.yimg.com/us.yimg.com/i/mesg/emoticons7/20.gif' width='22'/> :((

<img border='0' height='18' src='http://us.i1.yimg.com/us.yimg.com/i/mesg/emoticons7/1.gif' width='18'/> :)

<img border='0' height='18' src='http://us.i1.yimg.com/us.yimg.com/i/mesg/emoticons7/2.gif' width='18'/> :(

<img border='0' height='18' src='http://us.i1.yimg.com/us.yimg.com/i/mesg/emoticons7/8.gif' width='18'/> :X

<img border='0' height='18' src='http://us.i1.yimg.com/us.yimg.com/i/mesg/emoticons7/12.gif' width='18'/> =((

<img border='0' height='18' src='http://us.i1.yimg.com/us.yimg.com/i/mesg/emoticons7/13.gif' width='18'/> :-o

<img border='0' height='18' src='http://us.i1.yimg.com/us.yimg.com/i/mesg/emoticons7/7.gif' width='20'/> :-/

<img border='0' height='18' src='http://us.i1.yimg.com/us.yimg.com/i/mesg/emoticons7/11.gif' width='18'/> :-*

<img border='0' height='18' src='http://us.i1.yimg.com/us.yimg.com/i/mesg/emoticons7/22.gif' width='18'/> :|

<img border='0' height='18' src='http://us.i1.yimg.com/us.yimg.com/i/mesg/emoticons7/35.gif' width='24'/> 8-}

<img border='0' height='18' src='http://us.i1.yimg.com/us.yimg.com/i/mesg/emoticons7/100.gif' width='31'/> :)]

<img border='0' height='18' src='http://us.i1.yimg.com/us.yimg.com/i/mesg/emoticons7/102.gif' width='44'/> ~x(

<img border='0' height='18' src='http://us.i1.yimg.com/us.yimg.com/i/mesg/emoticons7/104.gif' width='30'/> :-t

<img border='0' height='18' src='http://us.i1.yimg.com/us.yimg.com/i/mesg/emoticons7/66.gif' width='18'/> b-(

<img border='0' height='18' src='http://us.i1.yimg.com/us.yimg.com/i/mesg/emoticons7/62.gif' width='18'/> :-L

<img border='0' height='18' src='http://us.i1.yimg.com/us.yimg.com/i/mesg/emoticons7/14.gif' width='34'/> x(

<img border='0' height='18' src='http://us.i1.yimg.com/us.yimg.com/i/mesg/emoticons7/24.gif' width='30'/> =))

</b>

</div>

<b:include data='post' name='comment-form'/>

<b:else/>

<b:if cond='data:post.allowComments'>

<a expr:href='data:post.addCommentUrl' expr:onclick='data:post.addCommentOnclick'><data:postCommentMsg/></a>

</b:if>

</b:if>

</p>

</b:if>

5. Now find  </body> tag and paste below code before body tag.

<script src='http://rethna30.googlepages.com/smiley.js'
 type='text/javascript'/><noscript><a 
href="http://introblogger.blogspot.com" target="_blank"><span 
style="font-size: x-small;">Add 
Smilies</span></a></noscript>
 6. Now you are done.
Read More

Saturday, January 29, 2011

Animated JQuery Social Bookmark Icon For Blogger

File Under: , , No comments

Earlie i wrote some post about social bookmark icons
like twitter facebook.But this one is animated social
bookmark. Try these. visit DEMO

1. Go to your blogger and click "Design" on your dashboard
   and click "Edit HTML"

2. Make sure "Expand Widget Templates" checked.

3. Find these tag  by using Ctrl+F  ]]></b:skin>

4.  Copy below code and paste just before    ]]></b:skin>
 
#sharebox{height:48px;width:400px;margin:0;padding:5px 0;
}ul.sharebox { margin:0px; padding:0px; list-style:none;
position:relative; display:block;}ul.sharebox li { 
float:left; margin:0 0 0 0px; padding:0px; position:absolute;}
ul.sharebox li a { margin:0 0 0 -24px; display:block;}
ul.sharebox li a:hover { margin:0 0 0 -8px; }ul.sharebox li img { border:none;}

5. Find these tag  by using Ctrl+F      </head> 

6. Copy below code and paste just before   </head> 

<script type='text/javascript'>(function($){$.fn.sharebox = function()
{var element = this;$(element).find(&quot;li&quot;).each(function(i)
{$(this).css(&quot;z-index&quot;, 10- i);if (i&gt;0)$(this).css
(&quot;left&quot;, i * 24 + 100);});}})(jQuery);
</script><script type='text/javascript'>$(document).ready(function()
{$(&quot;#sharebox&quot;).sharebox();});</script>

7.  Find these tag  by using Ctrl+F    <data:post.body />

8. Copy and paste this below code after  <data:post.body />   tag

<ul id="sharebox" class="sharebox">
  
  <li><img alt="Share this" src="http://lh6.ggpht.com/_dfnTVAxeWMI/SmkuLMrwEhI/AAAAAAAABm8/SF6x9UfvEJA/s800/sharethis.png" /></li>

  <li><a target="_blank" expr:href="&quot; http://digg.com/submit?url=&quot; + data:post.url + &quot;&amp;title=&quot; + data:post.title"><img alt="Sumbit to Digg" src="http://lh5.ggpht.com/_dfnTVAxeWMI/Smktud4qk8I/AAAAAAAABmk/z5vZVjTmD7k/s800/digg_48.png" /></a></li>

  <li><a target="_blank" expr:href="&quot; http://www.stumbleupon.com/submit?url=&quot; + data:post.url + &quot;&amp;title=&quot; + data:post.title"><img alt="Sumbit to StumbleUpon" src="http://lh5.ggpht.com/_dfnTVAxeWMI/SmkuLCBTubI/AAAAAAAABm4/KwVHDJnT-EQ/s800/sumbleupon_48.png" /></a></li>

  <li><a target="_blank" expr:href="&quot;http://del.icio.us/post?url=&quot; + data:post.url + &quot;&amp;title=&quot; + data:post.title"><img alt="Sumbit to Delicious" src="http://lh6.ggpht.com/_dfnTVAxeWMI/SmktubnHpoI/AAAAAAAABmg/b31Po_kEbnc/s800/delicious_48.png" /></a></li>

  <li><a target="_blank" expr:href="&quot; http://technorati.com/faves?add=&quot; + data:post.url + &quot;&amp;title=&quot; + data:post.title"><img alt="Sumbit to Technorati" src="http://lh5.ggpht.com/_dfnTVAxeWMI/SmkuK1y0_cI/AAAAAAAABm0/C8EExNM-xjE/s800/technorati_48.png" /></a></li>

  <li><a target="_blank" expr:href="&quot; http://www.reddit.com/submit?url=&quot; + data:post.url + &quot;&amp;title=&quot; + data:post.title"><img alt="Sumbit to Reddit" src="http://lh3.ggpht.com/_dfnTVAxeWMI/Smkturrni-I/AAAAAAAABmw/AbGticB0wAs/s800/reddit_48.png" /></a></li>
</ul>

9. Finished.
Read More

Share Bookmark For Blogger

File Under: , , , No comments

This is also Social bookmark buttons.Easy to share your
  post with others.


1. Now log to your blogger and navigate to Layout > Edit HTML and expand Widget Templates

2. Find this code by using Ctrl+F     <data:post.body/>

3. After found the code,paste below code after this red code.
<b>Share this post :</b><br/>

<div class='spacer' style='border-top:solid 0px #DEDEDE;'/>

<table bgcolor='#ffffff' border='0' cellpadding='0' cellspacing='0' width='100%'>

<tr>

<td valign='top' width='50%'><table border='0' cellpadding='0' cellspacing='0' width='222'>

<tr>

<td height='24' width='24'><img border='0' height='16' 
src='https://blogger.googleusercontent.com/img/b/R29vZ2xl/AVvXsEixCy1Uh_iwxUekAGVmWxPByB8e2aeMtBDFHjNb_V6PCWloWA7kbbCHpNQB77aWJJPwoLAuaL-v_tEVKjaYeUOwTqq-GdIeKm8YgOoHfMInMfSWR9gi80HJda7BX5SEZ8vOgZhfEmtnLh0/'
 width='16'/></td>

<td height='24'><a 
expr:href='&quot;http://www.facebook.com/sharer.php?&amp;u=&quot;
 + data:post.url' target='_blank'>Share on Facebook</a>

</td>

</tr>

<tr>

<td height='24'><img border='0' 
src='https://blogger.googleusercontent.com/img/b/R29vZ2xl/AVvXsEifb7ksSCTmaImklB7gos5qOo5iChZmdwSnHfimJLGWh23YYsgMzay2dlbR2cVBaWzUQ1q-ZqMzo9ZTnQHiiLzJIdnsGNgj-NbtHW3xDAWTX1erhsuvLEDWS8TvbudqxVyaODQ7f6Sk_iA/'/></td>

<td height='24'><a 
expr:href='&quot;http://twitthis.com/twit?url=&quot; + 
data:post.url' rel='external nofollow' target='_blank'>Share on 
Twitter</a>

</td>

</tr>

<tr>

<td height='24'><img border='0' height='16' 
src='https://blogger.googleusercontent.com/img/b/R29vZ2xl/AVvXsEhEfQfehxmvcg75BS09mD13K3E04oNyVdVtwmlKJfvRbpI7Ko1Xa9afBRA-GvnwEINRYsWnSy_Awl9AEbeNko2r3AdOb5sl_6sNaNa3cKdxLyy4Nk3dx9mPoTm65uM7FYYFIkAk8nuRRJM/'
 width='16'/></td>

<td height='24'><a 
expr:href='&quot;http://www.stumbleupon.com/submit?&amp;url=&quot;
 + data:post.url + &quot;&amp;title=&quot; + 
data:post.title' rel='nofollow' target='_blank'>Share on 
StumbleUpon</a></td>

</tr>

<tr>

<td height='24'><img border='0' height='16' 
src='https://blogger.googleusercontent.com/img/b/R29vZ2xl/AVvXsEgpv0OCHpWE0rUfWYmJABw1sfo5dlZ3Sks-DDOxwy7j3MeI1GwAM2pQ-YOJrSG0T0x32V4uUwlyfvR1cQQANk1CjoJsrpb76MENh_eiCg2DxYaqPNQrIwjuguyDxFZFxaXKfTxLW1_HfZ8/'
 width='16'/></td>

<td height='24'><a 
expr:href='&quot;http://del.icio.us/post?v=4&amp;url=&quot; +
 data:post.url + &quot;&amp;title=&quot; + data:post.title' 
rel='nofollow' target='_blank'>Share on 
Delicious</a></td>

</tr>

<tr>

<td height='24'><img border='0' height='16' src=' 
https://blogger.googleusercontent.com/img/b/R29vZ2xl/AVvXsEiW2SD9x6ghinkvxDW3YgfFyWn7bvXxNllSuvtfCit-Qx0kEKeB9Oz1H3eNrFMOKpJLdP9XmO6jJ2_mtqGjGaHG-k3B3epWNdXrcRy3r0sFxeb88YEw3VNaU7Pgkdy08wXRLZ4xhatJzGw/'
 width='16'/></td>

<td height='24'><a 
expr:href='&quot;http://reddit.com/submit?&amp;url=&quot; + 
data:post.url + &quot;&amp;title=&quot; + data:post.title' 
rel='nofollow' target='_blank'>Share on Reddit</a>

</td>

</tr>

</table></td>

<td valign='top' width='50%'><table border='0' cellpadding='0' cellspacing='0' width='222'>

<tr>

<td height='24' width='24'><img border='0' height='16' 
src='https://blogger.googleusercontent.com/img/b/R29vZ2xl/AVvXsEjgI9D10_fs_piAyqbZIzUS3L3TfUXQIysMwengz0qkUuvXePF1OVBV3GSU0Lt5Ov9FOXOzty898SCA4LKsYnAItFI5O6cvmS2A_xKtgdcHqGuRPHNW3dgPIOh9U4siWYceEDlTM8o_LM0/'
 width='16'/></td>

<td height='24'><a 
expr:href='&quot;http://digg.com/submit?phase=2&amp;url=&quot;
 + data:post.url + &quot;&amp;title=&quot; + 
data:post.title' rel='nofollow' target='_blank'>Share on 
Digg</a></td>

</tr>

<tr>

<td height='24'><img border='0' height='16' 
src='https://blogger.googleusercontent.com/img/b/R29vZ2xl/AVvXsEi3ZnyPJdgYHTEeoUEMiYSkGQt_KJPBXkBI771ide_OAQtxPjPWGjmNMqehPL5Z9G-n3ZPC3Yd3xRoYuvRvMZAUuWzu93YJKGUDHE6vwmicKTXY6pay2lrpL0EXdFkEu0JWBRobKCDBxSE/'
 width='16'/></td>

<td height='24'><a 
expr:href='&quot;http://www.simpy.com/simpy/LinkAdd.do?href=&quot;
 + data:post.url' rel='nofollow' target='_blank'>Share on 
simpy</a></td>

</tr>

<tr>

<td height='24'><img border='0' height='16' 
src='https://blogger.googleusercontent.com/img/b/R29vZ2xl/AVvXsEi4NQKVMK29gm5-vYAy2KdKuRv0CgwJDp7TUm0RDdbCawEDt0M2xdRQuWiMDsopovMsFYJkD2vMT3-Q5qKYATPEuKJBKZvHwkmRKkU-OUuaEBwM67ae9FkgAx71OJmYDHgr4GmD0_ObeWc/'
 width='16'/></td>

<td height='24'><a 
expr:href='&quot;http://technorati.com/signup/?f=favorites&amp;Url=&quot;
 + data:post.url' rel='nofollow' target='_blank'>Share on 
Technorati</a></td>

</tr>

<tr>

<td height='24'><img alt='furl' border='0' height='16' 
src='https://blogger.googleusercontent.com/img/b/R29vZ2xl/AVvXsEjhvjun1K8neRJ6rbf99DyIgV2RLbLCEk2T7UF-O0trsl0qLdhyphenhyphenGD3p9wHQSio2AknCirf6kAo7IYT4zgOOzPYbRCDlJzLg4XKRyQuWpTAsfJwQcyOWTvVUsUfA5FjJz2RG8Fyf45yPb6U/'
 width='16'/></td>

<td height='24'><a 
expr:href='&quot;http://www.furl.net/storeIt.jsp?&amp;u=&quot;
 + data:post.url' rel='nofollow' target='_blank'>Share on 
furl</a>

</td>

</tr>

<tr>

<td height='24'><img alt='Feeds RSS' border='0' height='16' 
src='https://blogger.googleusercontent.com/img/b/R29vZ2xl/AVvXsEguor15ZBNRWU37vqyfZyJ9tbLKP9nqpYLftsHinJOvIB-E09XIvyLPYlcdfSDhFLOMBw0RD53tSmGylvFG2FIp2b5hggwTDP6lx6dqFszu-vnpOAvwVVE3oBTGh5bIfcmssj5fQb2yer0/'
 width='16'/></td>

<td height='24'><a href='http://feeds2.feedburner.com/feed39' target='_blank'>Subscribe to Feeds RSS</a>

</td>

</tr>

</table></td>

</tr>

</table>

4. Save the template.Now you are done.
Read More

Social Bookmark Buttons For Blogger

File Under: , , , , 1 comment

This gadget helps to put social bookmark button collection to blogger.

1. Now log to your blogger and navigate to Layout > 
Edit HTML and expand Widget Templates

2. Find this code by using Ctrl+F       <data:post.body/>

3. Copy these code after there red code

<div style='clear:both; '>

<div style='width:60px; float:left;'>

<script type='text/javascript'>

digg_url = &#39;<data:post.url/>&#39;;

</script>

<script src='http://digg.com/tools/diggthis.js' type='text/javascript'/>

</div>

<div style='width:60px; float:left;'>

<script badgetype='square' 
src='http://d.yimg.com/ds/badge2.js' 
type='text/javascript'><data:post.url/></script>

</div>

<div style='width:65px; float:left;'>

<a 
expr:href='&quot;http://www.stumbleupon.com/submit?url=&quot; + 
data:post.url + &quot;&amp;title=&quot; + data:post.title' 
rel='external nofollow' target='_blank'><img alt='Stumble' 
src='http://s310.photobucket.com/albums/kk426/magznetwork/socialbig/stumble.gif'
 style='padding:0;margin:0;border:none;'/></a>

</div>

<div style='width:65px; float:left;'>

<a 
expr:href='&quot;http://del.icio.us/post?url=&quot; + 
data:post.url + &quot;&amp;title=&quot; + data:post.title' 
rel='external nofollow' target='_blank'><img alt='Delicious' 
src='http://s310.photobucket.com/albums/kk426/magznetwork/socialbig/delicious.gif'
 style='padding:0;margin:0;border:none;'/></a>

</div>

<div style='width:65px; float:left;'>

<a 
expr:href='&quot;http://technorati.com/faves?add=&quot; + 
data:post.url' rel='external nofollow' target='_blank'><img 
alt='Technorati' 
src='http://s310.photobucket.com/albums/kk426/magznetwork/socialbig/technorati.gif'
 style='padding:0;margin:0;border:none;'/></a>

</div>

<div style='width:65px; float:left;'>

<a 
expr:href='&quot;http://twitthis.com/twit?url=&quot; + 
data:post.url' rel='external nofollow' target='_blank'><img 
alt='Twitter' 
src='http://s310.photobucket.com/albums/kk426/magznetwork/socialbig/twitter.gif'
 style='padding:0;margin:0;border:none;'/></a>

</div>

<div style='width:65px; float:left;'>

<a 
expr:href='&quot;http://www.facebook.com/sharer.php?u=&quot; + 
data:post.url + &quot;&amp;t=&quot; + data:post.title' 
rel='external nofollow' target='_blank'><img alt='Facebook' 
src='http://s310.photobucket.com/albums/kk426/magznetwork/socialbig/facebook.gif'
 style='padding:0;margin:0;border:none;'/></a>

</div>

</div>

4. Now you are done.
Read More

Add Social Bookmark widget

File Under: , , No comments

This will helps you to  share your post with other.
Then your blog readers also increase.this is simply
but more powerful.Add these perfect tool.


Click here to get  this widget.
Read More