Thursday, July 5, 2012

How To Add Multi-Color Popular Posts Widget For Blogger

File Under: 6 comments

In Blogger, there have popular post widget.
Do you like to customize it with great look?
So, you came to right place. you can change
your popular post as multicolor look.You can
see below image.Its not too hard to add it to
your blog. just try this below steps


1. Log in to blogger account and Go to Design >> Edit HTML
    (make sure backup your template first)

2. Put checked marked in Expand Widget Templates

3. Find this code               /* Variable definitions
                                     ====================

4. Paste below code, after  above code

<Group description="PopularPosts Backgrounds" selector="#PopularPosts1">
<Variable name="PopularPosts.background.color1" description="background color1" type="color" default="#fa4242" value="#ff4c54"/>
<Variable name="PopularPosts.background.color2" description="background color2" type="color" default="#ee6107" value="#ff764c"/>
<Variable name="PopularPosts.background.color3" description="background color3" type="color" default="#f0f" value="#ffde4c"/>
<Variable name="PopularPosts.background.color4" description="background color4" type="color" default="#ff0" value="#c7f25f"/>
<Variable name="PopularPosts.background.color5" description="background color5" type="color" default="#0ff" value="#33c9f7"/>
<Variable name="PopularPosts.background.color6" description="background color6" type="color" default="#ff0" value="#7ee3c7"/>
<Variable name="PopularPosts.background.color7" description="background color7" type="color" default="#ff0" value="#f6993d"/>
</Group>

5. Now Find this code  by using Ctrl+F  ]]></b:skin>

6.  Paste below code Before ]]></b:skin> code

#PopularPosts1 ul{margin:0;padding:5px 0;list-style-type:none}
#PopularPosts1 ul li{position:relative;margin:5px 0;border:0;padding:10px}
#PopularPosts1 ul li:first-child{background:$(PopularPosts.background.color1);width:90%}
#PopularPosts1 ul li:first-child:after{content:"1"}
#PopularPosts1 ul li:first-child + li{background:$(PopularPosts.background.color2);width:85%}
#PopularPosts1 ul li:first-child + li:after{content:"2"}
#PopularPosts1 ul li:first-child + li + li{background:$(PopularPosts.background.color3);width:80%}
#PopularPosts1 ul li:first-child + li + li:after{content:"3"}
#PopularPosts1 ul li:first-child + li + li + li{background:$(PopularPosts.background.color4);width:75%}
#PopularPosts1 ul li:first-child + li + li + li:after{content:"4"}
#PopularPosts1 ul li:first-child + li + li + li + li{background:$(PopularPosts.background.color5);width:70%}
#PopularPosts1 ul li:first-child + li + li + li + li:after{content:"5"}
#PopularPosts1 ul li:first-child + li + li + li + li +li{background:$(PopularPosts.background.color6);width:65%}
#PopularPosts1 ul li:first-child + li + li + li + li + li:after{content:"6"}
#PopularPosts1 ul li:first-child + li + li + li + li + li +li{background:$(PopularPosts.background.color7);width:60%}
#PopularPosts1 ul li:first-child + li + li + li + li + li + li:after{content:"7"}
#PopularPosts1 ul li:first-child:after,
#PopularPosts1 ul li:first-child + li:after,
#PopularPosts1 ul li:first-child + li + li:after,
#PopularPosts1 ul li:first-child + li + li + li:after,
#PopularPosts1 ul li:first-child + li + li + li + li:after,
#PopularPosts1 ul li:first-child + li + li + li + li + li:after,
#PopularPosts1 ul li:first-child + li + li + li + li + li + li:after{position:absolute;top:20px;right:-15px;border-radius:50%;background:#353535;width:30px;height:30px;line-height:1em;text-align:center;font-size:28px;color:#fff}
#PopularPosts1 ul li .item-thumbnail{float:left;border:0;margin-right:10px;background:transparent;padding:0;width:40px;height:40px}
#PopularPosts1 ul li a{font-size:12px;color:#444;text-decoration:none}
#PopularPosts1 ul li a:hover{color:#222;text-decoration:none}

7. Again Now Find this code  by using Ctrl+F 

<b:widget id='PopularPosts1' locked='false' title='Popular Posts' type='PopularPosts'>
8. After you found, scroll below until u see this code  </b:widget>

9. Now delete it start to end.

10. After delete is place below code in same place

<b:widget id='PopularPosts1' locked='false' title='Popular Posts' type='PopularPosts'>
<b:includable id='main'>
   <b:if cond='data:title'>
    <h2><data:title/></h2>
   </b:if>
   <div class='widget-content popular-posts'>
    <ul>
     <b:loop values='data:posts' var='post'>
      <li>
       <b:if cond='data:showThumbnails == &quot;false&quot;'>
        <b:if cond='data:showSnippets == &quot;false&quot;'>
         <a expr:href='data:post.href' expr:title='data:post.title' rel='bookmark'><data:post.title/></a>
        <b:else/>
         <a expr:href='data:post.href' expr:title='data:post.snippet' rel='bookmark'><data:post.title/></a>
        </b:if>
       <b:else/>
        <b:if cond='data:showSnippets == &quot;false&quot;'>
         <b:if cond='data:post.thumbnail'>
          <img class='item-thumbnail' expr:alt='data:post.title' expr:src='data:post.thumbnail'/>
         <b:else/>
          <img alt='no image' class='item-thumbnail' src='https://blogger.googleusercontent.com/img/b/R29vZ2xl/AVvXsEiaopKAoini4Auuen2YAKUZQA1zjEjv1NZ8PelSBvIMmvz4tW8gtIwGzbSTpVp2Kr1BI1K3HVKPJ-5-hj2XGd-BBxwG5EJeDEsiyMIA2HG14Y5zGP4uItqIc_AD6NZmHquZFm5DN6VL85A/s1600/defaultimage.jpg'/>
         </b:if>
         <a expr:href='data:post.href' expr:title='data:post.title' rel='bookmark'><data:post.title/></a>
         <div class='clear'/>
        <b:else/>
         <b:if cond='data:post.thumbnail'>
          <img class='item-thumbnail' expr:alt='data:post.title' expr:src='data:post.thumbnail'/>
         <b:else/>
          <img alt='no image' class='item-thumbnail' src='https://blogger.googleusercontent.com/img/b/R29vZ2xl/AVvXsEiaopKAoini4Auuen2YAKUZQA1zjEjv1NZ8PelSBvIMmvz4tW8gtIwGzbSTpVp2Kr1BI1K3HVKPJ-5-hj2XGd-BBxwG5EJeDEsiyMIA2HG14Y5zGP4uItqIc_AD6NZmHquZFm5DN6VL85A/s1600/defaultimage.jpg'/>
         </b:if>
         <a expr:href='data:post.href' expr:title='data:post.snippet' rel='bookmark'><data:post.title/></a>
         <div class='clear'/>
        </b:if>
       </b:if>
      </li>
     </b:loop>
    </ul>
   </div>
  </b:includable>
</b:widget>

11. Now save your template
      if you have any problem, comment below.
Read More

Wednesday, July 4, 2012

How To Add Spinny Leaf Menu To Blogger

File Under: , , , 7 comments

This is attractive menubar to your blogger. It
call Spinny Leaf menu.In include with awesome
hover style.So,this menubar helps you to make
attractive your blog.You can link main page for it.
Like contact us page about us page.So, this menu
bar like classic. Earlier i made a post Attractive Css
Drop Down Menu Bar For Blogger
. It also nice
menu-bar.you can add it to your blog with easy
steps. Follow these steps to add it your blog.


DEMO

1. Log in to blogger account and Go to Design >> Edit HTML
    (make sure backup your template first)

2. Put checked marked in Expand Widget Templates

3. Find this tag by using Ctrl+F    ]]></b:skin>

4. Paste below code Before ]]></b:skin> tag

nav {   width: 900px;
        height: 100px;
        margin: 120px auto;
        text-align: center;
}
.top-menu li {
        display: inline-block;
        text-align: center;
        margin: 30px 5px;
        position: relative;
        -webkit-transition: all 0.3s ease;
        -moz-transition: all 0.3s ease;
        -o-transition: all 0.3s ease;
}
.top-menu li:hover {
        margin: 30px 20px;
}
.top-menu li:active {
        margin: 30px 33px;
}
.top-menu li a  {
        width: 100px;
        height: 100px;
        z-index: 9999;
        position: absolute;
        top: 35px;
        font-weight: bold;
        display: block;
        text-decoration: none;
        font-size: 20px;
        color: #fff;
        text-shadow: 0px 1px 1px rgba(0,0,0,0.4), 0px 4px 6px rgba(0,0,0,0.1), 0px 9px 11px rgba(0,0,0,0.1);
        -webkit-transition: all 0.1s linear;
        -moz-transition: all 0.1s linear;
        -o-transition: all 0.1s linear;
}
.top-menu li:active a {
        font-size: 26px;
        top: 30px;
        text-shadow: none;
}
.top-menu li div.menu-item {
        width: 100px;
        height: 100px;
        display: block;
        -webkit-transition: all 0.2s ease;
        -moz-transition: all 0.2s ease;
        -o-transition: all 0.2s ease;
        -webkit-border-top-left-radius: 100px;
        -webkit-border-bottom-right-radius: 100px;
        -moz-border-radius-topleft: 100px;
        -moz-border-radius-bottomright: 100px;
        border-top-left-radius: 100px;
        border-bottom-right-radius: 100px;
        -webkit-transform: rotate(45deg);
        -moz-transform: rotate(45deg);
        -o-transform: rotate(45deg);
}
.top-menu li:hover div.menu-item{
        -webkit-border-top-left-radius: 80px;
        -webkit-border-bottom-right-radius: 80px;
        -moz-border-radius-topleft: 80px;
        -moz-border-radius-bottomright: 80px;
        border-top-left-radius: 80px;
        border-bottom-right-radius: 80px;
                -webkit-transform: rotate(225deg);
        -moz-transform: rotate(225deg);
        -o-transform: rotate(225deg);
}
.top-menu li:active div.menu-item{
        -webkit-border-top-left-radius: 50px;
        -webkit-border-bottom-right-radius: 50px;
        -moz-border-radius-topleft: 50px;
        -moz-border-radius-bottomright: 50px;
        border-top-left-radius: 50px;
        border-bottom-right-radius: 50px;
}
#home { background: #41D05F; }
#cataloge { background: #E42B2B;}
#price { background: #ff8400; }
#about { background: #a800ff; }
#contact { background: #49a7f3; }

5. Now Find this code  by using Ctrl+F <div id='content-wrapper'>

6.  Paste below code Before <div id='content-wrapper'> code

<nav>

  <ul class="top-menu">

    <li><a href=#>Home</a><div class="menu-item" id="home"></div></li>

    <li><a href=#>Download</a><div class="menu-item" id="cataloge"></div></li>

    <li><a href=#>Links</a><div class="menu-item" id="price"></div></li>

    <li><a href=#>About</a><div class="menu-item" id="about"></div></li>

    <li><a href=#>Contact</a><div class="menu-item" id="contact"></div></li>

  </ul>

</nav>

*Replace # With your URL
*Replace Name with as your like.

7. Now save your template
 you are done.
Read More

Tuesday, July 3, 2012

How To Add Floating Horizontal Share Button For Blogger

File Under: , , 3 comments

This Is also Another Cool another cool tutorial.
You can add floating horizontal bar for blogger.
It include with share buttons.When users will
scroll  down, Horizontal bar will appear on top.
I think this helps you to get share your post and
blog.So,there have lot of social networks to share.
Earlier i post about 4 In 1 Smooth Social
Subscribing Slide Out For Blogger
. You can
Follow these steps to add it to your blog.


1. Log in to blogger account and Go to Design >> Edit HTML

2. Find this tag by using Ctrl+F   </head>

3. Paste below code Before </head> tag

<script type="text/javascript">
var addthis_config = {
    bar_show_below : 150
}
</script>
<script type="text/javascript" src="http://s7.addthis.com/js/300/addthis_widget.js"></script>

4. Again Find this tag by using Ctrl+F   </body>

3. Paste below code Before </body> tag
<div class="addthis_bar addthis_bar_medium">
    <label>Share This Page:</label>
    <div class="addthis_toolbox addthis_default_style addthis_32x32_style">
        <span><a class="addthis_button_preferred_1"></a></span>
        <span><a class="addthis_button_preferred_2"></a></span>
        <span><a class="addthis_button_preferred_3"></a></span>
        <span><a class="addthis_button_preferred_4"></a></span>
        <span><a class="addthis_button_compact"></a></span>
        <span><a class="addthis_counter addthis_bubble_style"></a></span>
    </div>
</div>
7. Now save your template
    you are done.
Read More

How To Add Jquery Recent Post Slider For Blogger

File Under: , , 12 comments

This is cool trick. You can add recent post as your
slider. So, This will help you to show your recent post
with  slider effect.This is not hard to add it to your blog.
Im Providing Demo for this post. so you can figure out
how this trick working. click below demo link to see
demo.

Demo


1. Log in to blogger account and Go to Design >> Edit HTML
    (make sure backup your template first)

2. Find this tag by using Ctrl+F    ]]></b:skin>

3. Paste below code Before ]]></b:skin> tag

#slide-container {
    height: 300px;
    position: relative;
    width: 480px;
}
#slider {
    height: 360px;
    left: 25px;
    overflow-x: hidden;
    overflow-y: hidden;
    position: relative;
    width: 480px;
    font-family: calibri;}
.slide-desc {
    background: transparent url(http://i195.photobucket.com/albums/z105/dantearaujo/darkbg.png) repeat scroll 0 0;
    color: #FFFFFF;
    padding: 10px;
    position: absolute;
    right: 0px;
    text-align: left;
    top: 0;
    width: 200px;
    z-index: 99999;
}
.slide-desc h2 {
    display: block;
}
.crosscol .widget-content {
    position: relative;
}
#slider ul, #slider li,
#slider2 ul, #slider2 li {
    margin: 0;
    padding: 0;
    list-style: none;
}
#slider2 {
    margin-top: 1em;
}
#slider li, #slider2 li {

    width: 480px;
    height: 360px;
    overflow: hidden;
}
#prevBtn, #nextBtn,
#slider1next, #slider1prev {
    display: block;
    width: 30px;
    height: 77px;
    position: absolute;
    left: -30px;
    text-indent: -9999px;
    top: 71px;
    z-index: 1000;
}
#nextBtn, #slider1next {
    left: 520px !important;
}
#prevBtn, #nextBtn, #slider1next, #slider1prev {
    display: block;
    height: 77px;
    left: 0;
    position: absolute;
    top: 132px;
    width: 30px;
    z-index: 1000;
}
#prevBtn a, #nextBtn a,
#slider1next a, #slider1prev a {
    display: block;
    position: relative;
    width: 30px;
    height: 77px;
    background: url(http://i195.photobucket.com/albums/z105/dantearaujo/prev.png) no-repeat 0 0;
}
#nextBtn a, #slider1next a {
    background: url(http://i195.photobucket.com/albums/z105/dantearaujo/next.png) no-repeat 0 0;
}
/* numeric controls */
ol#controls {
    margin: 1em 0;
    padding: 0;
    height: 28px;}
ol#controls li {
    margin: 0 10px 0 0;
    padding: 0;
    float: left;
    list-style: none;
    height: 28px;
    line-height: 28px;}
ol#controls li a {
    float: left;
    height: 28px;
    line-height: 28px;
    border: 1px solid #ccc;
    background: #DAF3F8;
    color: #555;
    padding: 0 10px;
    text-decoration: none;}
ol#controls li.current a {
    background: #5DC9E1;
    color: #fff;}
ol#controls li a:focus, #prevBtn a:focus, #nextBtn a:focus {
    outline: none;}
/* By bloggertrix.com */

4. Now again Find this tag by using Ctrl+F    </body>

<script src='http://ajax.googleapis.com/ajax/libs/jquery/1.6/jquery.min.js' type='text/javascript'></script>
<script src='http://accordion-template.googlecode.com/svn/trunk/easySlider1.7.js' type='text/javascript'></script>
<script type='text/javascript'>
//<![CDATA[
$(document).ready(function(){
 $("#slider").easySlider({
 auto: true,
 continuous: true
 });
});
//]]>
</script>
<!-- by bloggertrix.com -->

5. Click Save Template

6. Now Go to Design >> Page Element

7. Click Add Gadget and select 'HTML/Javascript'

8. Paste below code.

<div id="slider">
<script style="text/javascript" src="http://btrixx.googlecode.com/files/recentslider.js"></script>
<script style="text/javascript">
 var numposts_gal = 6;
 var numchars_gal = 150;
 var random_posts = false; // random posts
</script>
<!-- replace with your web address (marked with red color) -->
<script src="http://bloggertrix.com/feeds/posts/default?orderby=published&alt=json-in-script&callback=showgalleryposts&max-results=999999"></script>
</div>

* You can change numbers of showing post by Changing   6
* You can change numbers of post characters  by Changing  150

  Replace bloggertrix.com with your site/ URL

9. Now save HTML/Javascript'. You are done.
Read More

Monday, July 2, 2012

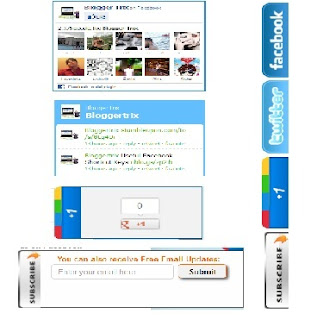
4 In 1 Smooth Social Subscribing Slide Out For Blogger

File Under: , , , , 3 comments

This is nice widget for your blog.This will help
specially who don't have more space in blogger.In
this wideget include Smooth Jquery Facebook fan
page
, Twitter Follower Box, Google Plus 1 Button
and Rss  SubscribeWidget.That's why it say 4 in one.
Its too easy to add to  your blogger.You can follow
these simple steps to add it.


Demo

1. Log in to blogger and Go to  Design >> Page Element.

2. Click Add Gadget and select 'HTML/Javascript'

3.Paste below code.

<style>
img,a {
border: 0;}
#on {
    visibility: visible;}
#off {
    visibility: hidden;}
#facebook_div {
    width: 196px;
    height: 340px;
    overflow: hidden;}
#twitter_div {
    width: 246px;
    height: 353px;
    overflow: hidden;}
#google_plus_div {
    width: 152px;
    height: 97px;
    overflow: hidden;
    margin-left: 50px;
    margin-top: 10px;}
#knfeedburner_div {
    width: 300px;
    height: 97px;
    overflow: hidden;
    margin-top: 5px;
    margin-left: -4px;}
#kakinetwork_div {
    width: 300px;
    height: 97px;
    overflow: hidden;
}/* right side style */#facebook_right {
    z-index: 10005;
    border: 2px solid #3c95d9;
    background-color: #fff;
    width: 196px;
    height: 353px;
    position: fixed;
    right: -200px;}
#facebook_right img {
    position: absolute;
    top: -2px;
    left: -35px;}
#facebook_right iframe {
    border: 0px solid #3c95d9;
    overflow: hidden;
    position: static;
    height: 360px;
    left: -2px;
    top: -3px;}
#twitter_right {
    z-index: 10004;
    border: 2px solid #6CC5FF;
    background-color: #6CC5FF;
    width: 246px;
    height: 353px;
    position: fixed;
    right: -250px;}
#twitter_right_img {
    position: absolute;
    top: -2px;
    left: -35px;
    border: 0;}
#google_plus_right {
    z-index: 10003;
    background-color: #F2F2F2;
    border: 2px solid #006ec9;
    border-top: 2px solid #0056a0;
    border-bottom: 2px solid #0056a0;
    border-right: 2px solid #0056a0;
    border-left: hidden;
    width: 152px;
    height: 97px;
    position: fixed;
    right: -154px;}
#google_plus_right_img {
    position: absolute;
    top: -2px;
    left: -33px;
    border: 0;}
#feedburner_right {
    z-index: 10003;
    background-color: #fefefe;
    border: 2px solid #5b5b5b;
    border-top: 2px solid #5b5b5b;
    border-bottom: 2px solid #5b5b5b;
    border-right: 2px solid #5b5b5b;
    border-left: hidden;
    width: 300px;
    height: 97px;
    position: fixed;
    right: -303px;}
#feedburner_right_img {
    position: absolute;
    top: -2px;
    left: -33px;
    border: 0;}
#kakinetwork_right {
    z-index: 10003;
    border: 2px solid #303030;
    background-color: #fff;
    width: 300px;
    height: 97px;
    position: fixed;}
#kakinetwork_right img {
    position: absolute;
    top: -2px;
    left: -101px;
}/* left side style */#facebook_left {
    z-index: 10005;
    border: 2px solid #3c95d9;
    background-color: #fff;
    width: 196px;
    height: 353px;
    position: fixed;
    left: -200px;}
#facebook_left img {
    position: absolute;
    top: -2px;
    right: -35px;}
#facebook_left iframe {
    border: 0px solid #3c95d9;
    overflow: hidden;
    position: static;
    height: 360px;
    right: -2px;
    top: -3px;}
#twitter_left {
    z-index: 10004;
    border: 2px solid #6CC5FF;
    background-color: #6CC5FF;
    width: 246px;
    height: 353px;
    position: fixed;
    left: -250px;}
#twitter_left_img {
    position: absolute;
    top: -2px;
    right: -35px;
    border: 0;}
#google_plus_left {
    z-index: 10003;
    background-color: #006ec9;
    border: 2px solid #006ec9;
    border-top: 2px solid #0056a0;
    border-bottom: 2px solid #0056a0;
    border-left: 2px solid #0056a0;
    border-right: hidden;
    width: 152px;
    height: 97px;
    position: fixed;
    left: -154px;}
#google_plus_left_img {
    position: absolute;
    top: -2px;
    right: -33px;
    border: 0;}
#feedburner_left {
    z-index: 10003;
    background-color: #fefefe;
    border: 2px solid #5b5b5b;
    border-top: 2px solid #5b5b5b;
    border-bottom: 2px solid #5b5b5b;
    border-left: 2px solid #5b5b5b;
    border-right: hidden;
    width: 300px;
    height: 97px;
    position: fixed;
    left: -303px;}
#feedburner_left_img {
    position: absolute;
    top: -2px;
    right: -33px;
    border: 0;}
#kakinetwork_left {
    z-index: 10003;
    border: 2px solid #303030;
    background-color: #fff;
    width: 300px;
    height: 97px;
    position: fixed;}
#kakinetwork_left img {
    position: absolute;
    top: -2px;
    right: -101px;}
.box-title1 {
    border: 1px solid #ddd;
/*border-radius*/
    -webkit-border-radius: 6px;
    -moz-border-radius: 6px;
    border-radius: 6px;
/*box-shadow*/
    -webkit-box-shadow: 5px 5px 5px #CCCCCC;
    -moz-box-shadow: 5px 5px 5px #CCCCCC;
    box-shadow: 5px 5px 5px #CCCCCC;
    padding: 10px;
    margin: 10px 0;}
.enteryouremail {
    background: #fff !important;
    border: 1px solid #d2d2d2;
    padding: 0px 8px 0px 8px;
    color: #a19999;
    font-size: 12px;
    height: 25px;
    width: 165px;
/*border-radius*/
    -webkit-border-radius: 5px;
    -moz-border-radius: 5px;
    border-radius: 5px;
    margin: 0px;}
.submitbutton {
    background: #F2F2F2;
    border: 1px solid #F66303;
/*box-shadow*/
    -webkit-box-shadow: 3px 3px 3px #666;
    box-shadow: 3px 3px 3px #666;
    font: bold 12px Arial, sans-serif;
    color: #000000;
    height: 25px;
    padding: 0 12px 0 12px;
    margin: 0 0 0 5px;
/*border-radius*/
    -webkit-border-radius: 5px;
    border-radius: 5px;
    cursor: pointer;}
</style><script src='http://ajax.googleapis.com/ajax/libs/jquery/1.7.1/jquery.min.js'></script>
<script type="text/javascript" src="http://apis.google.com/js/plusone.js"></script>
<script type="text/javascript">jQuery(document).ready(function(){ jQuery("#facebook_right").hover(function(){ jQuery(this).stop(true,false).animate({right:  0}, 500); },function(){ jQuery("#facebook_right").stop(true,false).animate({right: -200}, 500); });    jQuery("#twitter_right").hover(function(){ jQuery(this).stop(true,false).animate({right:  0}, 500); },function(){ jQuery("#twitter_right").stop(true,false).animate({right: -250}, 500); });     jQuery("#google_plus_right").hover(function(){ jQuery(this).stop(true,false).animate({right:  0}, 500); },function(){ jQuery("#google_plus_right").stop(true,false).animate({right: -154}, 500); });    jQuery("#feedburner_right").hover(function(){ jQuery(this).stop(true,false).animate({right:  0}, 500); },function(){ jQuery("#feedburner_right").stop(true,false).animate({right: -303}, 500); });    });</script>
<div id="on">
 <div id="facebook_right" style="top: 18%;">
  <div id="facebook_div">
   <img src="https://blogger.googleusercontent.com/img/b/R29vZ2xl/AVvXsEjMUR7ZOnhopsya7JTnkxIXBl17hwyf_s95V6KZYIK8Ncw2J6SQ1RQfzc_Wd-d3ncHr042PsfEJ_o3ZzinLrE5P0BgSipHHMoDpxLLGvJEht7iXId6zT53AcsYDVrj3b0VoiaKYTeYhHg-p/s1600/facebook-icon.png" alt=""/>
   <iframe src="//www.facebook.com/plugins/likebox.php?
href=http%3A%2F%2Fwww.facebook.com%2Fbloggertrix&amp;width=200&amp;height=346&amp;colorscheme=light&amp;show_faces=true&amp;border_color&amp;stream=false&amp;header=false" scrolling="no" frameborder="0" style="border:none; overflow:hidden; width:200px; height:346px;" allowtransparency="true">
   </iframe>
  </div>
 </div>
</div>
<div id="on">
 <div id="twitter_right" style="top: 35%;">
  <div id="twitter_div">
   <img id="twitter_right_img" src="https://blogger.googleusercontent.com/img/b/R29vZ2xl/AVvXsEiOC-ZYjJ6Iji7J9nn2D976UnFf9aBwCg_Yxlk3Lpv7EEkV43nswrnGC5XotxicX1mrBFVTIOsssn7AZ79d3_EAzGyzsFz7tzFzgSe2zWtHH3cZ12rS57mwBXVD68uyMeYWwNE7ZkUxA8qY/s1600/twitter-icon.png"/>
   <script src="http://widgets.twimg.com/j/2/widget.js"></script>
   <script>new TWTR.Widget({version: 2,type: 'profile',rpp: 4,interval: 1000,width: 246,height: 265,theme: {shell: {background: '#63BEFD',color: '#FFFFFF'},tweets: {background: '#FFFFFF',color: '#000000',links: '#47a61e'}},features: { loop: false,live: true,scrollbar: false,hashtags: false,timestamp: true,avatars: true,behavior: 'all' }})
.render().setUser('bloggertrix').start();</script>
  </div>
 </div>
</div>
<div id="on">
 <div id="google_plus_right" style="top: 52%;">
  <div id="google_plus_div">
   <img id="google_plus_right_img" src="https://blogger.googleusercontent.com/img/b/R29vZ2xl/AVvXsEgsMiSCBLxpzhjmwLSDnF_SyES1Ak8DQgthgmkaxpwQaszE2SBushWlJrIuB-4RZdqQ8vjzm-jtHOU6ykKu7zD7NfqmuR-oywIGd3lo2oYcguthz0X-EW4-ypzwqXr_RuBHZe0xTT4p4Zrm/s1600/google-plus-icon.png"/>
   <div style="float:left;margin:10px 10px 10px 0;">
    <g:plusone size="tall" expr:href="data:post.url"></g:plusone>
   </div>
  </div>
 </div>
 <div id="on">
  <div id="feedburner_right" style=" top: 69%;">
   <div id="knfeedburner_div">
    <center>
    <h4 style="color:#F66303;">You can also receive Free Email Updates:</h4>
    <form action="http://feedburner.google.com/fb/a/mailverify" method="post" target="popupwindow" onsubmit="window.open
('http://feedburner.google.com/fb/a/mailverify?uri=bloggertrix', 'popupwindow', 'scrollbars=yes,width=550,height=520');return true">
     <input gtbfieldid="10" class="enteryouremail" name="email" value="Enter your email here..." onblur="if (this.value == &#39;&#39;) {this.value = &#39;Enter your email here...&#39;;}" onfocus="if (this.value == &#39;Enter your email here...&#39;) {this.value = &#39;&#39;;}" type="text"/>
<input value="bloggertrix" name="uri" type="hidden"/><input value="Submit" class="submitbutton" type="submit"/>
    </form>
    </center><img id="feedburner_right_img" src="https://blogger.googleusercontent.com/img/b/R29vZ2xl/AVvXsEiK1sqW3api0xPcZljwvuO9RPIdZdSmf5_6gV4IBOY1dfC2bE6iP4RR_nIFndgiO0FR1sGprbBSarOd8sPF0DfTBpqpckr0mAXTHl9cwM7aqZgIKoBdNuXXO9FnDUCSY0ckpgqaPufvD-sl/s1600/subscribe-icon.png"/>
   </div>
  </div>
 </div>
</div>

* Replace  bloggertrix  With Facebook fan page.
* Replace  bloggertrix  With your Twitter Username.
* Replace  bloggertrix  With Your feedburner Username

4. Now save your HTML/Javascript'.

Read More

Sunday, July 1, 2012

Useful Facebook Shortcut Keys

File Under: , 3 comments

Actually When we talk about social network its
very important part of bloggers. Facebook is the
most popular social network now. Millions of
users use it.I hope all of bloggers use Facebook.
Do you know, there are more shortcut keys for
Facebook, You can open new massage,search
shortcut,home page shortcut and more. So, It
helps to do some important works without
moving courser.Shortcuts are sometime different
from internet browser.So,i will include all for you.

facebook-shortcut

New Message
Chrome:   ALT + M
Firefox:    SHIFT + ALT + M
Explorer : ALT + M + ENTER

Search Shortcut
Chrome:   ALT + ?
Firefox:    SHIFT + ALT + ?
Explorer : ALT + ? + ENTER

Home Page / News Feed
Chrome:   ALT + 1
Firefox:    SHIFT + ALT + 1
Explorer : ALT + 1 + ENTER

Profile Page
Chrome:   ALT + 2
Firefox:    SHIFT + ALT + 2
Explorer : ALT + 2 + ENTER

Friend Request
Chrome:   ALT + 3
Firefox:    SHIFT + ALT + 3
Explorer : ALT + 3 + ENTER

Message Shortcut
Chrome:   ALT + 4
Firefox:    SHIFT + ALT + 4
Explorer : ALT + 4 + ENTER

Notifications
Chrome:   ALT + 5
Firefox:    SHIFT + ALT + 5
Explorer : ALT + 5 + ENTER

Account Setting
Chrome:   ALT + 6
Firefox:    SHIFT + ALT + 6
Explorer : ALT + 6 + ENTER

Privacy Setting
Chrome:   ALT + 7
Firefox:    SHIFT + ALT + 7
Explorer : ALT + 7 + ENTER

Facebook Official Page
Chrome:   ALT + 8
Firefox:    SHIFT + ALT + 8
Explorer : ALT + 8 + ENTER

Service Agreement
Chrome:   ALT + 9
Firefox:    SHIFT + ALT + 9
Explorer : ALT + 9 + ENTER

Help Center
Chrome:   ALT + 0
Firefox:    SHIFT + ALT + 0
Explorer : ALT + 0 + ENTER

You can Like or unlike photos by press 'L' with any browser.

Hope this help to you.
Read More