This is a unique colourful drop down menu bar implemented by me. Now days there are lot of jQuery menu bar tutorials available on the internet that you can use it for blogger.However i focused on to create colourful menubar. Because its hard to find a kind of menubars. I hope you like this. Please dont forget to share with your social profiles.
Check all menubars from bloggertrix.com
Bloggertrix menu bars

Check all menubars from bloggertrix.com
Bloggertrix menu bars
Awesome 3d Effect Css Menu bar for Blogger
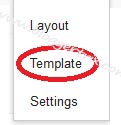
1. Go to Blogger Dashboard > Template
3. Paste below code just above it.
<link href="http://preview.bloggertrix.com/coloful_unique_dropdown_menu/js/boilerplate.css" rel="stylesheet" type="text/css">
<link href="http://preview.bloggertrix.com/coloful_unique_dropdown_menu/js/SpryMenuBarHorizontal.css" rel="stylesheet" type="text/css">
<link href="http://preview.bloggertrix.com/coloful_unique_dropdown_menu/js/SpryMenuBarVertical.css" rel="stylesheet" type="text/css">
<link href='http://fonts.googleapis.com/css?family=Noto+Serif' rel='stylesheet' type='text/css'>
<script src="http://preview.bloggertrix.com/coloful_unique_dropdown_menu/js/respond.min.js"></script>
<script src="http://preview.bloggertrix.com/coloful_unique_dropdown_menu/js/SpryMenuBar.js" type="text/javascript"></script>
<style>
.menubar {width: 750px;float: left;-moz-box-shadow: 0px 0px 19px #000000;-webkit-box-shadow: 0px 0px 19px rgb(0, 0, 0);box-shadow: 0px 0px 8px rgb(0, 0, 0);padding: 7px;border-radius: 4px;position: relative;margin-top: 50px;background-color: rgb(255, 255, 255);margin-left: 23%;
</style>
5. Paste below code just above it.
<script type="text/javascript">
var MenuBar1 = new Spry.Widget.MenuBar("MenuBar1", {imgDown:"http://preview.bloggertrix.com/coloful_unique_dropdown_menu/js/SpryMenuBarDownHover.gif", imgRight:"http://preview.bloggertrix.com/coloful_unique_dropdown_menu/js/SpryMenuBarRightHover.gif"});
var MenuBar2 = new Spry.Widget.MenuBar("MenuBar2", {imgRight:"http://preview.bloggertrix.com/coloful_unique_dropdown_menu/js/SpryMenuBarRightHover.gif"});
</script>
6. Now save your Template and go to blogger Layout
7. Click Add Gadget and select 'HTML/Javascript'
8. Paste below code.
<div class="menubar"> <ul id="MenuBar1" class="MenuBarHorizontal"> <li style="text-indent: 10px;width:80px;height:44px;background-color:#1d75bd";><a id="navhd" href="#">Home</a></li> <li class="choosedestination"><a id="navhd" class="MenuBarItemSubmenu" href="http://www.bloggertrix.com/" style="">Free blogger tricks</a> <ul id="destination1"> <li style="height: 34px;line-height: 10px;"><a class="MenuBarItemSubmenu" href="#">Item 3.1</a> <ul id="destination1" class="" style="margin-left: 175px;margin-top: -2px;"> <li id="desti_nav"><a href="#" class="">Item 3.1.1</a></li> <li id="desti_nav"><a href="#" class="">Item 3.1.2</a></li> </ul> </li> <li id="desti_nav"><a href="#">Item 3.2</a></li> <li id="desti_nav"><a href="#">Item 3.3</a></li> <li id="desti_nav"><a href="#">Item 3.3</a></li> <li id="desti_nav"><a href="#">Item 3.3</a></li> <li id="desti_nav"><a href="#">Item 3.3</a></li> <li id="desti_nav"><a href="#">Item 3.3</a></li> <li id="desti_nav"><a href="#">Item 3.3</a></li> <li id="desti_nav"><a href="#">Item 3.3</a></li> <li id="desti_nav"><a href="#">Item 3.3</a></li> </ul> </li> <li class="holidaytp" style=""><a id="navhd" class="MenuBarItemSubmenu" href="http://www.bloggertrix.com/">CSS Tricks</a> <ul id="holidayt" > <li style="height: 34px;line-height: 10px;"><a class="MenuBarItemSubmenu" href="#">Item 3.1</a> <ul id="holidayt" style="margin-left: 175px;margin-top: -2px;"> <li id="holiday_nav"><a href="#">Item 3.1.1</a></li> <li id="holiday_nav"><a href="#">Item 3.1.2</a></li> </ul> </li> <li id="holiday_nav"><a href="#">Item 3.2</a></li> <li id="holiday_nav" ><a href="#">Item 3.3</a></li> </ul> </li> <li class="retriveb" style=" width: 145px;"><a id="navhd" class="MenuBarItemSubmenu" href="http://www.bloggertrix.com/">JQuery Menu bars</a> <ul id="retrivemy"> <li style="height: 34px;line-height: 10px;"><a class="MenuBarItemSubmenu" href="#">Item 3.1</a> <ul id="retrivemy" style="margin-left: 175px;margin-top: -2px;"> <li id="Retrivebk"><a href="#">Item 3.1.1</a></li> <li id="Retrivebk"><a href="#">Item 3.1.2</a></li> </ul> </li> <li id="Retrivebk" ><a href="#">Item 3.2</a></li> <li id="Retrivebk" ><a href="#">Item 3.3</a></li> </ul> </li> <li class="makeanen" style="width: 127px;" ><a id="navhd" class="MenuBarItemSubmenu" href="#">Make an Enquiry</a> <ul id="makenanEnquery"> <li style="height: 34px;line-height: 10px;"><a class="MenuBarItemSubmenu" href="#">Item 3.1</a> <ul id="makenanEnquery" style="margin-left: 175px;margin-top: -2px;"> <li id="mkeinq"><a href="#">Item 3.1.1</a></li> <li id="mkeinq"><a href="#">Item 3.1.2</a></li> </ul> </li> <li id="mkeinq"><a href="#">Item 3.2</a></li> <li id="mkeinq"><a href="#">Item 3.3</a></li> </ul> </li> <li style="text-indent:10px;width: 109px;background-image: url(http://preview.bloggertrix.com/coloful_unique_dropdown_menu/js/images/naw-bar6.png);background-repeat: repeat-x; margin-left: 1px;"><a id="navhd" href="#">Contact Us</a> </ul> </div>
7. Now save your HTML/Javascript'.You are done. If you have any problem related to this unique Menu bar. Just leave a comment.I will help to you.