Friday, August 31, 2012

Attractive Round Corners Css3 Search Box For Blogger

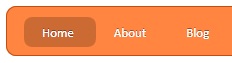
Earlier i posted about Css3 3D style search box.This is also nice Css3 style search box. You can keep it on your sidebar You can check my earlier post.Add Sleek Search  Box With Social Buttons For Blogger Its also great style with social buttons. you can add this to your blog easily. Try it.
Round-css3-search-bar

Demo

1. Log in to blogger  Design > Page Element.

2. Click Add Gadget and select 'HTML/Javascript

3.Paste below code.

<style>
#search-form {
 background: #e1e1e1; /* Fallback color for non-css3 browsers */
 width: 365px;

 /* Gradients */
 background: -webkit-gradient( linear,left top, left bottom, color-stop(0, rgb(243,243,243)), color-stop(1, rgb(225,225,225)));
 background: -moz-linear-gradient( center top, rgb(243,243,243) 0%, rgb(225,225,225) 100%);

 /* Rounded Corners */
 border-radius: 17px;
 -webkit-border-radius: 17px;
 -moz-border-radius: 17px;

 /* Shadows */
 box-shadow: 1px 1px 2px rgba(0,0,0,.3), 0 0 2px rgba(0,0,0,.3);
 -webkit-box-shadow: 1px 1px 2px rgba(0,0,0,.3), 0 0 2px rgba(0,0,0,.3);
 -moz-box-shadow: 1px 1px 2px rgba(0,0,0,.3), 0 0 2px rgba(0,0,0,.3);
}

/*** TEXT BOX ***/
input[type="text"]{
 background: #fafafa; /* Fallback color for non-css3 browsers */

 /* Gradients */
 background: -webkit-gradient( linear, left bottom, left top, color-stop(0, rgb(250,250,250)), color-stop(1, rgb(230,230,230)));
 background: -moz-linear-gradient( center top, rgb(250,250,250) 0%, rgb(230,230,230) 100%);

 border: 0;
 border-bottom: 1px solid #fff;
 border-right: 1px solid rgba(255,255,255,.8);
 font-size: 16px;
 margin: 4px;
 padding: 5px;
 width: 250px;

 /* Rounded Corners */
 border-radius: 17px;
 -webkit-border-radius: 17px;
 -moz-border-radius: 17px;

 /* Shadows */
 box-shadow: -1px -1px 2px rgba(0,0,0,.3), 0 0 1px rgba(0,0,0,.2);
 -webkit-box-shadow: -1px -1px 2px rgba(0,0,0,.3), 0 0 1px rgba(0,0,0,.2);
 -moz-box-shadow: -1px -1px 2px rgba(0,0,0,.3), 0 0 1px rgba(0,0,0,.2);
}

/*** USER IS FOCUSED ON TEXT BOX ***/
input[type="text"]:focus{
 outline: none;
 background: #fff; /* Fallback color for non-css3 browsers */

 /* Gradients */
 background: -webkit-gradient( linear, left bottom, left top, color-stop(0, rgb(255,255,255)), color-stop(1, rgb(235,235,235)));
 background: -moz-linear-gradient( center top, rgb(255,255,255) 0%, rgb(235,235,235) 100%);
}

/*** SEARCH BUTTON ***/
input[type="submit"]{
 background: #44921f;/* Fallback color for non-css3 browsers */

 /* Gradients */
 background: -webkit-gradient( linear, left top, left bottom, color-stop(0, rgb(79,188,32)), color-stop(0.15, rgb(73,157,34)), color-stop(0.88, rgb(62,135,28)), color-stop(1, rgb(49,114,21)));
 background: -moz-linear-gradient( center top, rgb(79,188,32) 0%, rgb(73,157,34) 15%, rgb(62,135,28) 88%, rgb(49,114,21) 100%);

 border: 0;
 color: #eee;
 cursor: pointer;
 float: right;
 font: 16px Arial, Helvetica, sans-serif;
 font-weight: bold;
 height: 30px;
 margin: 4px 4px 0;
 text-shadow: 0 -1px 0 rgba(0,0,0,.3);
 width: 84px;
 outline: none;

 /* Rounded Corners */
 border-radius: 30px;
 -webkit-border-radius: 30px;
 -moz-border-radius: 30px;

 /* Shadows */
 box-shadow: -1px -1px 1px rgba(255,255,255,.5), 1px 1px 0 rgba(0,0,0,.4);
 -moz-box-shadow: -1px -1px 1px rgba(255,255,255,.5), 1px 1px 0 rgba(0,0,0,.2);
 -webkit-box-shadow: -1px -1px 1px rgba(255,255,255,.5), 1px 1px 0 rgba(0,0,0,.4);
}
/*** SEARCH BUTTON HOVER ***/
input[type="submit"]:hover {
 background: #4ea923; /* Fallback color for non-css3 browsers */

 /* Gradients */
 background: -webkit-gradient( linear, left top, left bottom, color-stop(0, rgb(89,222,27)), color-stop(0.15, rgb(83,179,38)), color-stop(0.8, rgb(66,143,27)), color-stop(1, rgb(54,120,22)));
 background: -moz-linear-gradient( center top, rgb(89,222,27) 0%, rgb(83,179,38) 15%, rgb(66,143,27) 80%, rgb(54,120,22) 100%);
}
input[type="submit"]:active {
 background: #4ea923; /* Fallback color for non-css3 browsers */

 /* Gradients */
 background: -webkit-gradient( linear, left bottom, left top, color-stop(0, rgb(89,222,27)), color-stop(0.15, rgb(83,179,38)), color-stop(0.8, rgb(66,143,27)), color-stop(1, rgb(54,120,22)));
 background: -moz-linear-gradient( center bottom, rgb(89,222,27) 0%, rgb(83,179,38) 15%, rgb(66,143,27) 80%, rgb(54,120,22) 100%);
}
  
</style>

<form action="URL Of the Page Where the Result Appear" id="searchbox">
<input name="cx" type="hidden" value="X:Y" /> 
<input name="cof" type="hidden" value="FORID:11" /> 
<input id="q" name="q" size="70" type="text" /> 
<input name="sa" type="submit" value="Search" /> </form>


4. Now save your HTML/Javascript'.

    You are done...
Read More

Thursday, August 30, 2012

Attractive Css3 Labels / Category Widget For Blogger

In this post will help you to make attractive your blogger category look.You can add it to your blog easily.Im using CSS3 Gradients and Box-Shadow for this modification.Check blow image for example.Earlier i posted about same trickChange Blogger Label Links As Brick / Box Style. Follow below steps to add it to your blog.

label-category

1. Log in to blogger account & Go to Design >> Edit HTML

2. Find this code  by using Ctrl+F  ]]></b:skin>

3.Paste below code Before ]]></b:skin> code

.label-size{
 margin:0;
 padding:0;
 position:relative;
 } 
 .label-size a{
 float:left;
 height:24px;
 line-height:24px;
 position:relative;
 font-size:12px;
 margin-bottom: 9px;
 margin-left:20px;
 padding:0 10px 0 12px;
 background:#0089e0;
 color:#fff;
 text-decoration:none;
 -moz-border-radius-bottomright:4px;
 -webkit-border-bottom-right-radius:4px; 
 border-bottom-right-radius:4px;
 -moz-border-radius-topright:4px;
 -webkit-border-top-right-radius:4px; 
 border-top-right-radius:4px; 
 } 
.label-size a:before{
 content:"";
 float:left;
 position:absolute;
 top:0;
 left:-12px;
 width:0;
 height:0;
 border-color:transparent #0089e0 transparent transparent;
 border-style:solid;
 border-width:12px 12px 12px 0;  
 } 
.label-size a:after{
 content:"";
 position:absolute;
 top:10px;
 left:0;
 float:left;
 width:4px;
 height:4px;
 -moz-border-radius:2px;
 -webkit-border-radius:2px;
 border-radius:2px;
 background:#fff;
 -moz-box-shadow:-1px -1px 2px #004977;
 -webkit-box-shadow:-1px -1px 2px #004977;
 box-shadow:-1px -1px 2px #004977;
 }  

.label-size a:hover{background:#555;} 
.label-size a:hover:before{border-color:transparent #555 transparent transparent;}

4. Now Click  Save Template.

    You are done...
Read More

Wednesday, August 29, 2012

Stylish CSS3 Lavalamp Menu Bar For Blogger With jQuery

Earlier i posted about more menubars. Actually This is also great menubar, That include some more colors.Its include awesome hover style. It have 5 color styles. you can add it as your your. Follow these step well to add to yourblog.
Menubar Collection

lava-menubar

DEMO

1. Log in to blogger account and Go to Design >> Edit HTML

2. Put checked marked in Expand Widget Templates

3. Find this tag by using Ctrl+F   /head>

4. Paste below code Before </head> tag

<script src='http://ajax.googleapis.com/ajax/libs/jquery/1.7.2/jquery.min.js' type='text/javascript'/>
<script src='http://bloggertrix.googlecode.com/files/lava-menu.js' type='text/javascript'/>

5. Find this tag by using Ctrl+F    ]]></b:skin>

6. Paste below code Before ]]></b:skin> tag

.lavalamp {
    position: relative;
    border: 1px solid #d6d6d6;
    background: #fff;
    padding: 15px;
    -webkit-box-shadow: 0 3px 6px rgba(0,0,0,.25);
 -moz-box-shadow: 0 3px 6px rgba(0,0,0,.25);
    border-radius : 10px;
    -moz-border-radius : 10px;
    -webkit-border-radius : 10px;
    background : -webkit-gradient(linear, left top, left bottom, from(rgb(240,240,240)), to(rgb(204,204,204)));
    background : -moz-gradient(linear, left top, left bottom, from(rgb(240,240,240)), to(rgb(204,204,204)));
 height: 18px;
        font-family: calibri;
}

.magenta {
 background : rgb(190,64,120);
 background : -webkit-gradient(linear, left top, left bottom, from(rgb(190,64,120)), to(rgb(177,24,91)));
 background : -moz-gradient(linear, left top, left bottom, from(rgb(190,64,120)), to(rgb(177,24,91)));
 border: 1px solid #841144;
 
}

.cyan {
 background : rgb(64,181,197);
 background : -webkit-gradient(linear, left top, left bottom, from(rgb(64,181,197)), to(rgb(7,165,187)));
 background : -moz-gradient(linear, left top, left bottom, from(rgb(64,181,197)), to(rgb(7,165,187)));
 border: 1px solid #2f8893;
 
}

.yellow {
 background : rgb(255,199,79);
 background : -webkit-gradient(linear, left top, left bottom, from(rgb(255,199,79)), to(rgb(255,188,43)));
 background : -moz-gradient(linear, left top, left bottom, from(rgb(255,199,79)), to(rgb(255,188,43)));
 border: 1px solid #c08c1f;
 
}

.orange {
 background : rgb(255,133,64);
 background : -webkit-gradient(linear, left top, left bottom, from(rgb(255,133,64)), to(rgb(255,107,24)));
 background : -moz-gradient(linear, left top, left bottom, from(rgb(255,133,64)), to(rgb(255,107,24)));
 border: 1px solid #c04f11;
 
}

.dark {
 background : rgb(89,89,89);
 background : -webkit-gradient(linear, left top, left bottom, from(rgb(89,89,89)), to(rgb(54,54,54)));
 background : -moz-gradient(linear, left top, left bottom, from(rgb(89,89,89)), to(rgb(54,54,54)));
 border: 1px solid #272727;
 
}

.magenta li a , .cyan li a, .yellow li a , .orange li a, .dark li a{
 color: #fff;
 text-shadow: 0 -1px 0 rgba(0,0,0,.40);
 
}

.lavalamp a {
    text-decoration: none;
    color: #262626;
    line-height: 20px;
}

.lavalamp ul {
    margin: 0;
    padding: 0;
    z-index: 300;
    position: absolute;
}

.lavalamp ul li {
    list-style: none;
    float:left;

    text-align: center;
    }

.lavalamp ul li a {
    padding: 0 20px;
    text-align: center;
    }

.floatr {
    position: absolute;
    top: 10px;
    z-index: 50;
    width: 70px;
    height: 30px;
    border-radius : 8px;
    -moz-border-radius : 8px;
    -webkit-border-radius : 8px;
    background : rgba(0,0,0,.20);
    -webkit-transition: all .4s ease-in-out;
    -moz-transition: all .4s ease-in-out;
}

7. Now Find this code  by using Ctrl+F <div id='content-wrapper'>

8.  Paste below code Before <div id='content-wrapper'> code

<div class="lavalamp dark">
 <ul>
  <li class="active"><a href="">Home</a></li>
  <li><a href="#">About</a></li>
  <li><a href="#">Blog</a></li>
  <li><a href="#">Services</a></li>
  <li><a href="#">Portfolio</a></li>
  <li><a href="#">Contacts</a></li>
  <li><a href="#">Back to Article</a></li>
  <li><a href="#">How it Works?</a></li>
 </ul>
 <div class="floatr"></div>
</div>

*Replace # With your URL
*Replace Name with as your like.

9. To change the style, you have to replace <div class="lavalamp dark"> with below styles


     <div class="lavalamp magenta">


    <div class="lavalamp orange">


    <div class="lavalamp yellow">

    <div class="lavalamp dark">

   <div class="lavalamp cyan">

10. Now save your template
 you are done.
Read More

Tuesday, August 28, 2012

Add Attractive Social Media Widget For Blogger Easily

This is a simple Social media gadget for your blog. you can link Facebook fan page, Twitter and Rss subscribe. Its easier to add to your blog.you can try it.

Social-Media-Widget-For-Blogger

1. Log in to blogger and Go to  Design >> Page Element.

2. Click Add Gadget and select 'HTML/Javascript'

3.Paste below code.

<style type='text/css'>

#topbox{width:250px;border:4px solid #a1a1a1;background-color:#ffffff;}
#topbox:hover{border:4px solid #4e4c4c;background-color:#ffffff;}

#social1 .social2 h2.subscription { border:0; margin:0; padding:3px 0 0 55px; height:42px; font-size:14px;font-family:&quot;Segoe UI&quot;,Calibri,&quot;Myriad Pro&quot;,Myriad,&quot;Trebuchet MS&quot;,Helvetica,Arial,sans-serif;
font-weight:bold; }

#social1 .social2 h2.subscription:hover {color:#1c5ef3; font-size:15px;}

#social1 .social2 h2.facebook { background:url(https://blogger.googleusercontent.com/img/b/R29vZ2xl/AVvXsEgb6AYaYk_jmMWDwgM3FtS6GA0P-cGmukEVk6uw2Bba_hyFAca9cRPkV5K-S9y75OwD77Il364YC4uHxuJUwNfJq6g8Ech-mEc_-d58seVKQnn2pR9Dymzt0fU-Ly68fNvR8QWerbvg7io/s1600/bloggertrix-facebook-icon.png) no-repeat top left; }

#social1 .social2 h2.twitter { background:url(https://blogger.googleusercontent.com/img/b/R29vZ2xl/AVvXsEg7vGt4HgCDdOCToMVRKnx6GMmTicCKuE7lMJgitYvFJK9Hfpe89PjKHUMYtOGShDlb-jWzT7_eeqRzL425O-CGgbZ86H4VF-v8U-wLHFTY1bkIAegSysV8Q84JgHl2HntJz7w7EsL60jg/s1600/bloggertrix-twitter-icon.png) no-repeat top left; }

#social1 .social2 h2.Rss { background:url(https://blogger.googleusercontent.com/img/b/R29vZ2xl/AVvXsEixTvuIp08rvn7634MzKDWf2CjF7RHvnGlEL0G9PSjA4nb31YozXclIsnlTw8zpibgqMluho2BNlyCwbmV2h2LCgugif2dxALjgfhzEOtlyMDfPBKhzAN7bde_5zej-68xywE74wDCTjKQ/s1600/bloggertrix-rss-icon.png) no-repeat top left; }

#social1 .social2 .subscription a { color:#252e28; text-decoration:none; }

</style>

<div id="topbox">
<div id="social1">
<div class="social2">

<h2 class="subscription facebook"><a href="Facebook URL" target="_blank">Like On Facebook</a></h2>

<h2 class="subscription twitter"><a href="Twitter URL" target="_blank">Follow On Twitter</a></h2>

<h2 class="subscription Rss"><a href="Your Email Subscription URL" target="_blank"> Subscribe On RSS</a></h2>

</div></div>
</div>

* Repalce  Facebook URL with your URL
* Repalce  Twitter URL with your URL
* Replace Your Email Subscription URL  with your feed name

4. Now save your HTML/Javascript'.
     you are done.
Read More

Monday, August 27, 2012

8 Backgrounds For Customize Blogger Comment Box

In this post, im going help you to customize your blogger comment box with nice backgrounds.Actually this is great those who are trying to make your blog, attractive. Earlier
i posted about this, but today ill give more different styles.

8 Backgrounds For Customize Blogger Comment Box


1. Log in to blogger  Design > Edit HTML.

2. Find this tag by using Ctrl+F   ]]></b:skin>

3. Paste below code Before ]]></b:skin> tag

#mbt-form iframe{ 
background:#ffffff url(
https://blogger.googleusercontent.com/img/b/R29vZ2xl/AVvXsEgQqt8hWF9OwMBjEDNIwdlZcS40-3w1Fs-AxoavuNZg20wIQwzLIAjMcOEclXNXwUdgyjvfO7izqXhQfU6qt3F_pwaWxQoZajsOaXUVNT1ZaEzrr0a_hJ9TJSV0Vd7_GDHjWB7zReVyh6al/s400/11.png) repeat-x; 
border:1px solid #ddd; 
-moz-border-radius:6px; 
-webkit-border-radius:6px; 
box-shadow: 5px 5px 5px #CCCCCC; 
padding:5px; 
font:normal 12pt "ms sans serif", Arial; 
color:#2F97FF; 
width:560px; height:213px !important; 
}
#mbt-form a{ 
color:#fff; 
}

4. Find again this code by using Ctrl+F   <div class='comment-form'>

5.
Now replace <div class='comment-form'> with below code

<div id='mbt-form'>

6.
Now save your Template

Here is other backgrounds. you can change above code URL with below any URL.

https://blogger.googleusercontent.com/img/b/R29vZ2xl/AVvXsEjd5VfxiAOCGTfGOUWNXYnr0mPNS12DxvHq_UFbFI557uNt5zItt9_A4pQA-EIKi_bnOZV-kHVujtdwttd4Vgo6DtsMZPr1zTTyWGgGXVKLYTUowJIos0FGra3x_oA7AtdrPIEuK7Pe8Hde/s1600/form1.JPG


https://blogger.googleusercontent.com/img/b/R29vZ2xl/AVvXsEg4uHOJOhkVDmhOEU5PDtUaB3_e15aGMnEyfo63HhuyqdVIuqZxmocMTlF5dJJxsjdlipOsYvq5t0Pk1xpj6zhTiWROBBFdI0xjoflqdokE6gM_S-VHRu2IIVE4UejgFCfcXnDqAmq9eNeb/s1600/form2.JPG


https://blogger.googleusercontent.com/img/b/R29vZ2xl/AVvXsEiHBI3WgHmywO1fRxUhcjCdIWmypr6q_IpIRA8RYC9Q6yfKTxIW6-b-ccPX8ZoMawEL-F69jmLoI0m9V5tVraLcuIv_tH46bnY0WtT60d7VcNggS4QTND0S90IdF74kh1mqrB2RRqOsAAlA/s1600/form3.JPG


https://blogger.googleusercontent.com/img/b/R29vZ2xl/AVvXsEikpUE9zhuK6I8cTol3HHAhSqn7oqBfr4XfqQhqg2WXY0KZYxAKsXPCTMFQ5MJhl5sMwz9cQO5uKwB-EUmA_VhD6hemVAz8YtOcTRW1lTFO2xkXjLNQFFfPIGiDkWEorZ2gLbuYlhMu9uiZ/s1600/form4.JPG


https://blogger.googleusercontent.com/img/b/R29vZ2xl/AVvXsEiKaVDUe8wAaQtidaSZizP-CaEkbuZYKHWfJgJ0Nu_nCDdfgzOrYbJ7FbtKCF4tZ_5axbhlQfT944EcyeQLUHQxgwaGaRmp_Z5nbktJIpQqxUFIsboUYksk4YzSgG5e9lvhnH51fpsc0YXk/s1600/form5.JPG


https://blogger.googleusercontent.com/img/b/R29vZ2xl/AVvXsEiGyccAF9ushdTdRQBcErwUfUj0bA_bBzTtWKskhLgBX-WV4nyfKAuTOV2ZD5qA9gO5M5SSmp3fcY1ua7g1aJv5rVuB8fktioPhGbvsyzhT7X3uxdW8oVXELHEYrkEPOj1byEYAqruEz5XH/s1600/form6.JPG


https://blogger.googleusercontent.com/img/b/R29vZ2xl/AVvXsEiJJFGwRblDtjjfSSVd1dPZGuDXFgU04pq4RsVc8fp-w0Ys0K6ElpTaoY4OfPaixUTUnUkrt_NiA5pGohe1u6e1naP6EVNE21xoAJ3Z26ve9xoGiioY41e5zO1uz-5pHCb9eYV7IRyJKxND/s1600/form7.JPG


 https://blogger.googleusercontent.com/img/b/R29vZ2xl/AVvXsEg6mGyyi2dUeTyBf9EnzLgR034NE0g_ldYiBHL8uR_vFJJBB9ZaR6_SjN_gJ-BToeFglSfKfqMCgkdAt0PJerv9nM3Ap1cHpPd25rZfwojBlBCJvWB2XcuGaz5O31DXo4OBhOvMCcpnZkd_/s1600/form8.JPG


Read More

Sunday, August 26, 2012

Attractive Blogger Image Sliding With Css

This is a nice image show for your blog.You can add any image for this.This isbetter for saving space in your blog.Less space, you can add few photos. you can trythis, Follow these steps.

Css_images


1.  Log in to blogger account > Go to Design >> Page Element

2. Click Add Gadget and select 'HTML/Javascript'

3. Paste below code.

<style type="text/css">
#gallerydiv {
padding:0;   
margin:0; 
list-style-type:none; 
height:267px; 
width:535px; 
overflow: hidden;
}
#gallerydiv a {
width: 40px;
float: left;
width: 40px;
height: 267px;
overflow: hidden;
text-decoration:none; 
cursor:default; 
}
#gallerydiv a.d { overflow: visible; }
#gallerydiv a:hover {
width: 400px;
}
#gallerydiv a img {
border:0; 
margin:0; 
padding:0;
}
</style>
<div id="gallerydiv">
<a href="#" class="a"><img src="https://blogger.googleusercontent.com/img/b/R29vZ2xl/AVvXsEhaSv1j8CrjRGUyd2pYveU5gCxzvkaU7J-0DrjyyMHiC43p08luNexjohbG0eS1VXGz6xZZVy0WNxTcKz0uAEUVgIGWIb7o-iYSxUx9rivctcuddVcbzM-fNsPbPw9qiLmApcCtgGoJ_94/s1600/pic1.jpg" alt="multi"  /></a>
<a href="#" class="b"><img src="https://blogger.googleusercontent.com/img/b/R29vZ2xl/AVvXsEivczJeMDSCj3LXPDEhKfX7_w3YMK6opQeOkj3qH7HIJvG6v8gWNHQt7qMYznCVr9KNHVHHJy7zVDqxj58L5J8UJyfZaAl8zu2DI7QyJdwC8WQIIjAGn3db9cr_yPYdRiwSdc19KGHyPik/s1600/pic2.jpg" alt="green" /></a>
<a href="#" class="c"><img src="https://blogger.googleusercontent.com/img/b/R29vZ2xl/AVvXsEg_DITyACPcPY_4r0T5vfJEo8AyGiHpwxVzqncawZxM2aNWlV29u2j8QiTksRtaiAa6Brqn3a_lMEHg77hULkBsFkQ4ja_jS3kSYDTLGOVlz_Pms6NC6NvpLx0U7tR1HjexXyhdrTF65cM/s1600/pic3.jpg" alt="blue" /></a>
<a href="#" class="d"><img src="https://blogger.googleusercontent.com/img/b/R29vZ2xl/AVvXsEiWNVrvlpM_n8fHe-W2z4UHtmkLhFYAu52Tr55VdSUcHnET7C-lPkxD0p2JxaypAPtGjV0xH626OoBaw9PeJ4TRIeRcUYAqa6yj7kszPlXegwT9FyKhVRR-JQ8JR6vuhPb8wiKwYcksQQ0/s1600/pic4.jpg" alt="red globe"  /></a>

</div>


4. Save HTML/Javascript. you are done.
Read More

Saturday, August 25, 2012

Add Css Drop Cap Large First Letter To Your Blogger Post

This is  also another cool trick to your blog. You can Drop can your first letter in blogger
post.Drop cap mean enlarge first capital letter in your post.So you can use this codes for adding this this effect to your blog. check below image for example.

1. Log in to blogger account and Go to Design >> Edit HTML

2. Find this tag by using Ctrl+F    ]]></b:skin>

3. Paste below code Before ]]></b:skin> tag

.upperletter:first-letter {
float: left;
display: block;
font-family:Georgia;
font-size: 60px;
color:#0033CC;
margin:0px 5px 0 0;
padding:0 0 0 10px;
}

4. Now save your template

5. When you make a post you can use this code and add your text with it.

<div class='upperletter'> Your text Here... </div>

6. Publish your Post. you are done.
Read More

Friday, August 24, 2012

Css3 3D Style Search Box For Blogger

This is also nice looking search box to blogger.You can keep it on your sidebar This is also have good speed searching. You can check my earlier post.Add Sleek  Search Box With Social Buttons For Blogger Its also great style with social buttons. you can add this to your blog easily. Try it.

3D Style Search Box

1. Log in to blogger  Design > Page Element.

2. Click Add Gadget and select 'HTML/Javascript

3.Paste below code.

<style type="text/css">
.form-wrapper {
width: 270px;
padding: 8px;
margin: 10px auto;
overflow: hidden;
border-width: 1px;
border-style: solid;
border-color: #dedede #bababa #aaa #bababa;
-moz-box-shadow: 0 3px 3px rgba(255,255,255,.1), 0 3px 0 #bbb, 0 4px 0 #aaa, 0 5px 5px #444;
-webkit-box-shadow: 0 3px 3px rgba(255,255,255,.1), 0 3px 0 #bbb, 0 4px 0 #aaa, 0 5px 5px #444;
box-shadow: 0 3px 3px rgba(255,255,255,.1), 0 3px 0 #bbb, 0 4px 0 #aaa, 0 5px 5px #444;
-moz-border-radius: 10px;
-webkit-border-radius: 10px;
border-radius: 10px;
background-color: #f6f6f6;
background-image: -webkit-gradient(linear, left top, left bottom, from(#f6f6f6), to(#eae8e8));
background-image: -webkit-linear-gradient(top, #f6f6f6, #eae8e8);
background-image: -moz-linear-gradient(top, #f6f6f6, #eae8e8);
background-image: -ms-linear-gradient(top, #f6f6f6, #eae8e8);
background-image: -o-linear-gradient(top, #f6f6f6, #eae8e8);
background-image: linear-gradient(top, #f6f6f6, #eae8e8);
}
.form-wrapper #search {
width: 180px;
height: 20px;
padding: 10px 5px;
float: left;
font: bold 16px 'lucida sans', 'trebuchet MS', 'Tahoma';
border: 1px solid #ccc;
-moz-box-shadow: 0 1px 1px #ddd inset, 0 1px 0 #fff;
-webkit-box-shadow: 0 1px 1px #ddd inset, 0 1px 0 #fff;
box-shadow: 0 1px 1px #ddd inset, 0 1px 0 #fff;
-moz-border-radius: 3px;
-webkit-border-radius: 3px;
border-radius: 3px;
}
.form-wrapper #search:focus {
outline: 0;
border-color: #aaa;
-moz-box-shadow: 0 1px 1px #bbb inset;
-webkit-box-shadow: 0 1px 1px #bbb inset;
box-shadow: 0 1px 1px #bbb inset;
}
.form-wrapper #search::-webkit-input-placeholder {
color: #999;
font-weight: normal;
}
.form-wrapper #search:-moz-placeholder {
color: #999;
font-weight: normal;
}
.form-wrapper #search:-ms-input-placeholder {
color: #999;
font-weight: normal;
}
.thumb{position:relative;left:4px;top:1px; border:8px solid transparent;-webkit-box-shadow:0 0 8px rgba(0, 0, 0, 0.3);-moz-box-shadow:0 0 8px rgba(0, 0, 0, 0.3);box-shadow:0 0 8px rgba(0, 0, 0, 0.3);-webkit-background-clip:padding-box;-moz-background-clip:padding-box;background-clip:padding-box;}
.form-wrapper #submit {
float: right;
border: 1px solid #00748f;
height: 42px;
width: 70px;
padding: 0;
cursor: pointer;
font: bold 15px Arial, Helvetica;
color: #fafafa;
text-transform: uppercase;
background-color: #0483a0;
background-image: -webkit-gradient(linear, left top, left bottom, from(#31b2c3), to(#0483a0));
background-image: -webkit-linear-gradient(top, #31b2c3, #0483a0);
background-image: -moz-linear-gradient(top, #31b2c3, #0483a0);
background-image: -ms-linear-gradient(top, #31b2c3, #0483a0);
background-image: -o-linear-gradient(top, #31b2c3, #0483a0);
background-image: linear-gradient(top, #31b2c3, #0483a0);
-moz-border-radius: 3px;
-webkit-border-radius: 3px;
border-radius: 3px;
text-shadow: 0 1px 0 rgba(0, 0 ,0, .3);
-moz-box-shadow: 0 1px 0 rgba(255, 255, 255, 0.3) inset, 0 1px 0 #fff;
-webkit-box-shadow: 0 1px 0 rgba(255, 255, 255, 0.3) inset, 0 1px 0 #fff;
box-shadow: 0 1px 0 rgba(255, 255, 255, 0.3) inset, 0 1px 0 #fff;
}
.form-wrapper #submit:hover,
.form-wrapper #submit:focus {
background-color: #31b2c3;
background-image: -webkit-gradient(linear, left top, left bottom, from(#0483a0), to(#31b2c3));
background-image: -webkit-linear-gradient(top, #0483a0, #31b2c3);
background-image: -moz-linear-gradient(top, #0483a0, #31b2c3);
background-image: -ms-linear-gradient(top, #0483a0, #31b2c3);
background-image: -o-linear-gradient(top, #0483a0, #31b2c3);
background-image: linear-gradient(top, #0483a0, #31b2c3);
}
.form-wrapper #submit:active {
outline: 0;
-moz-box-shadow: 0 1px 4px rgba(0, 0, 0, 0.5) inset;
-webkit-box-shadow: 0 1px 4px rgba(0, 0, 0, 0.5) inset;
box-shadow: 0 1px 4px rgba(0, 0, 0, 0.5) inset;
}
.form-wrapper #submit::-moz-focus-inner {
border: 0;
}
</style>
<form class="form-wrapper" action="/search" method="get">
    <input id="search" name="q" type="text" placeholder="Search" />
    <input id="submit" type="submit" value="Search" />
</form>


4. Now save your HTML/Javascript'.

    You are done...
Read More

Thursday, August 23, 2012

Stylish Animated Blogger Recent Posts Widget

In this post will help you to create a recent post widget for your blogger. Its animated widget with thumbnail and Include with nice back ground. So you can try to add it to your blog.

Stylish Animated Blogger Recent Posts Widget

1. Log in to blogger  Design > Page Element.

2. Click Add Gadget and select 'HTML/Javascript

3.Now Paste Below code.

<script src="http://ajax.googleapis.com/ajax/libs/jquery/1.3.2/jquery.min.js" type="text/javascript"></script>     
<style type="text/css" media="screen">      
<!-- 
#spylist {     
overflow:hidden;      
margin-top:5px;      
padding:0px 0px;      
height:350px;      
}      
.spydate{      
overflow:hidden;      
font-size:10px;  }

#spylist ul{      
width:350px;      
overflow:hidden;      
list-style-type: none;      
padding: 0px 0px;      
margin:0px 0px;      
}      
#spylist li {      
width:230px;      
background: #1ed2f2;
list-style-type: none;
margin:0 0 5px 0px;
padding:5px 5px 1px 10px !important;
-webkit-transition:all 0.2s ease;-moz-transition:all 0.2s ease;-o-transition:all 0.2s ease;border: 0 none !important;-webkit-border-top-left-radius:40px;-webkit-border-bottom-right-radius:40px;-moz-border-radius-topleft:40px;-moz-border-radius-bottomright:40px;border-top-left-radius:40px;border-bottom-right-radius:40px; 
}     

#spylist li:hover { 
background: #84f6f5;

} 

#spylist li a {     
text-decoration:none;      
color:#4B545B;      
font-size:11px;      
height:18px;      
overflow:hidden;      
margin:0px 0px;      
padding:0px 0px 2px 0px;      
}      

#spylist li img {      
float:left;      
margin-right:5px;
margin-top:3px;       
background:none;      
border:0;      
}      

.spycomment{     
overflow:hidden;      
font-family:Tahoma,Arial,verdana, sans-serif;      
font-size:10px;      
color:#262B2F;      
padding:0px 0px;      
margin:0px 0px;      
} 
-->
</style>
 <script language='JavaScript'> 


imgr = new Array();

imgr[0] = "http://i43.tinypic.com/orpg0m.jpg";

imgr[1] = "http://i43.tinypic.com/orpg0m.jpg";

imgr[2] = "http://i43.tinypic.com/orpg0m.jpg";

imgr[3] = "http://i43.tinypic.com/orpg0m.jpg";

imgr[4] = "http://i43.tinypic.com/orpg0m.jpg";
showRandomImg = true;

boxwidth = 255;

cellspacing = 6;

borderColor = "#232c35";

bgTD = "#000000";

thumbwidth = 70;

thumbheight = 70;

fntsize = 12;

acolor = "#666";

aBold = true;

icon = " ";

text = "comments";

showPostDate = false;

summaryPost = 40;

summaryFontsize = 10;

summaryColor = "#666";

icon2 = " ";

numposts = 10;

home_page = "http://bloggertrix.com/";

limitspy=4
intervalspy=4000

</script>

<div id="spylist">
    <script src='http://dl.getdropbox.com/u/708209/scriptabufarhan/recentspy/recentpostthumbspy-min.js' type='text/javascript'></script>
</div><a style=" float:right;font-size:8px; color:#3B78CD; text-decoration:none;" href="http://bloggertrix.com">Blogger widget</a>


After paste above code
* Replace http://bloggertrix.com/ with your Site URL

4. Now save your HTML/Javascript'.

    You are done...
Read More

Wednesday, August 22, 2012

Activate Feedburner Recent Post Widget For Blogger

Recent post widget is more useful to blogger Actually, blogger also provided recent post widget.But sometime it take few more seconds to load.So, you can add recent post widget from Feedburner. This is cool widget and easy to install.You can follow these steps. Earlier I posted about How to add animated  recent post widget.

Feedburner-Recent-Post-Widget
1. Go to Feedburner

2. Now click Publicize like below image.
Feedburner-Recent-Post-Widget
3. Now click BuzzBoost on sidebar.

Feedburner-Recent-Post-Widget

4. Now you will get Feed Setting like below. you can setup as your like.

Feedburner-Recent-Post-Widget

5. Now click Activate Button

6. Now Use as a widget and click go

7. You can add it as blogger gadget.
     you are done.
Read More

Tuesday, August 21, 2012

Cool / Awesome Drop Down Menu Bar For Blogger

This tutorial will explain how to add cool drop down menubar for your blogger.Actually menubar is main thing of the blog.Because you can add main pages link with it, like contact us page,Privacy policy,Site-map, etc. So, you have to choose right menubar to your blog.Now i posted more quality menubars, you can add it as your like. Click below link to get all menubar tutorials.

Attractive menubar collection.

Blogger-Drop-Down-Menu-Bar

Demo

1.  Log in to blogger account > Go to Design >> Page Element

2. Click Add Gadget and select 'HTML/Javascript'

3. Paste below code.

<script src='http://bloggertrix.googlecode.com/files/menu1.js' type='text/javascript'></script>
<style>
#menu *{
margin:0px; padding:0px; list-style-type:none; text-decoration:none}
div#menu{position:relative}
#menu ul.menu{ white-space:nowrap}#menu ul.menu li{ display:inline-block; height:57px; position:relative}#menu ul.menu li div{ position:absolute; top:55px; left:0px}#menu ul.menu li div div{ position:absolute; top:-6px; left:176px}#menu ul.menu li div ul li{ display:block; float:none; width:auto; height:auto}#menu ul.menu li a{  padding-left:15px;  background-image:url("https://blogger.googleusercontent.com/img/b/R29vZ2xl/AVvXsEjMpGUaI7QiiaVBYHtCxZVvfzoQFGj4L06hrVT5Gvpyy9Y5JYYNBhC7b_ND8X2XyYBDjXmBnJDHSRHUmke5IwgpPWTiN8rJyZ8dLk9bUCUeTYGuv_BGUbxTXV6WALIUmtU9tMAUtvX8mVvK/s1600/menu_level1_item.png");  background-repeat:no-repeat;  background-position:left -1000px;  display:inline-block;  margin:6px 2px}#menu ul.menu li a span{  padding-right:15px;  padding-left:0px;  background-image:url("https://blogger.googleusercontent.com/img/b/R29vZ2xl/AVvXsEjMpGUaI7QiiaVBYHtCxZVvfzoQFGj4L06hrVT5Gvpyy9Y5JYYNBhC7b_ND8X2XyYBDjXmBnJDHSRHUmke5IwgpPWTiN8rJyZ8dLk9bUCUeTYGuv_BGUbxTXV6WALIUmtU9tMAUtvX8mVvK/s1600/menu_level1_item.png"); background-repeat:no-repeat; background-position:right -1000px; display:inline-block; height:40px; line-height:40px; cursor:pointer}#menu ul.menu li:hover a{ background-position:left -90px}#menu ul.menu li:hover a span{ background-position:right -135px}#menu ul.menu li.active a{ background-position:left 0px}#menu ul.menu li.active a span{ background-position:right -45px}#menu ul.menu li div ul li a{ display:block; padding:0px; margin:0px; background:none}#menu ul.menu li div ul li a span{ display:block; padding:0px; background:none; height:auto; line-height:25px; padding:10px 0 10px 12px; white-space:normal}#menu ul.menu li div{  width:194px;  padding-top:6px;  background-image:url("https://blogger.googleusercontent.com/img/b/R29vZ2xl/AVvXsEjdZS1VSEs-b7d6NJUvVGDXko-X7CBgAohV0uwBgwU46ajmpiT-0ILhvC-jzgsPYD8cW6y9n3Nr4B4CIIQtci46KdTXBsSjtP5oEdDAn9kPwwMUqmRYhCjALCm_F3717u57xSkRJKRicdIT/s1600/submenu-top.png");  background-repeat:no-repeat;  background-position:0px top}#menu ul.menu li div ul{  padding:9px;  padding-top:0;  background-image:url("https://blogger.googleusercontent.com/img/b/R29vZ2xl/AVvXsEguaCqpVtq9B2H85kZq4zCaBz56lj7zhcQRd0QjkYiHfgWtUhtRYeADy-ot7uwNVNYpjbb6lXrV26Z2DDpC8F690fa5hLK9qlUvhY_4SsLp3n55ETaDvyBqu8ysjI6rlGL3Aydt-nqap3Am/s1600/submenu-bottom.png"); background-repeat:no-repeat; background-position:0px bottom}#menu ul.menu ul li:hover{  background-repeat:repeat-x;  background-position:0% 100%;  background-image:url(https://blogger.googleusercontent.com/img/b/R29vZ2xl/AVvXsEi_itIbb7poOvawF4srD2QygdDd82-P9wyv6shaov5QX7yHr4JwO7Zp80xrs4GxRupoAS59hVzaaZWxbtu-IhlfltXBYYKq3Ad1hUvToNHGnE5NjBC1i26IGTJwBeRSptXIn9OyuhNy2xD6/s1600/menu_level2_item_hover.png)}#menu ul.menu ul li:hover>a{  background-repeat:repeat-x;  background-position:0% 0%;  background-color:transparent;  background-image:url(https://blogger.googleusercontent.com/img/b/R29vZ2xl/AVvXsEi_itIbb7poOvawF4srD2QygdDd82-P9wyv6shaov5QX7yHr4JwO7Zp80xrs4GxRupoAS59hVzaaZWxbtu-IhlfltXBYYKq3Ad1hUvToNHGnE5NjBC1i26IGTJwBeRSptXIn9OyuhNy2xD6/s1600/menu_level2_item_hover.png)}
#menu{  height:57px;  padding-left:14px;  background:transparent url(https://blogger.googleusercontent.com/img/b/R29vZ2xl/AVvXsEhvTa3-oGdIWnN2e70ZQlX4llbn_x5o8dp4nzR97q5TKYbWPK1_LxE5RrCtV37jxkcHpR9dwPX-ThpHjniKnHGtpYq_LmVBFIE67RkP-TG3dhgFPMFp5dpzusj0ehhFUEgkpPbVLlAMIW0n/s1600/page_header_b.png) repeat-x;
-webkit-border-radius: 20px;-khtml-border-radius: 10px; -moz-border-radius: 20px;border-radius: 10px;}
#menu span{ color:#edf0f1; text-shadow:0 -1px 1px #000}#menu li:hover>a>span { color:#fff; text-shadow:0 1px 1px #000,0 2px 10px #969696}#menu ul.menu li a span{ font-family:Arial; font-size:18px; font-weight:400}#menu ul.menu li div ul li a span{ font-family:Arial; font-size:15px; font-weight:400}#menu ul.menu li div ul{ padding-bottom:8px}#menu ul.menu li div ul li:first-child{ border-top-width:0px}#menu li>div{visibility:hidden}#menu li:hover>div{visibility:visible}/* */#menu ul.menu ul li:hover{ background-color:#393c45}#menu ul.menu li div ul li{ border-bottom:1px solid #70757b; border-top:1px solid #31363b}/* ie7 */#menu ul.menu li{ *zoom:1; *display:inline}#menu ul.menu li a{ *zoom:1; *display:inline}#menu ul.menu li a span{ *zoom:1; *display:inline}#menu ul.menu li div ul li a{ *display:inline}#menu ul.menu ul li:hover{ *background-image:none}#menu ul.menu ul li:hover>a{ *background-image:none}/* IE6 */#menu ul.menu li a{  _background-image:url("https://blogger.googleusercontent.com/img/b/R29vZ2xl/AVvXsEiOO7w8-fgMOsqFqaXyu3Lh9e0vajmGODDlAeOrv9jWWiA7z5yNat1cDe2gZ_ho1RuEpQTHNWVoLyd406TJpk8CWcP4O__STUT0b1dDQ8Ug4tuXrFjqjNZDNmW-fFo4qedD23BS0cu-Lvh8/s1600/menu_level1_item.gif")}#menu ul.menu li a span{  _background-image:url("https://blogger.googleusercontent.com/img/b/R29vZ2xl/AVvXsEiOO7w8-fgMOsqFqaXyu3Lh9e0vajmGODDlAeOrv9jWWiA7z5yNat1cDe2gZ_ho1RuEpQTHNWVoLyd406TJpk8CWcP4O__STUT0b1dDQ8Ug4tuXrFjqjNZDNmW-fFo4qedD23BS0cu-Lvh8/s1600/menu_level1_item.gif")}#menu ul.menu li div{  _background-image:url("https://blogger.googleusercontent.com/img/b/R29vZ2xl/AVvXsEg8Ch_Sphw5_ThLwQsnhCsgrpU56DMMhANdRg3u3sEL7DKuD_-1kuVYyfbxJEjA272-oksYIaEIqNBmNZ86XWoEQlXj7e6GUY45GoQAH6Gguarft-tQZB9YfMs2d73DE5dXtDkJNwJ9I9XD/s1600/submenu-top.gif");z-index:10}#menu ul.menu li div ul{  _background-image:url("https://blogger.googleusercontent.com/img/b/R29vZ2xl/AVvXsEiU1hUDrEaBAbK8cY4-mlsLc5ussRJ5eteKAoPMa0ztj8NJUyz769FH4cmbaVngrPkx7eUovjrP8E7bXk8MuBjtj84DlBzLZCavdGFm20Q3U5sXnp6xG9gpmX31fUW9cVwcADYtKkE9U_WC/s1600/submenu-bottom.gif")}#menu ul.menu li a:hover{ _background-position:left -90px}#menu ul.menu li a:hover span{ _background-position:right -135px}#menu div{_display:none}#menu div li:hover div{_display:block}#menu div li:hover li:hover div{_display:block}#menu div li:hover li:hover li:hover div{_display:block}/* */
</style>

<div id="menu">
    <ul class="menu">
        <li><a href="#" class="parent"><span>LINK 1</span></a>
        </li>
        <li><a href="#" class="parent"><span>LINK 2</span></a>
            <div><ul>
            <li><a href="#" class="parent"><span>ITEM 1</span></a>
                    <div><ul>
                      <li><a href="#"><span>ITEM 1.1</span></a>
                       <div><ul>
                        <li><a href="#"><span>ITEM 1.1.1</span></a></li>
                        <li><a href="#"><span>ITEM 1.1.2</span></a></li>
                        <li><a href="#"><span>ITEM 1.1.3</span></a></li>
                        <li><a href="#"><span>ITEM 1.1.4</span></a></li>
                       </ul></div>
                       </li>
 <li><a href="#"><span>ITEM 1.2</span></a></li>                                        <li><a href="#"><span>ITEM 1.3</span></a></li>
                        <li><a href="#"><span>ITEM 1.4</span></a></li>
                        <li><a href="#"><span>ITEM 1.5</span></a></li>
                        <li><a href="#"><span>ITEM 1.6</span></a></li>
                                        <li><a href="#"><span>ITEM 1.7</span></a></li>
                        <li><a href="#"><span>ITEM 1.8</span></a></li>
                        <li><a href="#"><span>ITEM 1.9</span></a></li>
                   </ul></div>
                </li>
                <li><a href="#" class="parent"><span>ITEM 2</span></a>
                </li>
 <li><a href="#" class="parent"><span>ITEM 3</span></a>
                </li>
 <li><a href="#" class="parent"><span>ITEM 4</span></a>
                </li>
             </ul></div>
        </li>           
    <li><a href="#" class="parent"><span>LINK 3</span></a></li>
<li><a href="#" class="parent"><span>LINK 4</span></a></li>
    <li><a href="#"><span>LINK 5</span>
        <li class="last"><a href="#"><span>LINK 6</span></a></li>

<li class="last"><a href="#"><span>LINK 7</span></a></li></a></li>

<li class="last"><a href="http://www.bloggertrix.com/"><span>Addthis</span></a></li>
</ul>
</div>


4. Save HTML/Javascript. you are done.
Read More

Monday, August 20, 2012

Blogger Social Sharing Widget With Rotation Hover Style

This social sharing include nice hover effect.Actually this help you to attractive your blog. Visitors will force to click it. Earlier also i added same sharing gadget but its hover effect is different.so you can try this. Earlier post here Follow these steps to add to your blog.
Demo

1. Log in to blogger  Design > Page Element.

2. Click Add Gadget and select 'HTML/Javascript

3.Now Paste Below code.


<style>
p#socialicons img {    -moz-transition: all 0.2s ease-in-out;    -webkit-transition: all 0.2s ease-in-out;    -o-transition: all 0.2s ease-in-out;    -ms-transition: all 0.2s ease-in-out;    transition: all 0.2s ease-in-out;} 
p#socialicons img:hover {    -moz-transform: rotate(70deg);    -webkit-transform: rotate(70deg);    -o-transform: rotate(70deg);    -ms-transform: rotate(70deg);    transform: rotate(70deg);}
p#socialicons1 img {    -moz-transition: all 0.8s ease-in-out;    -webkit-transition: all 0.8s ease-in-out;    -o-transition: all 0.8s ease-in-out;    -ms-transition: all 0.8s ease-in-out;    transition: all 0.8s ease-in-out;}
p#socialicons1 img:hover {    -moz-transform: rotate(360deg);    -webkit-transform: rotate(360deg);    -o-transform: rotate(360deg);    -ms-transform: rotate(360deg);    transform: rotate(360deg);} 
p#socialicons2 img {    -moz-transition: all 0.5s ease-in-out;    -webkit-transition: all 0.5s ease-in-out;    -o-transition: all 0.5s ease-in-out;    -ms-transition: all 0.5s ease-in-out;    transition: all 0.5s ease-in-out;} 
p#socialicons2 img:hover {    -moz-transform: rotate(-360deg);    -webkit-transform: rotate(-360deg);    -o-transform: rotate(-360deg);    -ms-transform: rotate(-360deg);    transform: rotate(-360deg);}</style>

<center><p id="socialicons">    
<a href="http://www.facebook.com/bloggertrix" target="_blank"><img border="0" src="https://blogger.googleusercontent.com/img/b/R29vZ2xl/AVvXsEi0pF3VWICqO7i7aJcSBnGGgHIh6yoKMvBkxi_c-WohqLwDgOMQtI-Dmuec5rucS8X0a3n1oJnZHnv-jNcDnyhsP4BxjU957LwU3wuyBfxhOxclG9esHe6_YOb0I3JSLPPM_HSq195scdw/s1600/bloggertrix.com-facebook-icon.png" /></a>    
<a href="http://www.twitter.com/bloggertrix/" target="_blank"><img border="0" src="https://blogger.googleusercontent.com/img/b/R29vZ2xl/AVvXsEiJM6XLKdSOD8af1ANKnyw4pm9WnwfRVVs6ZeXw-BKyfJ-r8SaOFuGton6neLC9rSACESucszFYUOGxssyBn9e3WYW0VhhYnjJ463tqZmbEHEKHEfJC-kDSoO8rRZbaEhOAIZtg-74dgn4/s1600/bloggertrix.com-twitter-icon.png" /></a>    
<a href="https://plus.google.com/107955298793879607964" target="_blank"><img border="0" src="https://blogger.googleusercontent.com/img/b/R29vZ2xl/AVvXsEgOzK7NVXyXbx6xzwKwcvvc-tV3hvOtRdeELmdZdTm815QNnORGuSnbiUDSSgUV2zygOwb5Bl9-xelbBJcwIaOBYCRKxzQuTqVNiIbx7_dOyMU1eh5xOU-X9kgUoDchI2QM-oY9K0NAoE4/s1600/bloggertrix.com-google-plus-icon.png" /></a>    
<a href="http://feeds.feedburner.com/bloggertrix/" target="_blank"><img border="0" src="https://blogger.googleusercontent.com/img/b/R29vZ2xl/AVvXsEjo49R5RTyBUjRyxDDjW11EL_gom_j_Ry8zqsDVt5kLkxB-Bo3_SLGsC5tDEjokpEe2hf_yFnVnySIP0SYG2jJmu1tPQVIb7xNDLf66a62D0bZZFcxAsDTDYoXLYdht-KnAUVDULmEr6jY/s1600/bloggertrix.com-rss-icon.png" /></a></p></center>

After paste above code
* Replace bloggertrix with your facebook username
*Replace bloggertrix  with your  twitter Username
*Replace 107955298793879607964 with Google plus id
*Replace bloggertrix with feedburner username

4. Now save your HTML/Javascript'.

    You are done...
Read More

Sunday, August 19, 2012

Add Blogger Page Number Navigation With Simple Steps

Most if page number navigation are not easy to add to your blog.Because, you have to do more steps to add it to your blog.This is just simple steps. you can add it like widget. Earlier also i posted about another page number navigation.This is deterrent with it.


Blogger-Page-Number-Navigation

1.  Log in to blogger account > Go to Design >> Page Element

2. Click Add Gadget and select 'HTML/Javascript'

3. Paste below code.

<style type='text/css'>
.showpageArea a {
text-decoration:none;
}
.showpageNum a {
 display: inline-block;
    padding: 0px 9px;
    margin-right: 4px;
    border-radius: 3px;
    border: solid 1px #c0c0c0;
    background: #e9e9e9;
    box-shadow: inset 0px 1px 0px rgba(255,255,255, .8), 0px 1px 3px rgba(0,0,0, .1);
    font-size: .875em;
    font-weight: bold;
    text-decoration: none;
    color: #717171;
    text-shadow: 0px 1px 0px rgba(255,255,255, 1);
}
.showpageNum a:hover {
padding: 0px 9px;
    margin-right: 4px;
    border-radius: 3px;
    border: solid 1px #c0c0c0;
    background: #de7d26;
    box-shadow: inset 0px 1px 0px rgba(255,255,255, .8), 0px 1px 3px rgba(0,0,0, .1);
    font-size: .875em;
    font-weight: bold;
    text-decoration: none;
    color: #717171;
    text-shadow: 0px 1px 0px rgba(255,255,255, 1)
}
.showpagePoint {
 display: inline-block;
    padding: 0px 9px;
    margin-right: 4px;
    border-radius: 3px;
    border: solid 1px #c0c0c0;
    background: #e9e9e9;
    box-shadow: inset 0px 1px 0px rgba(255,255,255, .8), 0px 1px 3px rgba(0,0,0, .1);
    font-size: .875em;
    font-weight: bold;
    text-decoration: none;
    color: #717171;
    text-shadow: 0px 1px 0px rgba(255,255,255, 1)
}
.showpageOf {
margin:0 3px 0 0;
padding:3px 7px;
text-decoration:none;
}
.showpage a {
 display: inline-block;
    padding: 0px 9px;
    margin-right: 4px;
    border-radius: 3px;
    border: solid 1px #c0c0c0;
    background: #e9e9e9;
    box-shadow: inset 0px 1px 0px rgba(255,255,255, .8), 0px 1px 3px rgba(0,0,0, .1);
    font-size: .875em;
    font-weight: bold;
    text-decoration: none;
    color: #717171;
    text-shadow: 0px 1px 0px rgba(255,255,255, 1)
}
.showpage a:hover {
text-decoration:none;
}
.showpageNum a:link, .showpage a:link {
color:#333333;
text-decoration:none;
}

</style>


<script type='text/javascript'>

var home_page_url = location.href;

var pageCount=1;
var displayPageNum=4;
var upPageWord ='Previous';
var downPageWord ='Next';

function showpageCount(json) {
var thisUrl = home_page_url;
var htmlMap = new Array();
var thisNum = 1;
var postNum=1;
var itemCount = 0;
var fFlag = 0;
var eFlag = 0;
var html= '';
var upPageHtml ='';
var downPageHtml ='';

for(var i=0, post; post = json.feed.entry[i]; i++) {

var timestamp1 = post.published.$t.substring(0,19)+post.published.$t.substring(23,29);
timestamp = encodeURIComponent(timestamp1);

var title = post.title.$t;

if(title!=''){
if(itemCount==0 || (itemCount % pageCount ==(pageCount-1))){
if(thisUrl.indexOf(timestamp)!=-1 ){
  thisNum = postNum;
}

if(title!='') postNum++;
htmlMap[htmlMap.length] = '/search?updated-max='+timestamp+'&max-results='+pageCount;
}
}
itemCount++;

}

for(var p =0;p< htmlMap.length;p++){
if(p>=(thisNum-displayPageNum-1) && p<(thisNum+displayPageNum)){
if(fFlag ==0 && p == thisNum-2){
if(thisNum==2){
 upPageHtml = '<span class="showpage"><a href="/">'+ upPageWord +'</a></span>';
}else{
 upPageHtml = '<span class="showpage"><a href="'+htmlMap[p]+'">'+ upPageWord +'</a></span>';
}

fFlag++;
}

if(p==(thisNum-1)){
html += '<span class="showpagePoint">'+thisNum+'</span>';
}else{
if(p==0){
  html += '<span class="showpageNum"><a href="/">1</a></span>';

}else{
 html += '<span class="showpageNum"><a href="'+htmlMap[p]+'">'+ (p+1) +'</a></span>';
}
}

if(eFlag ==0 && p == thisNum){
downPageHtml = '<span class="showpage"> <a href="'+htmlMap[p]+'">'+ downPageWord +'</a></span>';
eFlag++;
}
}
}

if(thisNum>1){
html = ''+upPageHtml+' '+html +' ';
}

html = '<div class="showpageArea"><span  class="showpageOf"> Pages ('+(postNum-1)+')</span>'+html;

if(thisNum<(postNum-1)){
html += downPageHtml;
}

if(postNum==1) postNum++;
html += '</div>';

var pageArea = document.getElementsByName("pageArea");
var blogPager = document.getElementById("blog-pager");

if(postNum <= 2){
html ='';
}

for(var p =0;p< pageArea.length;p++){
pageArea[p].innerHTML = html;
}

if(pageArea&&pageArea.length>0){
html ='';
}

if(blogPager){
blogPager.innerHTML = html;
}

}

function showpageCount2(json) {

var thisUrl = home_page_url;
var htmlMap = new Array();
var isLablePage = thisUrl.indexOf("/search/label/")!=-1;
var thisLable = isLablePage ? thisUrl.substr(thisUrl.indexOf("/search/label/")+14,thisUrl.length) : "";
thisLable = thisLable.indexOf("?")!=-1 ? thisLable.substr(0,thisLable.indexOf("?")) : thisLable;
var thisNum = 1;
var postNum=1;
var itemCount = 0;
var fFlag = 0;
var eFlag = 0;
var html= '';
var upPageHtml ='';
var downPageHtml ='';

var labelHtml = '<span class="showpageNum"><a href="/search/label/'+thisLable+'?&max-results='+pageCount+'">';
var thisUrl = home_page_url;

for(var i=0, post; post = json.feed.entry[i]; i++) {

var timestamp1 = post.published.$t.substring(0,19)+post.published.$t.substring(23,29);
timestamp = encodeURIComponent(timestamp1);

var title = post.title.$t;

if(title!=''){
if(itemCount==0 || (itemCount % pageCount ==(pageCount-1))){
if(thisUrl.indexOf(timestamp)!=-1 ){
 thisNum = postNum;
}

if(title!='') postNum++;
htmlMap[htmlMap.length] = '/search/label/'+thisLable+'?updated-max='+timestamp+'&max-results='+pageCount;

}
}
itemCount++;
}

for(var p =0;p< htmlMap.length;p++){
if(p>=(thisNum-displayPageNum-1) && p<(thisNum+displayPageNum)){
if(fFlag ==0 && p == thisNum-2){
if(thisNum==2){
 upPageHtml = labelHtml + upPageWord +'</a></span>';
}else{
 upPageHtml = '<span class="showpage"><a href="'+htmlMap[p]+'">'+ upPageWord +'</a></span>';
}

fFlag++;
}

if(p==(thisNum-1)){
html += '<span class="showpagePoint">'+thisNum+'</span>';
}else{
if(p==0){
 html = labelHtml+'1</a></span>';
}else{
 html += '<span class="showpageNum"><a href="'+htmlMap[p]+'">'+ (p+1) +'</a></span>';
}
}

if(eFlag ==0 && p == thisNum){
downPageHtml = '<span class="showpage"> <a href="'+htmlMap[p]+'">'+ downPageWord +'</a></span>';
eFlag++;
}
}
}

if(thisNum>1){
if(!isLablePage){
html = ''+upPageHtml+' '+html +' ';
}else{
html = ''+upPageHtml+' '+html +' ';
}
}

html = '<div class="showpageArea"><span  class="showpageOf"> Pages ('+(postNum-1)+')</span>'+html;

if(thisNum<(postNum-1)){
html += downPageHtml;
}

if(postNum==1) postNum++;
html += '</div>';

var pageArea = document.getElementsByName("pageArea");
var blogPager = document.getElementById("blog-pager");

if(postNum <= 2){
html ='';
}

for(var p =0;p< pageArea.length;p++){
pageArea[p].innerHTML = html;
}

if(pageArea&&pageArea.length>0){
html ='';
}

if(blogPager){
blogPager.innerHTML = html;
}

}

</script>
<script type='text/javascript'>

var thisUrl = home_page_url;
if (thisUrl.indexOf("/search/label/")!=-1){
if (thisUrl.indexOf("?updated-max")!=-1){
var lblname1 = thisUrl.substring(thisUrl.indexOf("/search/label/")+14,thisUrl.indexOf("?updated-max"));
}else{
var lblname1 = thisUrl.substring(thisUrl.indexOf("/search/label/")+14,thisUrl.indexOf("?&max"));
}
}

var home_page = "/";
if (thisUrl.indexOf("?q=")==-1){
if (thisUrl.indexOf("/search/label/")==-1){
document.write('<script src="'+home_page+'feeds/posts/summary?alt=json-in-script&callback=showpageCount&max-results=99999" ><\/script>')
}else{document.write('<script src="'+home_page+'feeds/posts/full/-/'+lblname1+'?alt=json-in-script&callback=showpageCount2&max-results=99999" ><\/script>')
}
}
</script>

By changing 1 and 4 , you can change how many page to view.

4. Save HTML/Javascript. you are done.
Read More

Saturday, August 18, 2012

Attractive Blogger Page Loading Effect With Jquery

This is  also another cool trick to your blog. Most of the time will take 2,3 seconds to view your blog.So, do you like to add some loading effect for that 2,3 seconds? So this is the right tutorial for you.This effect working with Jquery, You better to check the demo link below. You will figure-out , how will it works. Follow these steps to add it your blog.
Blogger-page-loading-Effect
DEMO

1. Log in to blogger account and Go to Design >> Edit HTML

2. Put checked marked in Expand Widget Templates

3. Find this tag by using Ctrl+F    </head>

4. Paste below code Before </head> tag

<style>
/*  bloggertrix.com */
#md-loading {
    position: fixed;
    z-index: 50;
    top: 0; left: 0;
    width: 100%; height: 100%;
    background: #FDFEF8 url(https://blogger.googleusercontent.com/img/b/R29vZ2xl/AVvXsEjk2koBKEi_qpMVfXkW8qOAWInAJ5ikPGOl304pcjpJTo1kzkL2ESxGyqIVv_vkA45bQQjYhEaAfnAF1BSrIFGhmBlzlmiQJWRtqPn-JOu0UcEMKU5JhAS_0BC5tctMPHOYzeie3qB2zrQ9/s1600/Bloggertrix-loading.gif) no-repeat center;
    line-height: 350px;
    text-align: center;
    font-size: 36px;
    color: #353231;
    text-indent: -9999px;
}
.MD #md-loading { display: none; }

@media only screen and (device-width: 768px) {
    #loading {
        position:absolute;
        width:1040px;
        min-height:768px;
    }
}
#md-progress-bar {
    position: absolute;
    top: 0; left: 0;
    background: #0d5ff6;
    opacity: 0.8;
    width: 0;
    height: 18px;
}
#md-loader {
    height: 100%;
    display: none;
}
</style>
<script>

(function($){

$("html").removeClass("MD");


$("#header").ready(function(){ $("#md-progress-bar").stop().animate({ width: "25%" },1500) });
$("#footer").ready(function(){ $("#md-progress-bar").stop().animate({ width: "75%" },1500) });


$(window).load(function(){

    $("#md-progress-bar").stop().animate({ width: "100%" },600,function(){
        $("#md-loading").fadeOut("fast",function(){ $(this).remove(); });
    });

});
})(jQuery);
</script>

5. Now Find this code  by using Ctrl+F <body>

6.  Paste 1 of below code after <body> code

* Add this code for showing this effect for all blog pages.
<div id='md-loading'><div 
id='md-progress-bar'></div><div 
id='md-loader'>Loading...</div></div>

* Add this code for showing this effect only home page.
<b:if cond='data:blog.url == data:blog.homepageUrl'> 

 <div id='md-loading'><div  
id='md-progress-bar'></div><div  
id='md-loader'>Loading...</div></div></b:if>

7. Now save your template
 you are done.
Read More

Friday, August 17, 2012

Stylish Jquery Slideshow To Blogger Sidebar

This is a jquery slideshow, Specially design for the sidebar.So you can add this featured slide show to your sidebar. So, your blog will looks like attractive.You can add this gadget easily.You can take a look at my earlier slideshows here. Im already added demo for this slideshow. you can check it,

Jquery-Slideshow

Demo

1. Log in to blogger  Design > Page Element.

2. Click Add Gadget and select 'HTML/Javascript

3.Now Paste Below code.

<style>
#slideshow {margin:50px auto;position:relative;width:240px;height:240px;padding:10px;box-shadow: 0 0 20px rgba(0,0,0,0.4);}
#slideshow > div {position:absolute;top:5px;left:-1px;right:10px;bottom:10px;}
</style>
<script src="http://ajax.googleapis.com/ajax/libs/jquery/1.5.2/jquery.min.js"></script>
<script>
$(function() {
$("#slideshow > div:gt(0)").hide();
setInterval(function() {
$('#slideshow > div:first')
.fadeOut(1000)
.next()
.fadeIn(1000)
.end()
.appendTo('#slideshow');
}, 3000);
});
</script>
<div id="slideshow">
<div>
<img alt="" class="icon-action" src="Image URL" /></div>
<div>
<img alt="" class="icon-action" src="Image URL" /></div>
<div>
<img alt="" class="icon-action" src="Image URL" /></div>
</div>

After paste above code
* Replace Image URL with your Image URLs
* Better to you 250x250 resolution images

4. Now save your HTML/Javascript'.

    You are done...
Read More

Thursday, August 16, 2012

Adding Numbers For Threaded Commenting In Blogger

This Post will helps you to add numbers inside  threaded comments.It will appear like 3, 3.a, 3.b, 3.c like that.To add this trick, you have to add threaded comments system for your blog.Im already provide screenshot for it. Follow these steps.

comment-numbers


1. Log in to blogger account & Go to Design >> Edit HTML

2. Find this code  by using Ctrl+F  ]]></b:skin>

3.Paste below code Before ]]></b:skin> code
.comment-thread ol {
    counter-reset: countcomments;
}
 
.comment-thread li:before {
    content: counter(countcomments,decimal);
    counter-increment: countcomments;
    float: right;
    font-size: 22px;
    color: #555555;
    padding-left: 10px;
    padding-top: 3px;
    background: url(https://blogger.googleusercontent.com/img/b/R29vZ2xl/AVvXsEigmnYNuQNQlFuEhgpUsag_0giAYvc0q1suxh7MgtDAtz-cyDZ6Mo6QlImIprcogcgJsz1K2OI_4Q9VEXwosUknaT9QFmU7LIOWJxl1yrqQisJH7bM2eKlCSTJj2uF1omb4hDNj9e8Q-NVR/s1600/commnetbt.png) no-repeat;
    margin-top: 7px;
    margin-left: 10px;
    width: 50px;
    height: 48px;

}
 
.comment-thread ol ol {
    counter-reset: contrebasse;
}
 
.comment-thread li li:before {
    content: counter(countcomments,decimal) "." counter(contrebasse,lower-latin);
    counter-increment: contrebasse;
    float: right;
    font-size: 18px;
    color: #666666;
}

4. Now Click  Save Template.
    You are done...
Read More

Wednesday, August 15, 2012

Add V2 Style Popular Posts Widget With Multi Color For Blogger

This is about Popular post widget. Actually earlier i posted about How To Add Multi-Color Popular Posts Widget For Blogger. So this is also same, But, this design is different, Its look Like round corners. You can add this effect with easily,You can try it.

Multi-Color Blogger Popular Posts


1. Log in to blogger account & Go to Design >> Edit HTML

2. Find this code  by using Ctrl+F  ]]></b:skin>

3.Paste below code Before ]]></b:skin> code
#PopularPosts1 ul li a:hover{color:#fff;text-decoration:none}
#PopularPosts1 ul li a {-webkit-text-size-adjust: auto; -webkit-text-stroke-width: 0px;  color: #333333; display: block; font-family: Georgia, 'Times New Roman', Times, serif; font-size: 13px; font-style: normal; font-variant: normal; font-weight: normal; letter-spacing: normal; line-height: 18px; margin: 0px 40px 0px 0px; min-height: 30px; orphans: 2; padding: 0px; text-align: -webkit-auto; text-decoration: none !important; text-indent: 0px; text-transform: none; white-space: normal; widows: 2; word-spacing: 0px;}
#PopularPosts1 ul li .item-thumbnail{float:left;border:0;margin-right:10px;background:transparent;padding:0;width:51px;height:51px}
#PopularPosts1 ul li:first-child:after,
#PopularPosts1 ul li:first-child + li:after,
#PopularPosts1 ul li:first-child + li + li:after,
#PopularPosts1 ul li:first-child + li + li + li:after,
#PopularPosts1 ul li:first-child + li + li + li + li:after,
#PopularPosts1 ul li:first-child + li + li + li + li + li:after,
#PopularPosts1 ul li:first-child + li + li + li + li + li + li:after,
#PopularPosts1 ul li:first-child + li + li + li + li + li + li + li:after,
#PopularPosts1 ul li:first-child + li + li + li + li + li + li + li + li:after,
#PopularPosts1 ul li:first-child + li + li + li + li + li + li + li + li + li:after{position:absolute;top:10px;right:5px;border-radius:50%;border:2px solid #ccc;background:#353535;-webkit-box-shadow:0px 0px 5px #000;-moz-box-shadow: 0px 0px 5px #000;width:30px;height:30px;line-height:1em;text-align:center;font-size:28px;color:#fff}
#PopularPosts1 ul li:first-child + li + li + li + li + li + li + li {background:#DF01D7;width:90%}
#PopularPosts1 ul li:first-child + li + li + li + li + li + li + li:after{content:"8"}
#PopularPosts1 ul li:first-child + li + li + li + li + li + li + li +li{background:#B041FF;width:90%}
#PopularPosts1 ul li:first-child + li + li + li + li + li + li + li + li:after{content:"9"}
#PopularPosts1 ul li:first-child + li + li + li + li + li + li + li +li +li{background:#F52887;width:90%}
#PopularPosts1 ul li:first-child + li + li + li + li + li + li + li + li + li:after{content:"10"}
#PopularPosts1 ul li:first-child + li + li + li + li +li{background:#7ee3c7;width:90%}
#PopularPosts1 ul li:first-child + li + li + li + li + li:after{content:"6"}
#PopularPosts1 ul li:first-child + li + li + li + li + li +li{background:#f6993d;width:90%}
#PopularPosts1 ul li:first-child + li + li + li + li + li + li:after{content:"7"}
#PopularPosts1 ul li:first-child + li + li + li + li{background:#33c9f7;width:90%}
#PopularPosts1 ul li:first-child + li + li + li + li:after{content:"5"}
#PopularPosts1 ul li:first-child + li + li + li{background:#c7f25f;width:90%}
#PopularPosts1 ul li:first-child + li + li + li:after{content:"4"}
#PopularPosts1 ul li:first-child + li + li{background:#ffde4c;width:90%}
#PopularPosts1 ul li:first-child + li + li:after{content:"3"}
#PopularPosts1 ul li:first-child + li{background:#ff764c; width:90%}
#PopularPosts1 ul li:first-child + li:after{content:"2"}
#PopularPosts1 ul li:first-child{background:#ff4c54 ;width:90%}
#PopularPosts1 ul li:first-child:after{content:"1"}
#PopularPosts1 ul{margin:0;padding:0px 0;list-style-type:none}
#PopularPosts1 ul li{position:relative;margin:6px 0;border-radius:25px 0px 25px 0px;border:2px solid #f7f7f7;-webkit-box-shadow:3px 3px 3px #000;-moz-box-shadow: 3px 3px 3px #000;padding:10px}


4. Now Click  Save Template.
    You are done...
Read More

Tuesday, August 14, 2012

How To Show YouTube Activity Feed On Your Blogger

This is nice widget for your blog. It will help you to show your YouTube activity feed on your blogger.Follow these steps to add it to your blog.

1. Log in to blogger  Design > Page Element.

2. Click Add Gadget and select 'HTML/Javascript

3.Now Paste Below code.

<script src='http://code.jquery.com/jquery-latest.js' type='text/javascript'></script>
    <style type="text/css">
    div.ytc {clear:both;padding:5px;font-size:11px;}
    div.ytc.odd {background-color: #eee;}
    div.ytc_thumb {position:relative;float:right;margin-left:4px;line-height:1;}
    div.ytc_thumb img {width:69px;height:52px;border:1px solid #888;}
    div.ytc_title {font-weight:bold;}
    </style>
    <script type='text/javascript'>
    var ytfUserName = "YouTube Username";
    var ytfMaxResults = 8;
    var ytfAllow = "";
    var ytfDisallow = "";
    var ytfEmpty = "No entries";

    $(document).ready(function() {
      $.getJSON("http://pipes.yahoo.com/pipes/pipe.run?_id=58c841d14337ba4fbf693abd9701dc49&_render=json&max-results="+ytfMaxResults+"&allow="+ytfAllow+"&disallow="+ytfDisallow+"&user="+ytfUserName+"&_callback=?", function(response) {
        var htm = "";
        for(var i=0;i<response.count;i++) {
          var item = response.value.items[i];
          htm += '<div class="ytc';
          if(i%2 == 1) htm += ' odd';
          htm += '"><div class="ytc_thumb"><a target="_blank" href="' + item.link + '"><img title="' + item.title + '" src="' + item.thumb + '"/></a></div>';
          htm += '<div class="ytc_title"><a target="_blank" href="' + item.link + '">' + item.title + '</a></div>';
          htm += '<div class="ytc_description">' + item.description + '</div><div style="clear:both;"></div></div>';
        }
        if(htm == "") htm = ytfEmpty;
        $("#ytfeed").html(htm);
      });
    });
    </script>
    <div id="ytfeed">Loading...</div>


After paste above code
* Replace YouTube Username with your youtube username.

4. Now save your HTML/Javascript'.

    You are done...
Read More

Sunday, August 12, 2012

Blogger Labels / Category With Cool Css3 Style

This is also cool trick for change your blogger labels, category with nice style. you can see below image. Its looks so great,Earlier i posted about same trick Change Blogger Label Links As Brick / Box Style. Follow below steps to add it to your blog.

blogger-lables


1. Log in to blogger account & Go to Design >> Edit HTML

2. Find this code  by using Ctrl+F  ]]></b:skin>

3.Paste below code Before ]]></b:skin> code

.label-size {
    float: left;
    margin: 0 0 7px 20px;
    position: relative;
    font-family: 'Helvetica Neue', Helvetica, Arial, sans-serif;
    font-size: 0.75em;
    font-weight: bold;
    text-decoration: none;
    color: #996633;
    text-shadow: 0px 1px 0px rgba(255,255,255,.4);
    padding: 0.417em 0.417em 0.417em 0.917em;
    border-top: 1px solid #d99d38;
    border-right: 1px solid #d99d38;
    border-bottom: 1px solid #d99d38;
    -webkit-border-radius: 0 0.25em 0.25em 0;
    -moz-border-radius: 0 0.25em 0.25em 0;
    border-radius: 0 0.25em 0.25em 0;
    background-image: -webkit-linear-gradient(top, rgb(254, 218, 113), rgb(254, 186, 71));
    background-image: -moz-linear-gradient(top, rgb(254, 218, 113), rgb(254, 186, 71));
    background-image: -o-linear-gradient(top, rgb(254, 218, 113), rgb(254, 186, 71));
    background-image: -ms-linear-gradient(top, rgb(254, 218, 113), rgb(254, 186, 71));
    background-image: linear-gradient(top, rgb(254, 218, 113), rgb(254, 186, 71));
    filter: progid:DXImageTransform.Microsoft.gradient(GradientType=0,StartColorStr='#feda71', EndColorStr='#feba47');
    -webkit-box-shadow: inset 0 1px 0 #faeaba,
        0 1px 1px rgba(0,0,0,.1);
    -moz-box-shadow: inset 0 1px 0 #faeaba,
        0 1px 1px rgba(0,0,0,.1);
    box-shadow: inset 0 1px 0 #faeaba,
        0 1px 1px rgba(0,0,0,.1);
    z-index: 1;
}
 
.label-size:before {
    content: '';
    width: 1.30em;
    height: 1.39em;
    background-image: -webkit-linear-gradient(left top, rgb(254, 218, 113), rgb(254, 186, 71));
    background-image: -moz-linear-gradient(left top, rgb(254, 218, 113), rgb(254, 186, 71));
    background-image: -o-linear-gradient(left top, rgb(254, 218, 113), rgb(254, 186, 71));
    background-image: -ms-linear-gradient(left top, rgb(254, 218, 113), rgb(254, 186, 71));
    background-image: linear-gradient(left top, rgb(254, 218, 113), rgb(254, 186, 71));
    filter: progid:DXImageTransform.Microsoft.gradient(GradientType=1,StartColorStr='#feda71', EndColorStr='#feba47');
    position: absolute;
    left: -0.69em;
    top: .2em;
    -webkit-transform: rotate(45deg);
    -moz-transform: rotate(45deg);
    -o-transform: rotate(45deg);
    transform: rotate(45deg);
    border-left: 1px solid #d99d38;
    border-bottom: 1px solid #d99d38;
    -webkit-border-radius: 0 0 0 0.25em;
    -moz-border-radius: 0 0 0 0.25em;
    border-radius: 0 0 0 0.25em;
    z-index: 1;
}
 
.label-size:after {
    content: '';
    width: 0.5em;
    height: 0.5em;
    background: #fff;
    -webkit-border-radius: 4.167em;
    -moz-border-radius: 4.167em;
    border-radius: 4.167em;
    border: 1px solid #d99d38;
    -webkit-box-shadow: 0 1px 0 #faeaba;
    -moz-box-shadow: 0 1px 0 #faeaba;
    box-shadow: 0 1px 0 #faeaba;
    position: absolute;
    top: 0.667em;
    left: -0.083em;
    z-index: 9999;
}
 
#Label1 {
    height: 210px;
}
 
.label-size:hover {
    background-image: -webkit-linear-gradient(top, rgb(254, 225, 141), rgb(254, 200, 108));
    background-image: -moz-linear-gradient(top, rgb(254, 225, 141), rgb(254, 200, 108));
    background-image: -o-linear-gradient(top, rgb(254, 225, 141), rgb(254, 200, 108));
    background-image: -ms-linear-gradient(top, rgb(254, 225, 141), rgb(254, 200, 108));
    background-image: linear-gradient(top, rgb(254, 225, 141), rgb(254, 200, 108));
    filter: progid:DXImageTransform.Microsoft.gradient(GradientType=0,StartColorStr='#fee18d', EndColorStr='#fec86c');
    border-color: #e1b160;
}
 
.label-size:hover:before {
    background-image: -webkit-linear-gradient(left top, rgb(254, 225, 141), rgb(254, 200, 108));
    background-image: -moz-linear-gradient(left top, rgb(254, 225, 141), rgb(254, 200, 108));
    background-image: -o-linear-gradient(left top, rgb(254, 225, 141), rgb(254, 200, 108));
    background-image: -ms-linear-gradient(left top, rgb(254, 225, 141), rgb(254, 200, 108));
    background-image: linear-gradient(left top, rgb(254, 225, 141), rgb(254, 200, 108));
    filter: progid:DXImageTransform.Microsoft.gradient(GradientType=1,StartColorStr='#fee18d', EndColorStr='#fec86c');
    border-color: #e1b160;
}

4. Now Click  Save Template.

    You are done...
Read More