Showing posts with label Widget. Show all posts

Monday, February 6, 2017

How To Add an Instagram Widget in a Blogger Blog

File Under: , , 3 comments

Instagram is a most popular picture and photo sharing network application for smartphones.It's also belong to social networking platform like Facebook, Twitter, and Flicker.You can register as a user in Instagram. When you post a photo or video on Instagram, It will display on your profile.So, others can follow you, like on your photos and comment on photos.Same thing also you can do, comment and like other photos. In instagram, there are 200 millions  active users use a month.

Read:  Best blogger Widgets 2017 for Blogger

Adding Instagram widget to blogger, you can get more facilities to your blog. Because it will show your photos in profile pages. When ever you go some where else, you can take a photo and share it on Instagram. There are more filters you can add to photos. This Instagram widget, specially design for blogger and it will show your images on blogger even they are not your follower.

Add-Instagram-Widget-Blogger
By adding this Instagram widget for blogger ,You can increase your follower. Once they visit your blog and if your shared photos are interesting, they will follow you. And you have to share photos according to your blog content,for example if you doing  food  making blog, you can share about foods.It will easy to get more followers in Instagram.

Today, this article will explain, how to add  Instagram widget to your blog site with step by step. By using this blogger widget  you can customize Instagram widget appearance like background color, font color and how to show this widget on blogger.So just follow below steps.

How to Add An Instagram Widget in Blogger


1: You need to visit this site to get Instagram widget  http://www.intagme.com/

2: Type Instagram  username first

3: You can choose slideshow as Widget type

4: Thumbnail Size 100

5: You can select Photo Border  If you want a border to photos

6: You can choose Background Color match to your template color with color picker

7: If you want to add sharing button select Yes
Instagram-Widget-Blogger
      Note: Once yo done, click preview and check your Instagram widget appearance.

8: Once you are done click Get Code and copy it.

9: Now just login to your blogger account https://www.blogger.com

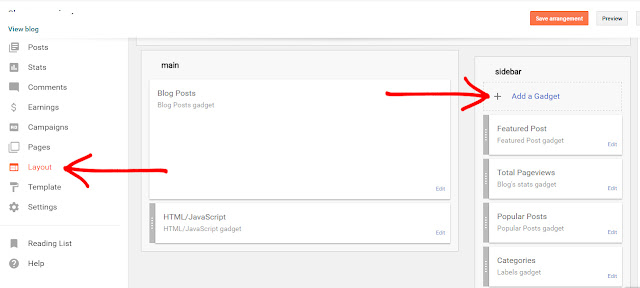
10: Go to layout on left side bar on blogger dashboard
add-Widget-Blogger


11: Click Add Gadget,  Select HTML/JavaScript gadget on popup window.

add-Widget-Blogger

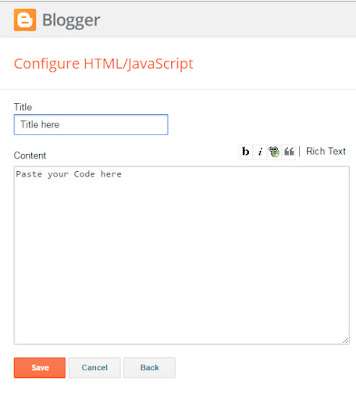
12: Paste the instagram widget code that you copied from intagme website and click Save

add-Widget-Blogger-instragram
13: Now you can drag the widget where you want to keep and click Save Arrangement

You are done

I hope you added Instagram widget to your blog.Hence, you can share photos and videos as i said above. To change color or appearance of this Instagram widget, you can go that site and edit it as your need.

Read: Best Blogger Gadgets 2017 for Blogger

Once you added Instagram widget to blogger, you can ask your visitors to follow you. Before do it, just make sure to add few photos to your profile and profile photos as well.Then they will get trust about you profile and follow you.

If you have a question about this Instagram widget for blogger gadget, You can comment below. If this article helps you, just spend moment share with Facebook twitter and follow us on Facebook and Twitter
Read More

Saturday, December 31, 2016

Animated Happy New Year 2017 Widget for Blogger

File Under: , , , , 13 comments

This is the first bloggertrix article for 2017. Wish you happy new year 2017 for all bloggers. For this new year, most of are like to show new year wishing widget and decorations to your blog. So, This article helps to add animated Happy New Year 2017 Widget for Blogger. Today I'm gonna share unique style Happy New year 2017 widget for your blog.  Its pretty easy to add to your blog. This will work for every blogger templates. I added demo for this widget. You can view it from below demo link before add it to your blog.

If you want to Add  New Year 2017 Fireworks Decoration  you can visit below article.

New Year Decorations :


/Happy-New-Year-2017-Widget


How to add Animated Happy New Year 2017 Widget for Blog


1. Go to Blogger Dashboard > Template
2. Backup your template
3. Click on Edit HTML
4. Find  <body>   and add below code just after it
<div style="position:fixed;top:0;right:40px;z-index:5000">
<img src="https://blogger.googleusercontent.com/img/b/R29vZ2xl/AVvXsEhg9CiUD3Cdu21T1isKPxMqqUcAZvm5Mzf-Ec4h_D5Yl5yiBaUh9McxaP0oET6adF1OA0CpBk9F9OQhS5-0dhTnty2zDz4KN8vEj0LlIhhZO904bfl8ChELxsfSCZKUA608mokRl4gRkv9w/s1600/bloggertrix2017.gif" /></div>

5. Now save your  Template  You are done. If you have any problem related to this Happy New Year 2017 widget. Just leave a comment.I will help you. Hope you can be a successful blogger in this year..

Author Bio: Sohan Jayasinghe is the owner and author of Bloggertrix.com .He has been blogging since 2009 and writing Blogger trix since 2010.If you want to contact him, Just leave a message via contact us page or connect with facebook or twitter
Read More

Tuesday, December 20, 2016

How to Add Animate Christmas Tree Widget for Blogger

File Under: , , , 3 comments

Few more days for biggest Christmas festival. As a blog writer, you can prepare for it by decorate your blog. So, today I'm gonna share new unique tutorial about how to add animate Christmas tree widget for your blog. This will works with every blogger templates.You can check  demo before add it your blog.

You can check our  previous snow effects tricks.

More Christmas Decorations :

Christmas-Tree-widget


How to add Christmas Tree widget for blog


1. Go to Blogger Dashboard > Template
2. Backup your template
3. Click on Edit HTML
4. Find  <body>   and add below code just after it
<div style="position:absolute;top:0;right:40px;">
<img src="https://blogger.googleusercontent.com/img/b/R29vZ2xl/AVvXsEgRF_xKeuJKyQHY6ig7-bYvSoOserYNKn36_d58IV7Z1S_uQkn9yPnIHC1CoYna-xUrVY4DvZUBdCyorryYS-fkgTJROn05yrQmWhBZ-mN77qvQabxxsTLlWZz67QUCTK4_JJAFtPFHDJ8G/s1600/tree.gif" /></div>
<div style="position:absolute;top:240px;right:15px;"><img src="https://blogger.googleusercontent.com/img/b/R29vZ2xl/AVvXsEhglORiYkrZIE98-mI5NL9Swh4qNj9yTV0qUjcQtwJDAr4-6XzrF-I-0HnH31p09BjMspIHQXzVPjd6hfIGFFyEZr_LXFtDXA2-UreI4j4AqS4hY0N-iHgTi9k80W7qohpDALG2xGw0KuGY/s1600/christmas.gif" /></div>
6. Now save your  Template  You are done. If you have any problem related to this Christmas tree widget. Just leave a comment.I will help you.

Author Bio: Sohan Jayasinghe is the owner and author of Bloggertrix.com .He has been blogging since 2009 and writing Blogger trix since 2010.If you want to contact him, Just leave a message via contact us page or connect with facebook or twitter
Read More

Saturday, December 3, 2016

How to add Unique Snow Falling Effect to Blogger

File Under: , , 14 comments

Most of blogger are use snow falling effect to their blog. It is a common trend all bloggers to in specific seasons.Snow falling effects are very famous in Christmas season. Sometime, evrn we search about snow falling effects for blogger, hard to get working versions.Therefore, today we will learn how to add snow falling effect to your blog.You can check our  previous snow effects tricks.

Must Read :

snow falling effect


Awesome 3d Effect CSS Menu bar for Blogger


1. Go to Blogger Dashboard > Template
2. Find </head> tag
3. Paste below code just above it.

<script src="https://ajax.googleapis.com/ajax/libs/jquery/1.7.1/jquery.js"></script>        
<script src="http://preview.bloggertrix.com/bloggertrix_christmas/snow.js"></script>      <style>
img.bg {
        min-height: 100%;min-width: 1024px;
        width: 100%; height: auto;
        position: fixed; top: 0;left: 0;}
h1 {
font-family: 'Chelsea Market', cursive;
color: #FFF;font-size: 90px;text-align: center;line-height: 95px;font-weight: normal;
margin-top: 350px;text-shadow: 5px 5px 5px #000;
}
@media screen and (max-width: 1024px) { /* Specific to this particular image */
        img.bg { left: 50%;margin-left: -512px;   /* 50% */}
}
html, body {
font-family: Helvetica, Arial, sans-serif;font-size: 12px; line-height: 16px; padding: 0;
margin: 0;color: #333;
}
.bar {background-color: #111;color: #f0f0f0; box-shadow: 0px 0px 2px #333;
line-height: 25px;padding: 0px 20px;opacity: 0.7;
}
.bar:hover {opacity: 1;}
.bar a {color: #DDD;}
.bar a:hover {color: #FFFFFF;}
a { color: #CCC; text-decoration: none; }
a:hover { color: #FFFFFF; }
#canvas {border: 1px solid black;position: absolute;z-index: 10000; }
#flake {color: #fff;position: absolute; font-size: 25px;top: -50px;}
#page {position: relative;}
</style>
4.  Again find <body>
5. Paste below code after <body> tag.
<div id = "flake">&#10052;</div>
6. Now save your  Template  You are done. If you have any problem related to this snow falling effect. Just leave a comment.I will help you.

Author Bio: Sohan Jayasinghe is the owner and author of Bloggertrix.com .He has been blogging since 2009 and writing Blogger trix since 2010.If you want to contact him, Just leave a message via contact us page or connect with facebook or twitter
Read More

Wednesday, June 10, 2015

Awesome 3d Effect Css Menu bar for Blogger

File Under: , , , 26 comments

Today i came up with new blogger widget, its a smooth 3d effect menu bar with jquery.You can add it to your blogger and make it some more nice.From the beginning, i gave lot of menu bar collection for blogger.
Did you check them  all?

If not Click below link
Awesome CSS Menubar For blogger

3d_Effect_Css_Menu


Awesome 3d Effect Css Menu bar for Blogger


1. Go to Blogger Dashboard > Template
2. Find ]]></b:skin>
3. Paste below code just below it.

<style>
@import url(http://fonts.googleapis.com/css?family=Raleway);
#cssmenu,
#cssmenu ul,
#cssmenu ul li,
#cssmenu ul li a,
#cssmenu #menu-button {margin: 0;padding: 0;border: 0;list-style: none;line-height: 1;display: block;position: relative;-webkit-box-sizing: border-box;-moz-box-sizing: border-box;box-sizing: border-box;}
#cssmenu:after,
#cssmenu > ul:after {content: ".";display: block;clear: both;visibility: hidden;line-height: 0;height: 0;}
#cssmenu #menu-button {display: none;}
#cssmenu {width: auto;font-family: Raleway, sans-serif;line-height: 1;}
#cssmenu > ul {background: #3db2e1;}
#cssmenu > ul > li {float: left;-webkit-perspective: 1000px;-moz-perspective: 1000px;perspective: 1000px;}
#cssmenu.align-center > ul {font-size: 0;text-align: center;}
#cssmenu.align-center > ul > li {display: inline-block;float: none;}
#cssmenu.align-right > ul > li {float: right;}
#cssmenu > ul > li > a {padding: 16px 20px;font-size: 14px;color: #ffffff;letter-spacing: 1px;text-transform: uppercase;text-decoration: none;background: #3db2e1;-webkit-transition: all .3s;-moz-transition: all .3s;
  -o-transition: all .3s;transition: all .3s;-webkit-transform-origin: 50% 0;-moz-transform-origin: 50% 0;transform-origin: 50% 0;-webkit-transform-style: preserve-3d;-moz-transform-style: preserve-3d;transform-style: preserve-3d;
}
#cssmenu > ul > li.active > a {color: #dff2fa;
}
#cssmenu > ul > li:hover > a,
#cssmenu > ul > li > a:hover {color: #dff2fa;-webkit-transform: rotateX(90deg) translateY(-23px);-moz-transform: rotateX(90deg) translateY(-23px);transform: rotateX(90deg) translateY(-23px);
  -ms-transform: none;
}
#cssmenu > ul > li > a::before {position: absolute;top: 100%;left: 0;z-index: -1;-webkit-box-sizing: border-box;-moz-box-sizing: border-box;box-sizing: border-box;width: 100%;height: 100%;padding: 16px 20px;color: #dff2fa;background: #19799f;content: attr(data-title);
  -webkit-transition: background 0.3s;-moz-transition: background 0.3s;transition: background 0.3s;-webkit-transform: rotateX(-90deg);-moz-transform: rotateX(-90deg);transform: rotateX(-90deg);
  -webkit-transform-origin: 50% 0;-moz-transform-origin: 50% 0;transform-origin: 50% 0;-ms-transform: translateY(- -18px);
}
#cssmenu > ul > li:hover > a::before,
#cssmenu > ul > li > a:hover::before { background: #3db2e1;}
#cssmenu.small-screen {width: 100%;}
#cssmenu.small-screen > ul,
#cssmenu.small-screen.align-center > ul {
  width: 100%;
  text-align: left;
}
#cssmenu.small-screen > ul > li,
#cssmenu.small-screen.align-center {
  float: none;
  display: block;
  border-top: 1px solid rgba(100, 100, 100, 0.1);
}
#cssmenu.small-screen > ul > li:hover > a,
#cssmenu.small-screen > ul > li > a:hover {
  color: #dff2fa;
  -webkit-transform: none;
  -moz-transform: none;
  transform: none;
  -ms-transform: none;
}
#cssmenu.small-screen > ul > li > a::before {
  display: none;
}
#cssmenu.small-screen #menu-button {
  display: block;padding: 16px 20px;cursor: pointer;font-size: 14px;text-decoration: none;color: #ffffff;text-transform: uppercase;letter-spacing: 1px;background: #3db2e1;}
#cssmenu.small-screen #menu-button:after {
  content: "";position: absolute;right: 20px;top: 17px;display: block;-webkit-box-sizing: content-box;-moz-box-sizing: content-box;box-sizing: content-box;border-top: 2px solid #ffffff;border-bottom: 2px solid #ffffff;width: 22px;height: 3px;
}
#cssmenu.small-screen #menu-button.menu-opened:after {
  border-top: 2px solid #dff2fa;
  border-bottom: 2px solid #dff2fa;
}
#cssmenu.small-screen #menu-button:before {
  content: "";position: absolute;right: 20px;top: 27px;display: block;width: 22px;
  height: 2px;
  background: #ffffff;
}
#cssmenu.small-screen #menu-button.menu-opened:before {
  background: #dff2fa;
}

  </style>
<script src="http://code.jquery.com/jquery-latest.min.js" type="text/javascript"></script> <script charset='utf-8' src='http://preview.bloggertrix.com/3d_cssmenu/script.js' type='text/javascript'/> 
       

4. Now go to blogger Layout
5. Click Add Gadget and select 'HTML/Javascript'
6. Paste below code.
<div id='cssmenu'>
<ul>
   <li class='active'><a href='#'>Home</a></li>
   <li><a href='#'>Products</a></li>
   <li><a href='#'>Company</a></li>
   <li><a href='#'>Contact</a></li>
</ul>
</div>


7. Now save your HTML/Javascript'.You are done. If you have any problem related to this 3d Effect Css Menu bar. Just leave a comment.I will help to you.

Author Bio: Sohan Jayasinghe is the owner and author of Bloggertrix.com .He has been blogging since 2009 and writing Blogger trix since 2010.If you want to contact him, Just leave a message via contact us page or connect with facebook or twitter
Read More

Saturday, December 27, 2014

How to Add 2015 New Year Fireworks Decoration for Blogger

File Under: , , , 23 comments

Hi friends,Today i came up with new blogger tricks, its a awesome fireworks decoration for 2015 new year using JavaScript.It can be add it to your blog easily.This scripts works for every modern browsers. if you are interesting with it check below link before add it to your blogger. Hope this helps to decorate your personal blog,blogger tricks blog in this  new year 2015.

Add-2015-New-Year-Fireworks-Decoration-for-Blogger

Awesome Lights Effect Widget for Blogger


How to Add Christmas Lights Widget for Blogger


1. Go to Blogger Dashboard > Template
2. Backup your template
3. Click on Edit HTML
4. Find  </body>   and add below code just before it
<script type="text/javascript">
// <![CDATA[
var bits=80; // how many bits
var speed=33; // how fast - smaller is faster
var bangs=5; // how many can be launched simultaneously (note that using too many can slow the script down)
var colours=new Array("#03f", "#f03", "#0e0", "#93f", "#0cf", "#f93", "#f0c");
//                     blue    red     green   purple  cyan    orange  pink

var bangheight=new Array();
var intensity=new Array();
var colour=new Array();
var Xpos=new Array();
var Ypos=new Array();
var dX=new Array();
var dY=new Array();
var stars=new Array();
var decay=new Array();
var swide=800;
var shigh=600;
var boddie;

if (typeof('addRVLoadEvent')!='function') function addRVLoadEvent(funky) {
  var oldonload=window.onload;
  if (typeof(oldonload)!='function') window.onload=funky;
  else window.onload=function() {
    if (oldonload) oldonload();
    funky();
  }
}

addRVLoadEvent(light_blue_touchpaper);

function light_blue_touchpaper() { if (document.getElementById) {
  var i;
  boddie=document.createElement("div");
  boddie.style.position="fixed";
  boddie.style.top="0px";
  boddie.style.left="0px";
  boddie.style.overflow="visible";
  boddie.style.width="1px";
  boddie.style.height="1px";
  boddie.style.backgroundColor="transparent";
  document.body.appendChild(boddie);
  set_width();
  for (i=0; i<bangs; i++) {
    write_fire(i);
    launch(i);
    setInterval('stepthrough('+i+')', speed);
  }
}}
function write_fire(N) {
  var i, rlef, rdow;
  stars[N+'r']=createDiv('|', 12);
  boddie.appendChild(stars[N+'r']);
  for (i=bits*N; i<bits+bits*N; i++) {
    stars[i]=createDiv('*', 13);
    boddie.appendChild(stars[i]);
  }
}
function createDiv(char, size) {
  var div=document.createElement("div");
  div.style.font=size+"px monospace";
  div.style.position="absolute";
  div.style.backgroundColor="transparent";
  div.appendChild(document.createTextNode(char));
  return (div);
}
function launch(N) {
  colour[N]=Math.floor(Math.random()*colours.length);
  Xpos[N+"r"]=swide*0.5;
  Ypos[N+"r"]=shigh-5;
  bangheight[N]=Math.round((0.5+Math.random())*shigh*0.4);
  dX[N+"r"]=(Math.random()-0.5)*swide/bangheight[N];
  if (dX[N+"r"]>1.25) stars[N+"r"].firstChild.nodeValue="/";
  else if (dX[N+"r"]<-1.25) stars[N+"r"].firstChild.nodeValue="\\";
  else stars[N+"r"].firstChild.nodeValue="|";
  stars[N+"r"].style.color=colours[colour[N]];
}
function bang(N) {
  var i, Z, A=0;
  for (i=bits*N; i<bits+bits*N; i++) {
    Z=stars[i].style;
    Z.left=Xpos[i]+"px";
    Z.top=Ypos[i]+"px";
    if (decay[i]) decay[i]--;
    else A++;
    if (decay[i]==15) Z.fontSize="7px";
    else if (decay[i]==7) Z.fontSize="2px";
    else if (decay[i]==1) Z.visibility="hidden";
    if (decay[i]>1 && Math.random()<.1) {
       Z.visibility="hidden";
       setTimeout('stars['+i+'].style.visibility="visible"', speed-1);
    }
    Xpos[i]+=dX[i];
    Ypos[i]+=(dY[i]+=1.25/intensity[N]);

  }
  if (A!=bits) setTimeout("bang("+N+")", speed);
}
function stepthrough(N) {
  var i, M, Z;
  var oldx=Xpos[N+"r"];
  var oldy=Ypos[N+"r"];
  Xpos[N+"r"]+=dX[N+"r"];
  Ypos[N+"r"]-=4;
  if (Ypos[N+"r"]<bangheight[N]) {
    M=Math.floor(Math.random()*3*colours.length);
    intensity[N]=5+Math.random()*4;
    for (i=N*bits; i<bits+bits*N; i++) {
      Xpos[i]=Xpos[N+"r"];
      Ypos[i]=Ypos[N+"r"];
      dY[i]=(Math.random()-0.5)*intensity[N];
      dX[i]=(Math.random()-0.5)*(intensity[N]-Math.abs(dY[i]))*1.25;
      decay[i]=16+Math.floor(Math.random()*16);
      Z=stars[i];
      if (M<colours.length) Z.style.color=colours[i%2?colour[N]:M];
      else if (M<2*colours.length) Z.style.color=colours[colour[N]];
      else Z.style.color=colours[i%colours.length];
      Z.style.fontSize="13px";
      Z.style.visibility="visible";
    }
    bang(N);
    launch(N);
  }
  stars[N+"r"].style.left=oldx+"px";
  stars[N+"r"].style.top=oldy+"px";
}
window.onresize=set_width;
function set_width() {
  var sw_min=999999;
  var sh_min=999999;
  if (document.documentElement && document.documentElement.clientWidth) {
    if (document.documentElement.clientWidth>0) sw_min=document.documentElement.clientWidth;
    if (document.documentElement.clientHeight>0) sh_min=document.documentElement.clientHeight;
  }
  if (typeof(self.innerWidth)!="undefined" && self.innerWidth) {
    if (self.innerWidth>0 && self.innerWidth<sw_min) sw_min=self.innerWidth;
    if (self.innerHeight>0 && self.innerHeight<sh_min) sh_min=self.innerHeight;
  }
  if (document.body.clientWidth) {
    if (document.body.clientWidth>0 && document.body.clientWidth<sw_min) sw_min=document.body.clientWidth;
    if (document.body.clientHeight>0 && document.body.clientHeight<sh_min) sh_min=document.body.clientHeight;
  }
  if (sw_min==999999 || sh_min==999999) {
    sw_min=800;
    sh_min=600;
  }
  swide=sw_min;
  shigh=sh_min;
}
// ]]>
</script><a href="http://www.bloggertrix.com/"></a>
 Hint: If you want change fireworks colors. you have to change red color code with new color codes.
4. Now save your Template.

You are done. If you have any problem related with this new blogger tricks , New Year Fireworks Decoration for Blogger. Just leave a comment or  message .I will help to you.

Author Bio: Sohan Jayasinghe is the owner and author of Bloggertrix.com .He has been blogging since 2009 and writing Blogger trix since 2010.If you want to contact him, Just leave a message via contact us page or connect with facebook or twitter

Read More

Saturday, December 20, 2014

Add Christmas Snow Falling Effect With Snowman for Blogger

File Under: , , , , 4 comments

How you friends? Hope you all doing great. Christmas seasons is coming,For this 2014 season you can decorate your blog with snow falling effect.So this post will help you to add Snow falling effect for your blog. last Christmas season, i posted about how to add  light decoration for your blog. if you are interesting with it check below link. Both are included with demo. Hope this help.

/Add_Christmas_Snow_Falling_Effect_With_Snowman_for_Blogger

Awesome Christmas Lights Widget for Blogger


How to Add Christmas Lights Widget for Blogger


1. Go to Blogger Dashboard > Template
2. Backup your template
3. Click on Edit HTML
4. Find  <body>   and add below code just after it
<script src='https://ajax.googleapis.com/ajax/libs/jquery/1.11.1/jquery.min.js' type='text/javascript'></script>
<script src='http://code.jquery.com/jquery-migrate-1.2.1.js' type='text/javascript'</script>
<script type='text/javascript'>
//<![CDATA[
(function(b){b.snowfall=function(a,d){function s(c,f,g,h,j){this.id=j;this.x=c;this.y=f;this.size=g;this.speed=h;this.step=0;this.stepSize=e(1,10)/100;if(d.collection)this.target=m[e(0,m.length-1)];c=b(document.createElement("div")).attr({"class":"snowfall-flakes",id:"flake-"+this.id}).css({width:this.size,height:this.size,background:d.flakeColor,position:"absolute",top:this.y,left:this.x,fontSize:0,zIndex:d.flakeIndex});b(a).get(0).tagName===b(document).get(0).tagName?(b("body").append(c),a=b("body")):
b(a).append(c);this.element=document.getElementById("flake-"+this.id);this.update=function(){this.y+=this.speed;this.y>n-(this.size+6)&&this.reset();this.element.style.top=this.y+"px";this.element.style.left=this.x+"px";this.step+=this.stepSize;this.x+=Math.cos(this.step);if(d.collection&&this.x>this.target.x&&this.x<this.target.width+this.target.x&&this.y>this.target.y&&this.y<this.target.height+this.target.y){var b=this.target.element.getContext("2d"),c=this.x-this.target.x,a=this.y-this.target.y,
e=this.target.colData;if(e[parseInt(c)][parseInt(a+this.speed+this.size)]!==void 0||a+this.speed+this.size>this.target.height)if(a+this.speed+this.size>this.target.height){for(;a+this.speed+this.size>this.target.height&&this.speed>0;)this.speed*=0.5;b.fillStyle="#fff";e[parseInt(c)][parseInt(a+this.speed+this.size)]==void 0?(e[parseInt(c)][parseInt(a+this.speed+this.size)]=1,b.fillRect(c,a+this.speed+this.size,this.size,this.size)):(e[parseInt(c)][parseInt(a+this.speed)]=1,b.fillRect(c,a+this.speed,
this.size,this.size));this.reset()}else this.speed=1,this.stepSize=0,parseInt(c)+1<this.target.width&&e[parseInt(c)+1][parseInt(a)+1]==void 0?this.x++:parseInt(c)-1>0&&e[parseInt(c)-1][parseInt(a)+1]==void 0?this.x--:(b.fillStyle="#fff",b.fillRect(c,a,this.size,this.size),e[parseInt(c)][parseInt(a)]=1,this.reset())}(this.x>l-i||this.x<i)&&this.reset()};this.reset=function(){this.y=0;this.x=e(i,l-i);this.stepSize=e(1,10)/100;this.size=e(d.minSize*100,d.maxSize*100)/100;this.speed=e(d.minSpeed,d.maxSpeed)}}
function p(){for(c=0;c<j.length;c+=1)j[c].update();q=setTimeout(function(){p()},30)}var d=b.extend({flakeCount:35,flakeColor:"#ffffff",flakeIndex:999999,minSize:1,maxSize:2,minSpeed:1,maxSpeed:5,round:false,shadow:false,collection:false,collectionHeight:40},d),e=function(b,a){return Math.round(b+Math.random()*(a-b))};b(a).data("snowfall",this);var j=[],f=0,c=0,n=b(a).height(),l=b(a).width(),i=0,q=0;if(d.collection!==false)if(f=document.createElement("canvas"),f.getContext&&f.getContext("2d"))for(var m=
[],f=b(d.collection),k=d.collectionHeight,c=0;c<f.length;c++){var g=f[c].getBoundingClientRect(),h=document.createElement("canvas"),r=[];if(g.top-k>0){document.body.appendChild(h);h.style.position="absolute";h.height=k;h.width=g.width;h.style.left=g.left;h.style.top=g.top-k;for(var o=0;o<g.width/d.minSize;o+=d.minSize)r[o]=[];m.push({element:h,x:g.left,y:g.top-k,width:g.width,height:k,colData:r})}}else d.collection=false;b(a).get(0).tagName===b(document).get(0).tagName&&(i=25);b(window).bind("resize",
function(){n=b(a).height();l=b(a).width()});for(c=0;c<d.flakeCount;c+=1)f=j.length,j.push(new s(e(i,l-i),e(0,n),e(d.minSize*100,d.maxSize*100)/100,e(d.minSpeed,d.maxSpeed),f));d.round&&b(".snowfall-flakes").css({"-moz-border-radius":d.maxSize,"-webkit-border-radius":d.maxSize,"border-radius":d.maxSize});d.shadow&&b(".snowfall-flakes").css({"-moz-box-shadow":"1px 1px 1px #555","-webkit-box-shadow":"1px 1px 1px #555","box-shadow":"1px 1px 1px #555"});p();this.clear=function(){b(a).children(".snowfall-flakes").remove();
j=[];clearTimeout(q)}};b.fn.snowfall=function(a){if(typeof a=="object"||a==void 0)return this.each(function(){new b.snowfall(this,a)});else if(typeof a=="string")return this.each(function(){var a=b(this).data("snowfall");a&&a.clear()})}})(jQuery);
//]]>
</script>
<script type='text/javascript'>
//<![CDATA[

jQuery(document).ready(function(){
    jQuery(document).snowfall({
        flakeCount : 800,
        flakeColor : "#ffffff",
        flakeIndex: 999999,
        minSize : 1,
        maxSize : 4,
        minSpeed : 2,
        maxSpeed : 8,
        round : true,
        shadow : false,
    });
});
//]]>
</script>
<style>.btriman {position:absolute;top:0;right:0;}#btrixposition {position:relative;}</style>
<div id="btrixposition"><img src="https://blogger.googleusercontent.com/img/b/R29vZ2xl/AVvXsEjb-Xx2Ym4-GEYz1tHrQEjo1d2GofGUf7SvO757Dq-ccxTBskZh-2KVEdlYJzapFILQJD1FXr9irXQ-FmxgjGsAM0qagxKa0cwP4nXCBHD-uX2Lz_2Tv7zvuuNa1Ti9vTXZiK4YP3JwaQkm/s1600/Bloggertrixman.png" class="btriman"/><a href="http://www.bloggertrix.com/"></a></div>
 Hint: If you want, you can change above red value as your like.
4. Now save your Template.

You are done. If you have any problem related to this Christmas Lights Widget for Blogger. Just leave a comment or  message .I will help to you.

Author Bio: Sohan Jayasinghe is the owner and author of Bloggertrix.com .He has been blogging since 2009 and writing Blogger trix since 2010.If you want to contact him, Just leave a message via contact us page or connect with facebook or twitter
Read More

Monday, December 23, 2013

Awesome Christmas Lights Widget for Blogger

File Under: , 14 comments

For this Christmas vacation, I hope to give flash lighting for decorate your blog.This is just CSS effect with animation.Every modern browsers support with this decoration. You can add this Christmas Lights effect as widget with simple steps.Use below button for demo.

https://blogger.googleusercontent.com/img/b/R29vZ2xl/AVvXsEg1LLu84SXPhXt48TOkGRQn2oj9rDS2t5mxMVQqkPyyJxNX-viLCZSYO3U6GZOwxSNA04aFyfKCD_t2t94p5Angyaq9i8l58ManaQYWHHoPpd4JP2NkZ0IWcyhaavrp4ZKe6Ov7oTxFUP4/s320/christmas-lights.gif


How to Add Christmas Lights Widget for Blogger


1. Go to Blogger Dashboard > Layout
2. Click Add Gadget and select 'HTML/Javascript'
3. Paste below code.
<div style='position: fixed; top: 0%; right: 0%;'/>
<a href="http://www.bloggertrix.com/" target="_blank"><img alt="Blog Tips" src="https://blogger.googleusercontent.com/img/b/R29vZ2xl/AVvXsEhTFHYuC8a93tsz2D8xJVtWQcOZae8HzyO79gChw7MQxec6vX-1h_ntCaHQJuWG9BrKvZ3BbyNkVTqKF6yFSjEhfkTQOrQ4dsilaDHLe9h3TWRfw4nXq7rMzndHxyPYLZCS9NSXAqdMI7zP/s1600/flashing+christmas+lights%255B12%255D.gif"/></a>
</div>
<div style='position: fixed; top: 0%; left: 0%;'/>
<a href="http://www.bloggertrix.com/" target="_blank"><img alt="Blog Tips" src="https://blogger.googleusercontent.com/img/b/R29vZ2xl/AVvXsEhTFHYuC8a93tsz2D8xJVtWQcOZae8HzyO79gChw7MQxec6vX-1h_ntCaHQJuWG9BrKvZ3BbyNkVTqKF6yFSjEhfkTQOrQ4dsilaDHLe9h3TWRfw4nXq7rMzndHxyPYLZCS9NSXAqdMI7zP/s1600/flashing+christmas+lights%255B12%255D.gif"/></a>
</div>
4. Now save your HTML/Javascript'.

You are done. If you have any problem related to this Christmas Lights Widget for Blogger. Just leave a comment.I will help to you.
Author Bio: Sohan Jayasinghe is the owner and author of Bloggertrix.com .He has been blogging since 2009 and writing Blogger trix since 2010.If you want to contact him, Just leave a message via contact us page.
Read More

Sunday, September 1, 2013

Stylish Jquery Animated Tabs Widget for Blogger

File Under: , , 5 comments

Tab widgets always help to save website space.In this tutorial im gonna explain how to add Unique juery tab widget for blogger.We can use add few pages for tab widgets.jQuery tabs are very stylish and very popular for blogging.This is a simple jquery tab widget.I used Css and jQuery to make this widget.This tab widget work with every modern web browsers.However its not work with IE. you can take a look at in demo page to get idea how it works. 

Jquery+Animated+Tabs+Widget

How to add Jquery Animated Tabs Widget to Blogger


1. Go to Blogger Dashboard > Template
2. Find ]]></b:skin>
3. Paste below code just below it.

<style>
.b, .c{ display:none;}
.buttons{
    border-bottom:solid #d1c8b8 4px;
    display:block;
    padding:8px;
    width:80px;-moz-border-radius: 1em 4em 1em 4em;
    border-radius: 1em 4em 1em 4em;
    text-align:center;
    margin:1px;
    background:#4b7975;
    text-decoration:none; color:#FFFFFF;
    float:left;font-family:Georgia, "Times New Roman", Times, serif; font-size:14px
}
.buttonHover{background:#86b8b4;border-bottom:solid #FF0000 4px;}
a.buttons:hover{background:#86b8b4;border-bottom:solid #FF0000 4px;}
#multitab {
    background:#919b9d;
    text-align:justify;
    overflow:hidden;
    color:#fff;
    padding:20px;
    -moz-border-radius: 1em 4em 1em 4em;
    border-radius: 1em 4em 1em 4em;    height:200px;
    width:272px;
}
#multwrap{
    text-align:left;
    overflow:hidden;
    width:350px;
    height:380px;
}
  </style>

<script type='text/javascript'>
// <![CDATA[
$(document).ready(function() {
    $("#first-tab").addClass('buttonHover');
});
function navigate_tabs(container, tab)
{  
    $(".b").css('display' , 'none');
    $(".c").css('display' , 'none');
    $(".a").css('display' , 'none');
  
    $("#first-tab").removeClass('buttonHover');
    $("#second-tab").removeClass('buttonHover');
    $("#third-tab").removeClass('buttonHover');
  
    $("#"+tab).addClass('buttonHover');
    $("."+container).show('slow');
}
// ]]>
</script>
<script charset='utf-8' src='https://bloggertrixcode.googlecode.com/files/jquery1.2.6.js' type='text/javascript'/> 
4. Now go to blogger Layout
5. Click Add Gadget and select 'HTML/Javascript'
6. Paste below code.
<div id="multwrap">
 <a href="javascript:navigate_tabs('a','first-tab');" class="buttons" id="first-tab">Tab 1</a>
<a href="javascript:navigate_tabs('b','second-tab');" class="buttons" id="second-tab">Tab 2</a>
<a href="javascript:navigate_tabs('c','third-tab');" class="buttons" id="third-tab">Tab 3</a>
   <br clear="all" />
      <div id="multitab" align="center">
          <div class="a">
                <em>B</em>logger is a blog-publishing service that allows private or multi-user blogs with time-stamped entries. It was developed by Pyra Labs, which was bought by Google in 2003. Generally, the blogs are hosted by Google at a subdomain of blogspot.com.  <br />  <br /> Thanks!

                </div>
                <div class="b"><em>L</em>orem Ipsum is simply dummy text of the printing and typesetting industry. Lorem Ipsum has been the industry's standard dummy text ever since the 1500s, when an unknown printer took a galley of type and scrambled it to make a type specimen book. It has survived not only five centuries, but also the leap into electronic typesetting, remaining essentially unchanged.

                </div>
                <div class="c"><em>S</em>tarting in February 2013 Blogger began integrating user blogs with multiple country specific URL addresses i.e. exampleuserblogname.blogspot.com would be automatically redirected to exampleuserblogname.blogspot.ca in Canada, exampleuserblogname.blogspot.co.uk in the United Kingdom etc. </div>
</div> </div>
</div>
Note:  You can past any text or code  with replacing above 3 different texts.

7. Now save your HTML/Javascript'.
You are done. If you have any problem related to this Jquery Animated Tabs Widget. Just leave a comment.I will help to you.
Read More

Saturday, August 24, 2013

Stylish Social Media Widget with Search Box

File Under: , , , 4 comments

Social media is very important in these days.In this tutorial im gonna explain,how to add social media widget with search box for blogger.Social media always helps to bring quality and fast traffic to your blog.All bloggers must use social medias sites like Facebook, Twitter,Linkdin.By sing this social media widget, you can link with your social profiles.And other thing is, this widget include with search box too. So, you can save your blogger side bar space by using this 2 in 1 widget.In this  post  im gonna  explain  how to add social media  widget with light search box for your blog. Im using css3 and HTML for this widget. you can take a look at in demo page.

Stylish+Social+Media+Widget+Search+Box

1. Go to Blogger Dashboard > Layout
2. Click Add Gadget and select 'HTML/Javascript'
3. Paste below code.


<style>
#btrixwidget{width:307px;
padding:0 0 5px 0;
border:1px solid black;}
#btrix-searchbox {
    border-radius: 5px;
    background: URL(https://blogger.googleusercontent.com/img/b/R29vZ2xl/AVvXsEhaYIfsBR7OKMwA67bc6YUPFPHyC9NQCjVhFgunGtdf03XlueS2PngPuWmKplejUXXe8RfILra-GCjrv2m_gIq6ElypvA3alUeGlX7kY9Jry4-5yXSBqoTq-_dvFJ5YLHnecYWZ-k5nGO1j/s1600/blue.png) no-repeat scroll center center transparent;
    width: 307px;height: 50px;disaply: block;}
form#btrix-searchform {
    display: block;padding: 9px 16px; margin: 0;}
 form#btrix-searchform #s {
    padding-left: 24px !important;padding: 7.5px;margin: 0;width: 198px;
    font-size: 16px;font-family: georgia;font-style: italic;color: #666666;vertical-align: top; border: none;background: transparent;}
 form#btrix-searchform
#sbutton {margin: 0;padding: 0;height: 40px;width: 74px;vertical-align: top;
    border: none;background: transparent;}
</style>
<div id="btrixwidget"><center>
<a href="http://twitter.com/bloggertrix" target="_blank" wrc_done="true"><img src="https://blogger.googleusercontent.com/img/b/R29vZ2xl/AVvXsEidt68o9W-rAnmAjc_1msmXYENzYQ2lKsTl9DeaCJ0-Lcv_Twwg7obIv_Zi20rfQRBILMTVQkvnqKgh4sUzwVACglujfaqBZwwqg_9-kKS8R8d7ErgSVdmG1_Fg0sT3gVxIXiHC0VpN9hc/s1600/btrix-twitter.png" alt="" title="twitter" width="62" height="78" class="alignnone size-full wp-image-6249"></a>

<a href="http://www.facebook.com/bloggertrix" target="_blank" wrc_done="true"><img src="https://blogger.googleusercontent.com/img/b/R29vZ2xl/AVvXsEgO9RkKx95iA1_TJPKY8QuKCZttMc3gF18_1-LRLGEW6TOdD6RPaHd1NwMGGlPQTAbhsenhT2EC1XEgVdd-F1UAU0_5Uzy4pjxERrm8Jrn3x6KozB1TJSjavnof0XDhEiYNb_ScEcbxRuY/s1600/btrix-facebook.png" alt="" title="facebook" width="62" height="78" class="alignnone size-full wp-image-6248"></a>

<a href="http://feeds.feedburner.com/bloggertrix" target="_blank" wrc_done="true"><img src="https://blogger.googleusercontent.com/img/b/R29vZ2xl/AVvXsEhDgWDgnX6ckWlvF0ZYKdGCuFfbVKV_zQ6MwPF7U2v07F17Etkizl46aRjp9Wnb9p9VVJIOUsoB2NaMR7K-EzFI-xnXZN2BVxuK76ED1kTP7nvddINLxDbeJ6pIgzEnT2rwI6IRcWhOWug/s1600/btrix-rss.png" alt="" title="rss" width="62" height="78" class="alignnone size-full wp-image-6251"></a>

<a href="http://au.linkedin.com/username" target="_blank" wrc_done="true"><img src="https://blogger.googleusercontent.com/img/b/R29vZ2xl/AVvXsEjGtED51H8L7umH-y-K4G-lPL0xu5-U-1gyb2s_7hyphenhyphenWZnfURwSQcaRy13t3fA3bhslk-FpZeoy1uS2QqnLAL-IGMZugneCj4mTKSK65leGVc5xV1har3PXzScFff0N2x22AyOiZLFkelZU/s1600/btrix-linkedin.png" alt="" title="linkedin" width="62" height="78" class="alignnone size-full wp-image-6250"></a>

<div id="btrix-searchbox">
    <form id="btrix-searchform" action="/search" method="get">
        <input type="text" id="s" name="q" value="Search..." onfocus='if (this.value == "Search...") {this.value = ""}'
        onblur='if (this.value == "") {this.value = "Search...";}' />
        <input type="image" src="http://img1.blogblog.com/img/blank.gif" id="sbutton"
        />
    </form>
</div>
</center>
</div>

Replace bloggertrix with your twitter profile
Replace bloggertrix with your facebook profile
Replace bloggertrix with your feedburner profile
Replace username with your linkedin profile

4. Now save your HTML/Javascript'.

You are done. If you have any problem related to this Stylish Social Media Widget. Just leave a comment.I will help to you.
Read More

Thursday, August 1, 2013

Dynamic Floating Social Bookmark Widget for Blogger

File Under: , , 22 comments

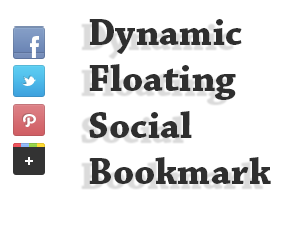
Social media networks always great resource to get traffic.Every bloggers love to get huge traffic for their blog.Therefore we have to be active in social medias site.Because we need  get lot of followers and friends.In this tutorial im gonna explain How to add Dynamic Floating Social Bookmark Widget for Blogger.It helps to increase your followers and friends.This Floating Social Bookmark Widget shows on every pages in bloggers. You can link your social media profile Facebook, Twitter Pinterest and Google plus. It will help to get new followers and friends to your profile.Check below link for demo.
Floating-Social-Bookmark


You may like these articles
How to Add Fixed Social Media Sidebar for Blogger
Awesome 8 tips to Increase Google Plus Followers
Smooth Sliding Social Media Widget For Blogger
Extracting Hover Style Social Media Widget for Blogger

How to Add Unique Rss Subscribe Widget For blogger


1. Log in to blogger account and Click drop down.
blog-post-option
2. Now select "Template"

3. Find this tag by using Ctrl+F   </head>
    Note: First click on template code (anywhere of code), After that press  Ctrl+F

4. Paste below code before </head> tag

<script src='http://ajax.googleapis.com/ajax/libs/jquery/1.3.2/jquery.min.js' type='text/javascript'/> 
<script language='javascript'> 
var name = &quot;#floatMenu&quot;;
var menuYloc = null;
$(document).ready(function(){menuYloc = 
parseInt($(name).css(&quot;top&quot;).substring(0,$(name).css 
(&quot;top&quot;).indexOf(&quot;px&quot;)))
$(window).scroll(function () { offset = menuYloc+$(document).scrollTop()+&quot;px&quot;;$(name).animate({top:offset},{duration:1000,queue:false});});}); 
#floatMenu {
position:absolute;top:150px;float:left;width:45px;}
#floatMenu ul {list-style: none;}
#floatMenu ul li a {-webkit-transform:scale(0.6);-moz-transform:scale(0.6);-o-transform:scale(0.6);-webkit-transition-duration: 0.5s;-moz-transition-duration: 0.5s;-o-transition-duration: 0.5s;opacity: 0.8;}
#floatMenu ul li a:hover {-webkit-transform:scale(1);-moz-transform:scale(1);-o-transform:scale(1);opacity: 1;}
</style>


5. Now again Find this tag by using Ctrl+F   </body>
    Note: First click on template code (anywhere of code), After that press  Ctrl+F

6. Paste below code before </body> tag

<div id='floatMenu'>
<ul>
<li><a href='http://facebook.com/bloggertrix' target='_blank'><img border='0' src='https://blogger.googleusercontent.com/img/b/R29vZ2xl/AVvXsEhqwR17TGn5Yl6scrKBKQQcdKREZwtewY9RKxiBY7_jbX6jAh5DAp38UAhXWgqKdP7JOaggc_CMMKbzHfsha8X7DJnmsRRmNRNgFFGjyJw39DwfGliSBz1TRTHTGoWrxWjXFIFdA_tqTqs/s1600/btrix-facebook.png' style='margin-bottom: 3px;' title='Follow Me On  Facebook'/></a></li>
<li><a href='http://twitter.com/bloggertrix' target='_blank'><img border='0' src='https://blogger.googleusercontent.com/img/b/R29vZ2xl/AVvXsEi8K2psjJGZB4ATwBfJYAyR6MyN3W2sD_phBXDcx4poLp3jrwJLa0yjr5Qv1Pys6MiEURy7sCVGwPx09AyUIcBgVupqivenpgbnz4UkFn33u6N03WeQVS2V9PFUStyj45xVhaOgFt4g_zE/s1600/btrix-twitter.png' style='margin-bottom: 3px;' title='Follow Me On  Twitter'/></a></li>
<li><a href='http://pinterest.com/bloggertrix/' target='_blank'><img border='0' src='https://blogger.googleusercontent.com/img/b/R29vZ2xl/AVvXsEgK-RfZdj-qITGC2OAKBuEeZKPzx2XftqghzDxaWqBE_jKUzDwdNGnonEy9CcCQ23ctRQ_L2tyXLTiVoyxUvz19M9toNBhyphenhyphenholFzeSp824HX4ij5FrzSC4mDlaKemzBTwxs98nW27YKZWs/s1600/btrix-pinterest.png' style='margin-bottom: 3px;' title='Follow Me On  Pinterest'/></a></li>
<li><a href='https://plus.google.com/107955298793879607964' target='_blank'><img border='0' src='https://blogger.googleusercontent.com/img/b/R29vZ2xl/AVvXsEh0uZjN_lXeXOKkle3Q8m7tCVze4FMX03NUm_H6WQdM2ADoVbvPjDu2DXYgExzOAJ2VU38NPFmaTvGkBPevcw4ESDW19dtGQ8Q01xcWhWOx028n9eBaHfElfTNhYgS_MPGZGtdgfnHYjA8/s1600/btrix-googleplus.png' style='margin-bottom: 3px;' title='Add Me your Circle'/></a></li>
</ul></div>

Replace bloggertrix with your Facebook username
Replace bloggertrix with your Twitter Username
Replace bloggertrix with your Pinterest Username
Replace 107955298793879607964 with your Google plus id Username

7. Now click Save Template You are done...
If you need any help for Dynamic Floating Social Bookmark Widget, Just leave a comment.
Read More

Saturday, July 27, 2013

Add Unique Rss Subscribe Widget For Blogger

File Under: , 16 comments

Today im gonna explain about,How to add Unique Rss Subscribe Widget. all of bloggers like to keep their blog neat right.So you have to choose some attractive and  neat widget for your blog.This is the right tutorial for Rss Subscribe Widget .This widget have awesome look.By using this Rss Subscribe Widget you can link your social media profile Facebook, Twitter Rss Google  Pinterest. It will help to get the new updates by emails.You can check it  from below demo link.

Rss+Subscribe+Widget


You may like these articles
Dark Style Rss Subscription Widget
Social Media And Rss Subscribe Widget
Stylish Rss Feed Subscription Box
Awesome Rss Feed Subscription Widget

How to Add Unique Rss Subscribe Widget For blogger


1. Log in to blogger account and Click drop down.
blog-post-option
2. Now select "Layout" Like Below.

3. Click Add Gadget and select 'HTML/Javascript

4. Paste below code. (You can add any Names for Title )

<style> 
.btrixsocial_box-email{ 
background:Fff no-repeat 0px 12px ; width:270px;float:center;font-size:1.4em;font-weight:bold;margin:2px 20px 0px 10px;color:#686B6C;
}
.btrixsocial_box-emailsubmit{ 
background:#0084CE;cursor:pointer;  color:#fff; border:none;padding:3px;margin:0 0 0px 0;text-shadow:0 -1px 1px rgbaundefined0,0,0,0.25); 
-moz-border-radius:2px; -webkit-border-radius:2px; border-radius:2px; font:12px sans-serif;
} 
.btrixsocial_box-emailsubmit:hover{ 
background:#E98313; 
} 
.textarea{ 
padding:2px; margin:0px 2px 0px 2px; background:#f9f9f9; border:1px solid #ccc; resize:none; box-shadow:inset 1px 1px 1px rgbaundefined0,0,0,0.1); 
-moz-box-shadow:inset 1px 1px 1px rgbaundefined0,0,0,0.1); -webkit-box-shadow:inset 1px 1px 1px rgbaundefined0,0,0,0.1); font-size:13px;   width:200px; height:20px;color:#666;}
#socialboxbt 
{
text-align:center;font-weight:bold;padding:5px;border:1px solid black;width:300px;
-moz-box-shadow: 0px 0px 8px #000000;-webkit-box-shadow: 0px 0px 8px #000000;box-shadow: 0px 0px 8px #000000;}
</style>
<br />
<div id="socialboxbt">
<a href="http://feeds.feedburner.com/bloggertrix" imageanchor="1" rel="nofollow" style="float: center; margin-left: .5em; margin-right: 1em;" target="blank"><img border="0" src="https://blogger.googleusercontent.com/img/b/R29vZ2xl/AVvXsEhDw0tYQRFpX-kh37j5iIeFe5uYuRb2uOcWZk27shIRbx8y1mnCtHARFj44ht44-GKptBv_HvB-7uNFbOvp0_ZcvPwZfpr0ihee_LYlJrogDJJC_T7YhjZ-hq7OgCFW1fwfmNaIaTY_CQEl/s1600/rss.png" /></a>
Submit your Email Address to Get Free latest Articles Directly to your Inbox
<br />
<div class="btrixsocial_box-email">
<form action="http://feedburner.google.com/fb/a/mailverify" id="feedform" method="post" onsubmit="window.openundefined'http://feedburner.google.com/fb/a/mailverify?uri=bloggertrix', 'popupwindow', 'scrollbars=yes,width=550,height=520');return true" target="popupwindow">
<input class="textarea" gtbfieldid="3" name="email" onblur="if undefinedthis.value == &quot;&quot;) {this.value = &quot;Enter email address here&quot;;}" onfocus="if undefinedthis.value == &quot;Enter email address here&quot;) {this.value = &quot;&quot;;}" type="text" value="Enter email address here..." /> 
<input name="uri" type="hidden" value="bloggertrix" /><input name="loc" type="hidden" value="en_US" /> 
<input class="btrixsocial_box-emailsubmit" type="submit" value="Submit" /> 
</form>
</div>
<style class="text/css">
table
{border-bottom: 0px solid #E6E6E6;float: center;width: 300px;margin:-8px 0 0 0px;}
.subicons
{border-right: 0px solid #E6E6E6;}
.Fadeout {filter:alphaundefinedopacity=100);opacity: 1.0;border:0;
}
.Fadeout:hover{filter:alphaundefinedopacity=80);opacity: 0.8;border:0;
}
</style>
<br /><div class="table"><table>
<tbody><tr>
<td><div class="subicons">
<a class="Fadeout" href="http://www.facebook.com/bloggertrix" imageanchor="1" rel="nofollow" target="_blank"><img border="0" src="https://blogger.googleusercontent.com/img/b/R29vZ2xl/AVvXsEhfrFmF6A8T1aMhYMJzpFbRnOnkALOsoIH3oQHp5lX5KOv5iiI5bakSxr28_WXzZtOF_LfRRk9gYOJ9b9EmbkrrB77I10cdspSa0KtjFW7deBEwb7yG41Eq4GTOVJuLx8RtJ1iclrCr_0I/s1600/btrix-facebook-icon.png" /></a></div>
</td><td><div class="subicons">
<a class="Fadeout" href="http://twitter.com/bloggertrix" imageanchor="1" rel="nofollow" target="_blank"><img border="0" src="https://blogger.googleusercontent.com/img/b/R29vZ2xl/AVvXsEgLHMuLVxV__tOeXctU4dh7Xhl3b4T2e1rHSU4sLhnYk4ExBIdwir_AhV6n5uCqLE9fAEtquKpA_GDMEV0idY9DX1cmZKvx8zcRHuLZB5WKi9EEZ1G8lH5FkdruWwG7tdXKb1RS0OXC7dc/s1600/btrix-twitter-icon.png" /></a></div>
</td>
<td><div class="subicons">
<a class="Fadeout" href="http://feeds.feedburner.com/bloggertrix" imageanchor="1" rel="nofollow" target="_blank"><img border="0" src="https://blogger.googleusercontent.com/img/b/R29vZ2xl/AVvXsEjF3ERzUe_511a-p8MxaO_2fXX63YqoK0kiu6eDP52tDWH8chq6OY9NTkZQLDVCAuI8msSSdR9ALUF5boBx7KR6KCRULuqb1kKox1OtHqaffPRvMvvWbLxiF0dmdZLUe0xTCB5zL8zUIq0/s1600/btrix-rss-icon.png" /></a></div>
</td>
<td><a class="Fadeout" href="https://pinterest.com/bloggertrix" imageanchor="1" rel="nofollow" target="_blank"><img border="0" src="https://blogger.googleusercontent.com/img/b/R29vZ2xl/AVvXsEgE1mkPeJ2h3uRMQtyh5HuBj8XGuHxc6zaoPlO_1utDTa1K92BRbJNSqhHfeO928JwdMGNSoo7ZB35sU8HmsYVBkPKTwCq4O2Mt4ChHwfyDK2JsEkpiC6vCJSCxKkmzGQOpBnNCiQI4C-E/s1600/btrix-Pinterest-icon.png" /></a></td>
</tr></tbody></table></div></div>


Replace bloggertrix with your Feedburner ID
Replace bloggertrix with your Facebook username
Replace bloggertrix with your Twitter Username

5. Now save your HTML/Javascript'. You are done...
If you need any help for Unique Rss Subscribe Widget, Just leave a comment.
Read More

Monday, May 20, 2013

Stylish Rss Feed Subscription Box For Blogger

File Under: , , 4 comments

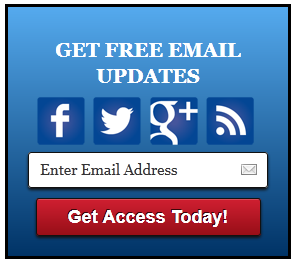
In this tutorial im gonna explain how to add stylish Rss Subscription widget with social  media   profile icons. By using this Rss Feed Subscription widget you can link your social  media profile  Facebook, Twitter and Rss and subscribe field. It will help to get the new updates by emails.You can check it from below demo link.

Stylish+Rss+Feed+Subscription
You may like these articles.
     Dark Style Rss Subscription Widget
     Social Media And Rss Subscribe Widget
     Awesome Rss Feed Subscription Widget

How to add Rss Feed Subscription Box For Blogger


1. Log in to blogger account and Click drop down.
blog-post-option
2. Now select "Layout" Like Below.

3. Click Add Gadget and select 'HTML/Javascript

4. Paste below one of below code.

<center>
<div align="center" id="bloggertrix1-Subscribe-wrapper">
<div id="ig-subscription-optin" style="border: 3px solid #000000; filter: progid:DXImageTransform.Microsoft.gradient( startColorstr='#55AAEE', endColorstr='#003366',GradientType=0 ); width: 250px;">
<h3 id="bloggertrix1-title-text" style="color: white; font-size: 20px;">
GET FREE EMAIL UPDATES</h3>
<form action="http://feedburner.google.com/fb/a/mailverify" method="post" onsubmit="window.open('http://feedburner.google.com/fb/a/mailverify?uri=bloggertrix', 'popupwindow', 'scrollbars=yes,width=550,height=520');return true" target="popupwindow">
<a class="social-icons" href="https://facebook.com/bloggertrix"><img src="https://blogger.googleusercontent.com/img/b/R29vZ2xl/AVvXsEizisrjJMKtr7ORSrDEtpAfIOOjduR6lwJ95FeextO_NhGJPUKDr-qfBOU4hbtxxeeFAGEsbHw4Q17GA4YbO_uT2W3Co58TDbMCUyqd8QQVLv9NSNhEtaKCpP4Ag8E0sMIZpcTjS77ojres/s1600/Bloggertrix-facebook.png" /></a>
<a class="social-icons" href="https://twitter.com/bloggertrix"><img src="https://blogger.googleusercontent.com/img/b/R29vZ2xl/AVvXsEhqGaKctIfwByDWun89G2xK6hqoXA-IPcDpykt0g4fccx5UoeXFK40kpoD1-aPiWM5JrIXJJjpQa4dFqGC6y02f0p25zXo2B3h3o7L_H7URapR5sHzPFE_4iLrjkfLa8pjRH35a1fy3hc60/s1600/bloggertrix-twitter.png" /></a>
<a class="social-icons" href="https://plus.google.com/userId"><img src="https://blogger.googleusercontent.com/img/b/R29vZ2xl/AVvXsEhUybmCGvl2xtYgb3r6heADMqDlYxTFbCOur8bjeQKPuV_lNxYp1j-YkxijZZ7xNoBEibl0wKuVghdoNKL1TOZnqiFZvRiIsMQVa1CdyBsf1kgcnw6LIcSCSK4AmXHabBPtKF6eI4dm52uY/s1600/Bloggertrix-Googleplus.png" /></a>
<a class="social-icons" href="http://www.feedburner.com/bloggertrix"><img src="https://blogger.googleusercontent.com/img/b/R29vZ2xl/AVvXsEi7aNs0_2-J0oh8FInVQIpnAbA14Yp8F_QbFbymm_3JMxonP34MB7pMLn3V0wRJA0umU59o6bPP4BNq2wG_dsvHQwZZMPEA5ZxqL70cQ5o7x3uowAs6rAtRCqanQv0M-rwPxuNvabos5uY7/s1600/Bloggertrix-Rss.png" /></a>

<input class="email" id="bloggertrix_Subscriber_email" name="from" onblur="if(this.value=='')this.value=this.defaultValue;" onfocus="if(this.value==this.defaultValue)this.value='';" style="width: 130px;" type="text" value="Enter Email Address" /><br />
<div class="separator" style="clear: both; text-align: center;">
</div>
<input name="uri" type="hidden" value="bloggertrix" /><input name="loc" type="hidden" value="en_US" /> <input id="digitalhubinc_Submit_Text" style="height: auto; padding: 5px 0;" type="submit" value="Get Access Today!" /></form>
</div>
</div>
</center>
<style>
a.social-icons {margin-right: 5px; height:40px;width:40px;}
a.social-icons:hover {opacity: .7;filter:alpha(opacity=70); }
#ig-subscription-optin {margin: 0px;padding: 10px;background: #2A6DA9;
background: -moz-linear-gradient(top, #5AE, #036);background: -webkit-gradient(linear, left top, left bottom, from(#5AE), to(#036));height: auto!important;color: white !important;padding: 20px 15px !important;
text-align: center !important;font-family: Georgia, Times, "Times New Roman", serif !important;margin: 10px;margin: 0px;padding: 10px;
margin: 8px 0 0 !important;line-height: 22px;font-family: Georgia, Times, "Times New Roman", serif;padding: 5px;border: none;}#ig-subscription-optin p {margin: 8px 0 0 !important;line-height: 22px;font-family: Georgia, Times, "Times New Roman", serif;
padding: 5px;border: none;}#ig-subscription-optin input.name {
background: white url(https://blogger.googleusercontent.com/img/b/R29vZ2xl/AVvXsEiQGFG3GkqXhWmFIZ1nKac_ZuU_pnEcOtwhrBIQ5KkHQWDTcSqT-lr5RWxHd9ORYlXSy3IcDyL8mO1_QMExRiz57UsS3kdvnGE5VYKx6rz03ufuVG55pUS2hg9-ZW1tW9rZ180XL1C0NJCm/s1600/subscribe-name.png) no-repeat center right;}
#ig-subscription-optin input[type="text"] {border: 1px solid #111 !important;
font-size: 15px !important;margin-bottom: 10px !important;padding: 8px 28px 8px 10px !important;width: 80% !important;height: auto !important;}
#ig-subscription-optin input.email {background: white url(https://blogger.googleusercontent.com/img/b/R29vZ2xl/AVvXsEgBJfZhXIMWfPFHxog0_vo9ddHNOGESqgvLdvqkHKPekw5guhFu0EKk6w7bKxGRUQNo0RmSdonwg9xY8BAcUBNK-lKT2CE1_WTKWJ9n6mspJpKCr6_RT3giPv73dDb_dNu-GLLFqYF0VvDT/s1600/subscribe-email.png) no-repeat center right;}#ig-subscription-optin input {
font-family: Georgia, Times, "Times New Roman", serif;border-radius: 3px;-moz-border-radius: 3px;-webkit-border-radius: 3px;box-shadow: 0 2px 2px #111;-moz-box-shadow: 0 2px 2px #111;-webkit-box-shadow: 0 2px 2px #111;margin: 0px;padding: 0px;}#ig-subscription-optin h3 {margin-top: 10px !important;margin-bottom: 8px !important;margin-left: 10px !important;margin-right: 10px !important;
font-weight: bold !important;line-height: 26px !important;letter-spacing: normal;
text-transform: none;text-decoration: none;
text-align: center !important;font-family: Georgia, Times, "Times New Roman", serif;
border: none;padding: 0px !important;float: none;}input:hover[type="submit"] {
background-color: #0094D2;border: 1px solid #0094D2;color: white;text-decoration: none;}input[type="submit"] {background-color: #00A7ED;border: 1px solid #0094D2;
color: white;cursor: pointer;font-family: 'Droid Sans', sans-serif !important;font-size: 13px;font-weight: normal;padding: 5px;text-decoration: none;}input {
color: #333;font-family: 'Droid Sans', sans-serif;}#ig-subscription-optin input[type="submit"] {background: #960E17 url(https://blogger.googleusercontent.com/img/b/R29vZ2xl/AVvXsEiXDnx8kJ2kdavbAyZraCygQWguUG-bFFcQNteLwBgyf7iULHrQtO1NL2nsFyCcmJMtYmLElfcjzcNZijW1V_295kXzVJ1NpiCYmqI7EDXve75FGWRLcEpsysfhsK7qtByKnXzwXSddcueM/s1600/subscribe-red.png) repeat-x top;border: 1px solid #111 !important;color: white;cursor: pointer !important;font-size: 18px !important;font-weight: bold !important;
padding: 6px 0 !important;text-shadow: -1px -1px #3A060A !important;width: 90% !important;height: auto !important;line-height: 24px !important;}
#ig-subscription-optin input[type="submit"]:hover {color: #FFA5A5;}</style>
You have to change the counters manually, just change red color number according to profile.

Replace bloggertrix with your Feedburner ID
Replace bloggertrix with your Facebook username
Replace bloggertrix with your Twitter Username
Replace UserId with your Twitter Username

5. Now save your HTML/Javascript'. You are done.
If you need a help for adding Rss Feed Subscription Box, Just leave a comment.
Read More

Monday, April 29, 2013

Sliding Css Social Profile Widget for Blogger

File Under: , , 8 comments

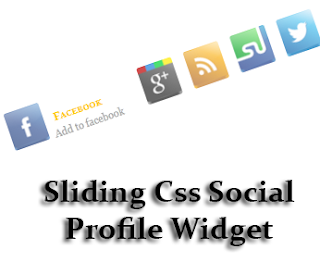
In this post im  gonna explain how to add Css sliding social icons list  for blogger. By using Sliding Css Social Profile widget you can link your social media profile Facebook, Twitter and Rss Google plus,Rss and StumbleUpon Check the demo from below link.

Sliding Css Social Profile Widget


1. Log in to blogger account and Click drop down.
blog-post-option
2. Now select "Layout" Like Below.

3. Click Add Gadget and select 'HTML/Javascript

4. Paste below code.

<style>
#socialmenu_btrix { 
  margin:0; 
  padding:0; 
  width: 30em; 
  height: 4.5em; 
  overflow:hidden; 
  } 
#socialmenu_btrix li { 
  display:inline; 
  list-style-type:none; 
  } 
#socialmenu_btrix li a { 
  display:block; 
  float:left; 
  text-decoration:none; 
  margin:0; 
  } 
#socialmenu_btrix li a img { 
  opacity:0.7; 
  margin:0.5em; 
  border:0; 
  float:left; 
  } 
#socialmenu_btrix li a span { 
  display:none; 
  } 
#socialmenu_btrix li a:hover { 
  background:transparent; 
  } 
#socialmenu_btrix li a:hover span { 
  width:7em; 
  color:#aaa; 
  display:block; 
  cursor:pointer; 
  float:left; 
  } 
#socialmenu_btrix .h2 { 
  margin:0 5px; 
  padding:0; 
  color:#fc0; 
  font-variant:small-caps; 
  font-size:1em; 
  border:0; 
  }
  
  </style>
  <ul id="socialmenu_btrix"> 
  <li> 
    <a href="https://www.facebook.com/bloggertrix"><img src="https://blogger.googleusercontent.com/img/b/R29vZ2xl/AVvXsEjRv4QogsRhSe5s525dWh3_5rRja6HmFMOyFR4RObSB8ip3O1dUfmljRPcQdW4dUXoN0m2Z5ceSDl3b7KJibNDmJ1CnzP9Sa6NB7UIq7Pqcy6bwGnlt_-mGXqBCZIzIrFsPbmqQDHB_LPI/s1600/Facebook-icon_btrix.png" alt="facebook" width="50" height="50" title="Facebook" /> 
     <span><br /> 
      <b class="h2">Facebook</b><br /> 
      Add to facebook 
     </span> 
    </a> 
   </li> 
   <li> 
    <a href="https://plus.google.com/107955298793879607964"><img src="https://blogger.googleusercontent.com/img/b/R29vZ2xl/AVvXsEicwUdIcv6reIVZixUziB_a2mrwCtTho1KTUnaB4_sNmV7D5uM0njyF-gzdylgns2GbI6SKndyy9htKjl3kNOSfgJumwrN__RNoRp6NrP8W2CVC1-_d_Y0xGLYhEb7A71ySULm0HEiSbDY/s1600/Google-plus-icon_btrix.png" alt="Google plus" width="50" height="50" title="=Google plus" /> 
     <span> 
      <br /> 
      <b class="h2">Twitter</b><br /> 
      Add to twitter
     </span> 
    </a> 
   </li> 
   <li> 
    <a href="http://feeds.feedburner.com/bloggertrix"><img src="https://blogger.googleusercontent.com/img/b/R29vZ2xl/AVvXsEihpY1kTDqqp7VmQ_Q8fxbeC9rAIoxNn7L-31ccPyu8Y-Ddk0jdP0FGOQrceBunz6QKH196pdZzMesKwt4Z69Au7udM_O0wOwRh2CIZ-l4MhR5GmBLmeu0p1I08g3o21SgSu20MD0g7MUE/s1600/RSS-icon_btrix.png" alt="Rss" width="50" height="50" title="Rss" /> 
     <span><br /> 
      <b class="h2">Rss Feed</b><br /> 
        Subscribe
     </span> 
    </a> 
   </li> 
   <li> 
    <a href="http://stumbleupon.com/Username"><img src="https://blogger.googleusercontent.com/img/b/R29vZ2xl/AVvXsEjZ1Mt1PkWpcVP2DGTSoJORdBhal2r3VouC0Rofc3jGSrqL1u-nC-vVkhNsQQy5c3DrVtxihfgZIX0-T9TKeMQLtemFGO33AxEMlQttSiXgm4iBqmq1hov8OctAJtLKizYGSunMcrdJi_E/s1600/StumbleUpon-icon_btrix.png" alt="Stumbleupon" width="50" height="50" title="Stumbleupon" /> 
     <span><br /> 
      <b class="h2">Stumbleupon </b><br /> 
      add to stumble
     </span> 
    </a> 
   </li> 
    <li> 
    <a href="https://twitter.com/bloggertrix"> 
     <img src="https://blogger.googleusercontent.com/img/b/R29vZ2xl/AVvXsEjkuK3EUqp1YY0Cg0NDaR7UqAzVu1pc9PUInDP8Nl1ZjLVzlST5v87S4f_OZueEWPhZdin9GiQrIJhSRnzE2koKWopGlXsUXHlSMSQmQ7uLSYJeS-nNuNEZIa9qdJ2IlqJiDfVvyGhdZrY/s1600/Twitter-icon_btrix.png" alt="twitter" width="50" height="50" title="twitter" /> 
     <span><br /> 
      <b class="h2">Twitter</b><br /> 
      add to twitter
     </span> 
    </a> 
   </li> 
  </ul> 


You have to change the counters manually, just change red color number according to profile.

Replace bloggertrix with your Feedburner ID
Replace bloggertrix with your Facebook username
Replace bloggertrix with your Twitter Username
Replace 107955298793879607964 with your Google plus ID
Replace Username with your StumbleUpon Username


5. Now save your HTML/Javascript'.You are done.
Hope this Sliding Css Social Profile helps to link your social profiles to increase followers.
Read More