Thursday, February 28, 2013

DIY SEO? Think Again!

With  scores of   SEO services hitting the online market, SEO seems like a thing next door. Many small business owners perceive spending on an SEO expert as dissipation of both  time  and money. Therefore people are now shifting  to  do it  yourself  (DIY) SEO, but  obviously to no avail!

Let’s say you don't directly rush to  optimization immed- iately after   your  website is  ready. Perhaps, in order to bring your DIY SEO to action, you scan through a bun- dle of SEO articles and a bunch of books too, grasping the major techniques while rejecting the others. It's good to trust your smartness and believe in your sharp analytical skills. But getting on the first page of Google, takes more than mere smartness.


Optimizing your website calls for a dozen of different tactics, a thousand of steps and an outstanding strategy. Search engine optimization is a profession and only skilled practitioners can achieve SEO successfully. Also don't forget that SEO methodology exists in wide spectrum shifting from an industry type to business form and targeted audience.

Still believe you can take on as a self-made SEO expert? Read ahead to have an overview of the prerequisites you must procure before web optimization.

Keywords, Link Building and Content

In order to achieve a thriving on-page and off-page optimization, you need to understand the psychology of your customer base. Identify keywords that they may use to find businesses
similar to yours. Also, watch out for the keywords your competitors are using. Google Analytics might not help you meet this purpose effectively. Hiring an SEO expert is the only proficient option.

Practicing back linking is a boon if you manage to gain authoritative links to your site. Do it off the beam and the generated link spam would plague you forever.

As the cliché says, Content is the King in SEO industry. Engaging and fresh content is a must. Simply write a bundle of catchy and unique posts every day that will make both the search engines and visitors happy. Easy? Stop living in false hopes and go for expert help.

Social Media Marketing

With social networking sites transforming as the lifeline of people, you cannot afford a loose word-of-mouth marketing if not miss it entirely! So either set up spare accounts on all leading social networks and maintain a powerful presence there or simply hire an SEO expert service to do it for you.

Have a handle on the Search engines

Simply reading about Google updates is not enough. You must understand them to keep any risk factors at bay. Also, Google introduces new complex algorithms almost every day, which only professional teams can keep a pace with.

Trying SEO yourself is like betting your luck. Though it might work at exceptional scenarios, but mostly you lose or opt out of the battle due to other strong contenders. Remember, if the internet is a maze, then there is an SEO expert at every corner. When you hire a professional for SEO work, you can easily sublimate your energies in further expansion and growth of your business. Get wise on the web, hire an SEO expert.

Author Bio:
Ian Patrick is the director and creator of an SEO expert company. His team has helped many lost businesses realize their real potential on the web in terms of higher sales, traffic, rankings and ROI. His blog is regularly updated with SEO related articles. His other interests include composing music and playing guitar.
If you would like to write for bloggertrix, check our guest posting guidelines
Read More

Tuesday, February 26, 2013

jQuery Sliding Effect Apple Menubar For Blogger

In  this  tutorial im gonna explain how to add jQuery sliding  hover  style menu  bar  for blogger. Actually this  is  a  updated  version  of  Apple Style Menubar. For  this  menu  bar im using  jQuery  and  Css.  Just check out demo.Its easy to add to blogger get my all  menu bar here

jQuery+Sliding+Effect+Apple+Menubar+For+Blogger

Demo

1. Log in to blogger account and Click drop down.
blog-post-option
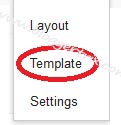
2. Now select "Template" Like Below.

Select-template

3. Now you can see Live on blog, Click EDIT HTML Button"

4. Now click Proceed button.
   
5. Find this tag by using Ctrl+F    </head>

6. Paste below code Before </head> tag

/* The CSS Code for the menu starts here bloggertrix.com */

<script src='http://bloggertrixcode.googlecode.com/files/jquery-1.2.6.min.js' type='text/javascript'/>
<script src='http://bloggertrixcode.googlecode.com/files/kwicks.js' type='text/javascript'/>
<script src='http://bloggertrixcode.googlecode.com/files/custom.js' type='text/javascript'/>

7. Go to blogger and click Layout

8. Click Add Gadget and select 'HTML/Javascript

9. Paste below code.

<style>
.kwicks {  
     list-style: none;  
     position: relative;  
     margin: 0;  
     padding: 0; 
     background-image:url(https://blogger.googleusercontent.com/img/b/R29vZ2xl/AVvXsEiDHZLd-JlN647slutr4pARqmvVt5q21-JhyizvE6ez3HfCuiEV3wJw5g2NR2mpO3QidFPVZhi1DurB41Hd1GlZf5xpTOl7-EALAxgLY_OUnTXDR3UEYELXwfIiCjEQBGY6x0uykPgqxww/s1600/btrix_no_flicker.jpg); /*some browsers are to slow when aligning the menu items via jQuery and so the background shines through, this prevents this flickering*/}  
 .kwicks li{  
    display: block;  
    overflow: hidden;  
    padding: 0;  
    cursor: pointer;  
 float: left;
 width: 125px;
 height: 40px;
 margin-right: 0px;
 background-image:url(https://blogger.googleusercontent.com/img/b/R29vZ2xl/AVvXsEiNFtiAHZV5Guz6lbrG5ZhVvdVAw5QdY0qqvW1V_pg4-pXFXMVkacjInDT59OyYhXXvj-ZLxedq071h462qcJsnt46ZLh3sZdNxbCDSqE7B1eHe38ya_fHfjMpa_rcskfWejVcjdWhQ9uU/s1600/btrix_kwicks_sprite.jpg);
 background-repeat:no-repeat;}
.kwicks a{
 display:block;
 height:40px;
 text-indent:-9999px;
 outline:none;}
#kwick1 {
 background-position:0px 0px;}
#kwick2 {
 background-position:-200px 0px;}
#kwick3 {
 background-position:-400px 0px;}
#kwick4 { 
 background-position:-600px 0px;}
#kwick1.active, #kwick1:hover { 
 background-position: 0 bottom;}
#kwick2.active, #kwick2:hover{
 background-position: -200px bottom;}
#kwick3.active, #kwick3:hover {
 background-position: -400px bottom;}
#kwick4.active, #kwick4:hover {
 background-position: -600px bottom; }
#kwick1 a{
 background-image:url(https://blogger.googleusercontent.com/img/b/R29vZ2xl/AVvXsEh5Ji5LRJpPbicZ0o-O1_LBvMOVBthZFFHzR0zi7xITnt4IkmWFqd-rjDD42qAOo7oQQtJSrXPB1BvhGi-Iy4HITlg7boDbLaYUSRIH7XQJSwm_BjQBaJJseshswEZAhvbjPRiB6COzSl4/s1600/btrix_end.jpg);
 background-repeat:no-repeat;
 background-position: left 0px;}
#kwick1 a:hover{
 background-position: left -80px;}
#kwick4 a{
 background-image:url(https://blogger.googleusercontent.com/img/b/R29vZ2xl/AVvXsEh5Ji5LRJpPbicZ0o-O1_LBvMOVBthZFFHzR0zi7xITnt4IkmWFqd-rjDD42qAOo7oQQtJSrXPB1BvhGi-Iy4HITlg7boDbLaYUSRIH7XQJSwm_BjQBaJJseshswEZAhvbjPRiB6COzSl4/s1600/btrix_end.jpg);
 background-repeat:no-repeat;
 background-position: right -40px;}
#kwick4 a:hover{
 background-position: right -120px;
}
</style>

<ul class="kwicks">  
     <li id="kwick1"><a href="#">Home</a></li>  
     <li id="kwick2"><a href="#">Contact</a></li>  
     <li id="kwick3"><a href="#">Downloads</a></li>  
     <li id="kwick4"><a href="http://www.bloggertrix.com/">Search</a></li>  
 </ul>  
Replace # with your links.

10. Now save your HTML/Javascript'.
    You are done...
Read More

Monday, February 25, 2013

4 Steps You Should Follow to Get Success in Internet Marketing

The  Internet is an  essential  tool in promoting your business. Internet marketing   can be a great tool for increasing the success  of your business. This article describes  some  online  marketing  techniques  you should  be  using, as well   as the benefits that using them can bring.

internet-marketing

Step 1.
A site-wide link is a type of link that shows up on every one of your site's pages. These links often appear at the bottom of pages. This type of link can be beneficial if you have a central page you want your visitors to see, such as a page where they can order your products or a page where you concentrate your efforts to convince them to buy something. Make sure you use a site-wide link menu that will help your visitors navigate throughout your site. Your menus should contain a short and clear description for each page.

Step 2.
Intelligent usage of meta tags is an important factor in the creation of solid HTML code. Search engines use meta tags in order to classify your site and your visitors will be unaware of the tags that you have chosen. The first tags are the most important and should reflect the content of your website accurately. Target your tags in a way that keeps the focus on the primary purpose of each page, and don't hesitate to freshen them up when you update the attached page. It is your responsibility to determine what are the most commonly used keywords utilized by your target audience so that these can be included in your site.

Step 3.
Bold important parts of your article by using HTML, especially keywords. The attention of the search engines that crawl your site is drawn to the bold text, so they see what you want them to see. This can also be a straightforward way to guide your reader's attention to whatever information you want to highlight. The titles of your posts should also contain keywords.

Step 4.
Look at all the ways that are possible to advertise your product on the Internet. Sticking to what works best is good, but there are always new and better ideas out there. Often, a new image or website spreads online like a wildfire, and capitalizing on current trends can significantly increase your sales. The Internet can be random because it is difficult to accurately determine what will be successful next.

Over to you...

Your best option is to constantly create new and exciting content. To get an idea on what is popular, make sure you take a look at websites like YouTube and Twitter. So what is you Internet marketing mantra? Share with us! We love to hear from you.

Author Bio:
Mukesh kumar is the founder of www.bloggerbonus.com who interested in SEO, SEM, website development, online business and blog creation.
write for bloggertrix, check our guest posting guidelines
Read More

Greeny Css3 Navigation Bar For Blogger

In this  tutorial im gonna explain how to add Greeny Css3 navigation bar for blogger. You can add this cool menu bar within few seconds.This Greeny navigation bar work fine with every modern internet  browsers. This include with nice drop down menu. So, You can link with your main pages by  using this Css3 thin navigation bar.Will see how to add this CSS3 navigation bar within few seconds.
    
Css3-Navigation-Bar

You may like these articles
     
     Add Multilevel CSS3 Menu Bar With Icons
     Modern Ribbon Hover Effect Menu Ba
     Rollover Css3 Navigation Bar
     Beautiful Bouncing jQuery Menu Bar
   

Greeny Css3 Navigation Bar For Blogger


1. Log in to blogger account and Click drop down.
blog-post-option
2. Now select "Template" Like Below.

Select-template

3. Now you can see Live on blog, Click EDIT HTML Button"

4. Find this tag by using Ctrl+F    ]]></b:skin>

5. Paste below code Before ]]></b:skin> tag

/* The CSS3 Code for the menu starts here bloggertrix.com */
 .btrix-greenymenu{width:950px;background: #7cae15;color:#eee;text-shadow: 1px 1px 1px #495505;display:inline-block;-moz-box-shadow: 3px 3px 4px #007308;
-webkit-box-shadow: 3px 3px 4px #007308;box-shadow: 3px 3px 4px #007308;-moz-border-radius-topleft: 8px;-moz-border-radius-topright:8px;-moz-border-radius-bottomleft:8px;-moz-border-radius-bottomright:8px;-webkit-border-top-left-radius:8px;-webkit-border-top-right-radius:8px;-webkit-border-bottom-left-radius:8px;-webkit-border-bottom-right-radius:8px;border-top-left-radius:8px;border-top-right-radius:8px;border-bottom-left-radius:8px;border-bottom-right-radius:8px;}
.btrix-greenymenu ul{width:950px;padding:0;margin:0 auto}
.btrix-greenymenu li:first-child a{padding:7px 10px 3px}
.btrix-greenymenu li{list-style:none;display:inline-block;float:left}
.btrix-greenymenu li a{background:url(http://1.bp.blogspot.com/-4OIAjD0uSN0/UR1FWgJm2YI/AAAAAAAAAJk/H-ajqHe53Ic/s1600/sprite.png) right no-repeat;color:#fff;display:block;font:16px Oswald;position:relative;text-decoration:none;padding: 8px 15px;-moz-border-radius-topleft: 8px;-moz-border-radius-topright:8px;-moz-border-radius-bottomleft:8px;-moz-border-radius-bottomright:8px;-webkit-border-top-left-radius:8px;-webkit-border-top-right-radius:8px;-webkit-border-bottom-left-radius:8px;-webkit-border-bottom-right-radius:8px;
border-top-left-radius:8px;border-top-right-radius:8px;border-bottom-left-radius:8px;border-bottom-right-radius:8px;}
.btrix-greenymenu li a:hover{background:#333;color:#fff;text-shadow: 1px 1px 1px #000;-moz-border-radius-topleft: 8px;-moz-border-radius-topright:8px;-moz-border-radius-bottomleft:8px;-moz-border-radius-bottomright:8px;-webkit-border-top-left-radius:8px;-webkit-border-top-right-radius:8px;-webkit-border-bottom-left-radius:8px;-webkit-border-bottom-right-radius:8px;
border-top-left-radius:8px;
border-top-right-radius:8px;
border-bottom-left-radius:8px;
border-bottom-right-radius:8px;}
.btrix-greenymenu li a .sf-sub-indicator{overflow:hidden;position:absolute;text-indent:-9999px}
.btrix-greenymenu li li a,.btrix-greenymenu li li a:link,.btrix-greenymenu li li a:visited{background:#439700;border-bottom:1px solid #000;border-right:none;color:#fff;font:12px Arial;position:relative;text-transform:none;width:138px;padding:10px 10px;text-shadow: none;opacity:0.8}
.btrix-greenymenu li li a:hover,.btrix-greenymenu li li a:active{background:#444}
.btrix-greenymenu li ul{height:auto;left:-9999px;position:absolute;width:160px;z-index:9999;margin:0}
.btrix-greenymenu li ul a{width:140px}
.btrix-greenymenu li ul ul{margin:-33px 0 0 157px}
.btrix-greenymenu li:hover>ul,.btrix-greenymenu li.sfHover ul{left:auto}
.menusearch{width:200px;float:right;margin:0 auto;padding:5px 10px 0}
.searchform {margin-top:0px;display: inline-block;*display: inline;padding:0;background:#fff;width:200px;height:23px; overflow:hidden;-webkit-border-radius:3px;-moz-border-radius:3px;border-radius:3px;border:1px solid #5c820d;}
.searchform input {font:italic 12px Arial;color:#222;line-height:23px;height:23px;padding:0;margin:0;}
.searchform .searchfield {background:transparent;padding:0 0 0 6px;margin:0;width: 160px;height:23px;border:0px;outline: none;line-height:23px;}
.searchform .searchbutton{border:none;font-size:12px;height:23px;width:23px;margin:0;padding:0}

6. Go to blogger and click Layout

7. Click Add Gadget and select 'HTML/Javascript

8. Paste below code.

<div class="btrix-greenymenu">
<ul class="sf-menu">
<li><a href="http://www.blogger.com/"><img alt="home" src="https://blogger.googleusercontent.com/img/b/R29vZ2xl/AVvXsEgL-61lq6WhXsjlZsUQE3nAuvmeZ1iIk9NhIz3QVzhDl5yfdt54arT6tBJOzVTb_bjEbFNsTTSvFuR3uqRnIyH2tdIistB0uq-Ml7OfSz5vL55CZc9z6uMBOkD_0JXcWw4_4IbO_2ywZNg/s1600/home.gif" style="padding: 0px;" /></a></li>
<li><a href="#">Menu 1</a></li>
<li><a href="#">Drop Menu 1</a>
<ul>
<li><a href="#">Sub Menu 1</a></li>
<li><a href="#">Sub Menu 2</a></li>
<li><a href="#">Sub Drop Menu 3</a>
<ul>
<li><a href="#">Sub Drop Menu 3.1</a></li>
<li><a href="#">Sub Drop Menu 3.2</a></li>
</ul>
</li>
</ul>
</li>
<li><a href="#">Drop Menu 2</a>
<ul>
<li><a href="#">Sub Menu 1</a></li>
<li><a href="#">Sub Menu 2</a></li>
<li><a href="#">Sub Menu 3</a></li>
</ul>
</li>
<li><a href="#">Menu 2</a></li>
<li><a href="#">Menu 3</a></li>
</ul>
<div class="menusearch">
<form action="/search" class="searchform" method="get">
<input class="searchfield" id="q" name="q" onblur="if(this.value=='')this.value=this.defaultValue;" onfocus="if(this.value==this.defaultValue)this.value=''" type="text" value="Search here...." />
    <input class="searchbutton" src="https://blogger.googleusercontent.com/img/b/R29vZ2xl/AVvXsEh4FkkBduJQOks7E7iEKsG13wGJvw2psVTiD1ZgxHnkUu2XeLHyeN7w6eHkLwaTmaT1LG4wKRlb2j3UbpDeWJFBIohCUX6lKjgHRqDVPBj0bgksgcszJMbZ5j57ijqSLYKAdtDn6nVjCMA/s1600/tombolcari.gif" style="cursor: pointer; vertical-align: top;" type="image" value="Go" />
</form>
</div>
</div>

Replace # with your links.

9. Now save your HTML/Javascript'.  You are done.

If you have any problem regarding this Greeny Css3 Navigation Bar. Leave a comment.
Read More

Sunday, February 24, 2013

Stylish jQuery Image Menu For Blogger

In this  tutorial im gonna   explain,  how  to add jQuery photo  slider   for   blogger.  This  will  be   really  cool with     blogger.  You  can    add    it    above     to  your blogger  post with nice  looking  images  with  links  to your blog post.For this slider we are using jQuery  and jquery-easing  effects. Check  below link  for demo.Its not hard to add to your blog. Get my earlier slideshow
Stylish+jQuery+image+menu++For+Blogger
Demo

1. Log in to blogger account and Click drop down.
blog-post-option
2. Now select "Template" Like Below.

Select-template

3. Now you can see Live on blog, Click EDIT HTML Button"

4. Now click Proceed button.
   
5. Find this tag by using Ctrl+F    ]]></b:skin>

6. Paste below code Before ]]></b:skin> tag

/* slider www.bloggertrix.com*/

.jimgMenu {
 position: relative;
 width: 670px;
 height: 200px;
 overflow: hidden;
 margin: 25px 0px 0px;
}

.jimgMenu ul {
 list-style: none;
 margin: 0px;
 display: block;
 height: 200px;
 width: 1340px;
 }
.jimgMenu ul li {
 float: left;
}

.jimgMenu ul li a {
 text-indent: -1000px;
 background:#FFFFFF none repeat scroll 0%;
 border-right: 2px solid #fff;
 cursor:pointer;
 display:block;
 overflow:hidden;javascript:;
 width:78px;
 height: 200px;
}

.jimgMenu ul li.landscapes a {
 background: url(https://blogger.googleusercontent.com/img/b/R29vZ2xl/AVvXsEibiWGWqBoeXLXGbxC55rFrfMwvNAQLezhnAtyknQzSuDx1UULZiJ_Q2zOxWSpv3pL2-klzD8rcQt3pyVGwrmFzb4yqmOTY8mdvCR87MxdHQe-VohXg9KlMJY-_G80c99eKTjZ_QRprdfI/s1600/abstract.png) repeat scroll 0%;
}

.jimgMenu ul li.people a {
 background: url(https://blogger.googleusercontent.com/img/b/R29vZ2xl/AVvXsEgM5mSBZNVI4MnFnukh9Oujsw2kWEPuViPsmm4JBVAlBbBWuyGRAuVtu-rb5TbUOO-GCH3KOfzOizfBqrSoqV96eFiAjHn6Rc5oOnZQCu1QlP97Na7ux_JjENMGcJf2I_W40vc_MKS87rU/s1600/games.png) repeat scroll 0%;
}

.jimgMenu ul li.nature a {
 background: url(https://blogger.googleusercontent.com/img/b/R29vZ2xl/AVvXsEidkV_16_uYdlzrPtZbdKMnRBW1MtWtPgtxGpRMVLZRB94W_briHGJrZydrd44gbEe6ISLDiF4tm6T42e3Xqr2_IPDFEa1kAPij9wem08nLsXnWmle7ShfYRZuKPI-gV72BmN5C9oYPIrk/s1600/nature.png) repeat scroll 0%;
}
.jimgMenu ul li.abstract a {
 background: url(https://blogger.googleusercontent.com/img/b/R29vZ2xl/AVvXsEgpm6KPIeGPZczkax68kvOb4X1_u5jm0RIhM-MmxUvIa2QqBY7Xt4vjSlpxGV5EMHcpk4BcWnh9QMT84fPeZ0-PbQaWc4cW3jJobTzYbYtfHCgIO0Zx0hTp2jqKgi0IqFg5ls4jvy9tqz4/s1600/2010-gqbycitroen-concept-car.png) repeat scroll 0%;
}
.jimgMenu ul li.urban a {
 background: url(https://blogger.googleusercontent.com/img/b/R29vZ2xl/AVvXsEianExLvOQlGSY6P0UIkYD0-J-e9n3fC3yapGVjs66wJBD6fTARgXHgiMqTXoimSIM0jKz6xYJnqGbhcMGizThScRygVFBnFeabEHsDa9igWZuSkze0bGsiVyApBe_QwDVl7zM7ubTjpDs/s1600/landscape.png) repeat scroll 0%;
 min-width:310px;

}
.clear {
 clear: both;}

7. Again Find this tag by using Ctrl+F    </head>

8. Paste below code Before </head> tag

<script src='http://bloggertrixcode.googlecode.com/files/jquery.js' type='text/javascript'/>
<script src='http://bloggertrixcode.googlecode.com/files/jquery-easing-1.3.pack.js' type='text/javascript'/>
<script src='http://bloggertrixcode.googlecode.com/files/jquery-easing-compatibility.1.2.pack.js' type='text/javascript'/>

<script type='text/javascript'>
$(document).ready(function () {

  // find the elements to be eased and hook the hover event
  $(&#39;div.jimgMenu ul li a&#39;).hover(function() {
    
    // if the element is currently being animated (to a easeOut)...
    if ($(this).is(&#39;:animated&#39;)) {
      $(this).stop().animate({width: &quot;310px&quot;}, {duration: 450, easing:&quot;easeOutQuad&quot;});
    } else {
      // ease in quickly
      $(this).stop().animate({width: &quot;310px&quot;}, {duration: 400, easing:&quot;easeOutQuad&quot;});
    }
  }, function () {
    // on hovering out, ease the element out
    if ($(this).is(&#39;:animated&#39;)) {
      $(this).stop().animate({width: &quot;78px&quot;}, {duration: 400, easing:&quot;easeInOutQuad&quot;})
    } else {
      // ease out slowly
      $(this).stop(&#39;animated:&#39;).animate({width: &quot;78px&quot;}, {duration: 450, easing:&quot;easeInOutQuad&quot;});
    }
  });
});
</script>

9. Go to blogger and click Layout

10. Click Add Gadget and select 'HTML/Javascript

11. Paste below code.

<div class="jimgMenu">
  <ul>
    <li class="landscapes"><a href="#nogo">Landscapes</a></li>
    <li class="people"><a href="#nogo">People</a></li>
    <li class="nature"><a href="#nogo">Nature</a></li>
    <li class="abstract"><a href="#nogo">Abstract</a></li>
    <li class="urban"><a href="#nogo">Urban</a></li>
  </ul>
</div>

You can change images links on 6th step code.

12. Now save your HTML/Javascript'.

    You are done...
Read More

Saturday, February 23, 2013

Awesome Rss Feed Subscription Widget For Blogger

First, Happy new year to all,This is the first tutorial for 2013.So, today i gonna explain how to add rss
feed subscribe box for blogger.This is unique widget. hope you will like it. By using this users can subscribe your blog. So, it will help to get the new updates by emails. You can check it from below demo link.If you want to look at other rss feed subscription widget,click this link.

Awesome+Rss+Feed+Subscription+Widget+For+Blogger

Demo

1. Log in to blogger account and Click drop down.
blog-post-option
2. Now select "Layout" Like Below.

3. Click Add Gadget and select 'HTML/Javascript

4. Paste below one of below code.

<style>
#topbox{width:250px;border:1px solid #a1a1a1;background-color:#ffffff;padding-bottom:15px;padding-top:5px;}
#news-letter{clear:both;padding-top:10px;}
.msg-box{float:left;width:50px;height:54px;margin-right:9px;padding-top:5px;background: url(https://blogger.googleusercontent.com/img/b/R29vZ2xl/AVvXsEglzSS0z0m3JyMfGAn9s3fDkqGakA_UKlsG8kvSS3xeCMiAckzqd7IuXkuC-MXAT1k3RZrcX-T8ZV5JEiLp5jxYOUGheaZCMP9Z57y4Y20J4gzzB97nv8Snt2t5OTol5eedACQ3QOXHhyphenhypheng/s800/mail-box.png) no-repeat;}
.news-headline{position: relative;z-index: 999;font-size: 18px;padding-bottom:10px;font-weight:bold;}
</style><br />
<div id="topbox">
<center>
<div class="news-headline" color:="color:">
Get Free Email Updates
</div></center>
<center>
<table border="0">
<tbody>
<tr>
<td style="padding-right: 4px;"><a href="http://twitter.com/bloggertrix" target="_blank" title="Follow Me On Twitter">
<img src="https://blogger.googleusercontent.com/img/b/R29vZ2xl/AVvXsEjtgC5r6BpPVwpxi7a3wsEh048qs6I3KHuoL-c4LBVeKTwv2I-STWKTQvLVcl7mIzrwpK_esScJCYirFkkcS6gBJKOg9WYGvPdwP2wuYJyxLHfUvIRyepicRCDLAQ6cUaPYND5zU7PbnMY/s1600/bloggertrix.com-twitter-icon.png" style="height: 25px; width: 25px;" /></a>
</td>
<td style="padding-right: 4px;"><a href="http://feeds.feedburner.com/bloggertrix" target="_blank" title="Subscribe Via RSS">
<img src="https://blogger.googleusercontent.com/img/b/R29vZ2xl/AVvXsEiH27sZDhFRZ9EEI8DAjQ3IyvuVMgoif-Z6MAnCaXeOoBfCvqFjp6n0l_5DmxYDg39plF-tT7d0aYh_9PGgGG1SfsEZHxDFUQsciUXo9drRUqoG8fBg2NqDQJeJaPTz7wdmHghR9nzQLwc/s1600/bloggertrix.com-rss-icon.png" style="height: 25px; width: 25px;" /></a>
</td>
<td style="padding-right: 4px;"><a href="http://www.facebook.com/bloggertrix" target="_blank" title="Find Us On Facebook">
<img src="https://blogger.googleusercontent.com/img/b/R29vZ2xl/AVvXsEiE8G2uIpCnqx-GCUZ1TOtpK9j6mQ0fm2SFBZq3fJqqdXlfnUreCAKgKff1hx2ju4FlP1ctUxpX9TPpKuanSxf6ih8Aj-LCwI7gMAFTQhiaJow_G6pf9N0MNlaQbfO9As3BES0626mTKPY/s1600/bloggertrix.com-facebook-icon.png" style="height: 25px; width: 25px;" /></a>
</td>
<td style="padding-right: 4px;"><a href="https://plus.google.com/107955298793879607964" target="_blank" title="Add me on Google+">
<img src="https://blogger.googleusercontent.com/img/b/R29vZ2xl/AVvXsEiiFgm6sua2Lf6EWCr085I0DQG2T6RJxDIjVjDvoQ7o7mKj75KsefJNIzGWBoDzP6uTi6Y8lB8mn3ZuydXupBfEnUV04Iat_bm_5vcbCPomTxYBLN3CboWgh6J38syEc87nbHabzzytKbI/s1600/bloggertrix.com-google-icon.png" style="height: 25px; width: 25px;" /></a>
</td>
<td style="padding-right: 4px;"><a href="http://youtube.com/username" target="_blank" title="Add To Technorati">
<img src="https://blogger.googleusercontent.com/img/b/R29vZ2xl/AVvXsEhQzE_LdS29Ch1pCBpe7r-A-jirYGZdakULu184F7CC4QyWnR5HWIwdx7D3WQJcJjUuhVOysZlc6AhUADLiBsQ_E4nxn182OhpBUGQTB2-DV5QRtt3VVFcOwnBBNnxrw8yGI8DQH35JLQA/s1600/bloggertrix.com-youtube-icon.png" style="height: 25px; width: 25px;" /></a>
</td></tr>
</tbody></table>
</center>
<div id="news-letter">
<span class="msg-box"></span>
<b>Sign up for newsletter</b>
<br />
<form action="http://feedburner.google.com/fb/a/mailverify" method="post" onsubmit="window.open('http://feedburner.google.com/fb/a/mailverify?uri=bloggertrix', 'popupwindow', 'scrollbars=yes,width=550,height=520');return true" target="popupwindow">
<input class="ebutton3" gtbfieldid="2" maxlength="100" name="email" onfocus="this.value = '';" size="25" style="color: #333333; font-size: 11px; height: 21px; width: 130px;" type="text" valign="middle" value="Enter your email address" />
<input name="uri" type="hidden" value="bloggertrix" />
<input name="loc" type="hidden" value="en_US" />
<input class="ebutton2" id="submit" style="font-size: 11px;" type="submit" value="Send" />
</form>
</div>
</div>
<div class="clear">
</div>

<br />
<div class="clear">
</div>

For social media icons, you can change URLs as your link.
Replace Bloggertrix with your Feedburner ID

7. Now save your HTML/Javascript'.

    You are done...
Read More

Friday, February 22, 2013

Beautiful Css3 Navigation Menu For Blogger

Menu bar is very important in blogger.Because it helps to navigate your blog or website easily.It mean they can find easily  what  they  looking  for.  In  this  tutorial im gonna explain  how  to  add    Css3    menu  bar  for  blogger. Its include nice  hover  style.Im  using Css3 and HTML, Just check out demo.Its easy to add to blogger get my all 
menu bar here


Demo

1. Log in to blogger account and Click drop down.
blog-post-option
2. Now select "Template" Like Below.

Select-template

3. Now you can see Live on blog, Click EDIT HTML Button"

4. Now click Proceed button.
   
5. Find this tag by using Ctrl+F    ]]></b:skin>

6. Paste below code Before ]]></b:skin> tag

/* The CSS Code for the menu starts here bloggertrix.com */

#navigation { width:900px;height: 45px; background: url(https://blogger.googleusercontent.com/img/b/R29vZ2xl/AVvXsEhHHXKDQgIK-t0wBT7aH2fb-EKubChFTAyGKGjKL1j48kcG5mmVybsvMpFW0hatYFElVncPdaD5HSvCkVWAzQVIfBI_6twSokDfR7drffbG1MGaMjCVqm3UnLzfzPt1MYrLppNQZI4xB7o/s1600/nav-bg.gif) repeat-x 0 0;
border:inherit 2px #000000;
-moz-border-radius-topleft: 10px;-moz-border-radius-topright:10px;-moz-border-radius-bottomleft:10px;-moz-border-radius-bottomright:10px;-webkit-border-top-left-radius:10px;-webkit-border-top-right-radius:10px;-webkit-border-bottom-left-radius:10px;-webkit-border-bottom-right-radius:10px;
border-top-left-radius:10px;border-top-right-radius:10px;border-bottom-left-radius:10px;border-bottom-right-radius:10px; }
#navigation ul { list-style: none outside; padding: 8px 0 0 8px; }
#navigation li { float: left; display: inline; height: 29px; line-height: 29px; text-transform: uppercase; margin-right: 3px }
#navigation li.last { margin-right: 0; }
#navigation li a,
#navigation li a span { float: left; display: inline; height: 29px; padding-left: 10px; background-position: 0 0; color: #919191; }
#navigation li a span { padding-left: 0; padding-right: 10px;  background-position: right 0; }
#navigation ul.sf-menu li a:hover,
#navigation ul.sf-menu li a:hover span { background-image: url(https://blogger.googleusercontent.com/img/b/R29vZ2xl/AVvXsEh0-n1PJ2uRY-QmwVzKiD6NS7VHRJXAB4d8DKExwoqbDaUq1jxpKrfVw2xEipdCgfTzQc7iNJAAs5u9H8Q2-UKRjTgiJ2w9wxX3wxgNzkAf2NyhnkfToHreikqEyOUc-F_ag9DVbqKEkQM/s1600/nav-states-red.gif); text-decoration: none; color: #fff; }
#navigation li a.clicked,
#navigation li a.clicked span { background-position: 0 bottom }
#navigation li a.clicked span { background-position: right bottom; }

7. Go to blogger and click Layout

8. Click Add Gadget and select 'HTML/Javascript

9. Paste below code.

<div id="navigation">
<ul class="sf-menu sf-js-enabled sf-shadow">
<li class="cat-item cat-item-29"><a title="Home" href="#"><span>HOME</span></a></li>
<li class="cat-item cat-item-29"><a href="#" title="Graphics"><span>Graphics</span></a></li>
<li class="cat-item cat-item-31"><a href="#" title="Coding"><span>Coding</span></a></li>
<li class="cat-item cat-item-18"><a href="#" title="inspiration"><span>inspiration</span></a> </li>
<li class="cat-item cat-item-1"><a href="#" title="Photography"><span>Photography</span></a></li>
<li class="cat-item cat-item-30"><a href="#" title="Freebies"><span>Blogger</span></a></li>
<li class="cat-item cat-item-19"><a href="#" title="Wordpress"><span>Wordpress</span></a></li>
<li class="cat-item cat-item-25"><a href="#" title="Logo"><span>Logo</span></a></li>
<li class="cat-item cat-item-22"><a href="http://www.bloggertrix.com/" title="Contact"><span>Contact</span></a>
</li></ul></div>
Replace # with your links.

10. Now save your HTML/Javascript'.

    You are done...
Read More

CSS Thin Style Dropdown Menu For Blogger

Today  im   gonna explain   how  to  add   Pure CSS menu  bar for blogger.This is simple thin drop down menu bar.This menu bar looks like classic style You can check demo form below  link. Its easy to add to blogger. get my all  menu bar here


Demo

1. Log in to blogger account and Click drop down.
blog-post-option
2. Now select "Template" Like Below.

Select-template

3. Now you can see Live on blog, Click EDIT HTML Button"

4. Now click Proceed button.
   
5. Find this tag by using Ctrl+F    ]]></b:skin>

6. Paste below code Before ]]></b:skin> tag

/* The CSS Code for the menu starts here bloggertrix.com */

.mainmenu {
 position:absolute; 
 z-index:100;
 font-family:Verdana, Geneva, sans-serif;
 font-weight:normal;
 font-size:90%;
 line-height:25px;
 left:50%; 
 margin-left:-303px; 
 width:906px;
} 

ul.menu {
 padding:0; 
 margin:0; 
 list-style:none; 
 width:100px; 
 overflow:hidden; 
 float:left; 
 margin-right:1px;
} 

ul.menu a {
 text-decoration:none; 
 color:#fff; 
 padding-left:5px;
}
 
ul.menu li.list {
float:left;
width:250px;
margin:-32767px -125px 0px 0px;
background::#e81717 url() no-repeat left bottom;
}

ul.menu li.list a.category {
position:relative;
z-index:50;
display:block;
float:left;
width:120px;
margin-top:32767px;
background:transparent;
}

ul.menu li.list a.category:hover,
ul.menu li.list a.category:focus,
ul.menu li.list a.category:active {
 margin-right:1px;
 background-image:url();
 background-repeat:no-repeat;
 background-position:left top;
}

ul.submenu {
 float:left; 
 padding:25px 0px 0px 0px; 
 margin:0; 
 list-style:none; 
 background:#e81717;
 background-repeat:no-repeat;
 background-position:left top;
 margin:-25px 0px 0px 0px;
}
 
ul.submenu li a {
float:left;
width:120px;
background:#369;
clear:left;
}

ul.submenu li a.endlist {
 background:url();
}
 
ul.submenu li a.endlist:hover,
ul.submenu li a.endlist:focus,
ul.submenu li a.endlist:active {
background:url();
}
 
ul.submenu a:hover,
ul.submenu a:focus,
ul.submenu a:active {
background:#e81717;
margin-right:1px;
}
-->
.menu {
width: 300px;
background: #00199E;
margin: 10px;
padding: 0;
border: 1px solid black;
cursor: pointer;
}

7. Go to blogger and click Layout

8. Click Add Gadget and select 'HTML/Javascript

9. Paste below code.

<script type="text/javascript" src="http://cdnjs.cloudflare.com/ajax/libs/jquery/1.7.2/jquery.min.js"></script>

<div class="mainmenu">
<ul class="menu">
<li class="list">
 <a class="category" href="#Home">Home</a>
</li>
</ul>
<ul class="menu">
<li class="list">
 <a class="category" href="#about">About Us&nbsp;&nbsp;&raquo;</a>
 <ul class="submenu">
  <li><a href="#about1">About link 1</a></li>
  <li><a href="#about2">About link 2</a></li>
  <li><a href="#about3">About link 3</a></li>
        <li><a href="#about4">About link 4</a></li>
  <li><a href="#about5">About link 5</a></li>
 </ul>
</li>
</ul>
<ul class="menu">
<li class="list">
 <a class="category" href="#articles">Articles&nbsp;&nbsp;&raquo;</a>
 <ul class="submenu">
  <li><a href="#articles1">Articles link 1</a></li>
  <li><a href="#articles2">Articles link 2</a></li>
  <li><a href="#articles3">Articles link 3</a></li>
  <li><a href="#articles4">Articles link 4</a></li>
 </ul>
</li>
</ul>
<ul class="menu">
<li class="list">
 <a class="category" href="#news">News&nbsp;&nbsp;&raquo;</a>
 <ul class="submenu">
  <li><a href="#news1">News link 1</a></li>
  <li><a href="#news2">News link 2</a></li>
  <li><a href="#news3">News link 3</a></li>
 </ul>
</li>
</ul>
<ul class="menu">
<li class="list">
 <a class="category" href="#donate">Donate</a>
</li>
</ul>
<ul class="menu">
<li class="list">
 <a class="category" href="http://www.bloggertrix.com/">Contact</a>
</li>
</ul>
<!-- end mainmenu --></div>
Replace # with your links.

10. Now save your HTML/Javascript'.

    You are done...
Read More

Animated Bar With Jquery Image Slider For Blogger

Images sliders are common and ton of are available now. But hard to find working versions some times.Because some sliders lost jQuery hosted files and no longer works.Hope this tutorial work for you.However, Photo Slider always helps to make website more attractive.However there have lot of advantages of using it. We can use if for introduce some offers and new products to our audience.We can create awesome images according to our service or product and share with slider.

Today I'm gonna share awesome about how to add Animated Bar With Jquery Image Slider.Its made with jQuery and CSS.Every code are well arranged. I added five photos for this slider. You can customize as your like.However just have a look demo page.You can get a idea about it very well.Let see, how to add this image slider for blogger.

Animated+Bar+With+Jquery+Image+Slider


Some of stylish navigation bars.
           Attractive jQuery Slideshow for Blogger
           jQuery Smooth SlideShow For Blogger
           Stylish jQuery Photo Gallery With Description Effect
           Get All Navigation bars

How to add Animated Bar With Jquery Image Slider For Blogger


1. Go to Blogger Dashboard > Template
2. Backup your template
3. Click on Edit HTML
4. Find </head>  and add below code just above it
<link href='https://bloggertrixcode.googlecode.com/files/animate.css' rel='stylesheet' type='text/css'/>
<script src='https://ajax.googleapis.com/ajax/libs/jquery/1.10.2/jquery.min.js'/>
<script src='https://bloggertrixcode.googlecode.com/files/border-slider.js'/>
<script>/****/
            jQuery(document).ready(function(){
            jQuery(&#39;#bloggertrix_slider&#39;).animatedSlider({
                &#39;loader&#39;:true,
                &#39;width&#39;:900,
                &#39;height&#39;:300,
                &#39;slide_animation_data&#39; :
                    [//slides
                        //slide1 BEGIN
                        [
                            {
                            &#39;target_element&#39;:&#39;.txt1&#39;,
                            &#39;animation_frame&#39;:0,
                            &#39;animation_type&#39;:&#39;tada&#39;
                            },{
                            &#39;target_element&#39;:&#39;.txt2&#39;,
                            &#39;animation_frame&#39;:0.8,
                            &#39;animation_type&#39;:&#39;tada&#39;
                            }
                            ],//slide1 END
                        
                         //slide2 BEGIN
                         [{
                            &#39;target_element&#39;:&#39;img&#39;,
                            &#39;animation_frame&#39;:0,
                            &#39;animation_type&#39;:&#39;bounceInUp&#39;
                            },{
                            &#39;target_element&#39;:&#39;p&#39;,
                            &#39;animation_frame&#39;:0.7,
                            &#39;animation_type&#39;:&#39;bounceInUp&#39;
                            }],//slide2 END
                           //slide3 BEGIN
                         [{
                            &#39;target_element&#39;:&#39;img&#39;,
                            &#39;animation_frame&#39;:0,
                            &#39;animation_type&#39;:&#39;bounceInUp&#39;
                            },{
                            &#39;target_element&#39;:&#39;p&#39;,
                            &#39;animation_frame&#39;:0.6,
                            &#39;animation_type&#39;:&#39;bounceInUp&#39;
                            }],//slide3 END

                          //slide4 BEGIN
                         [{
                            &#39;target_element&#39;:&#39;img&#39;,
                            &#39;animation_frame&#39;:0,
                            &#39;animation_type&#39;:&#39;bounceInUp&#39;
                            },{
                            &#39;target_element&#39;:&#39;p&#39;,
                            &#39;animation_frame&#39;:0.5,
                            &#39;animation_type&#39;:&#39;bounceInUp&#39;
                            }],//slide4 END
                        //slide5 BEGIN   
                         [{
                            &#39;target_element&#39;:&#39;img&#39;,
                            &#39;animation_frame&#39;:0,
                            &#39;animation_type&#39;:&#39;bounceInUp&#39;
                            },{
                            &#39;target_element&#39;:&#39;p&#39;,
                            &#39;animation_frame&#39;:0.4,
                            &#39;animation_type&#39;:&#39;bounceInUp&#39;
                            }],//slide5 END

                        //slide BEGIN   
                         [{
                            &#39;target_element&#39;:&#39;h1&#39;,
                            &#39;animation_frame&#39;:0,
                            &#39;animation_type&#39;:&#39;bounceInUp&#39;
                            },{
                            &#39;target_element&#39;:&#39;p&#39;,
                            &#39;animation_frame&#39;:0.3,
                            &#39;animation_type&#39;:&#39;bounceInUp&#39;
                            }
                         ]//slide END

                    ]});});
        </script>
    <link href='http://fonts.googleapis.com/css?family=Kavoon' rel='stylesheet' type='text/css'/>
5. Again Find  ]]></b:skin>   and add below code just above it

/* The CSS Code for the slider starts here bloggertrix.com
#bloggertrix_slider {margin:0 auto;}
#bloggertrix_slider .slider-contents {overflow:hidden;border:8px solid #DDDDDD;box-shadow:0 0 3px rgba(3,3,3,0.5);}
#bloggertrix_slider .slide-nav {float:left;padding: 0 8px;height: 26px;background: #3a3a3a;}
#bloggertrix_slider .slide-nav a {width: 14px;height: 14px;text-indent: -999px;float: left;list-style: none;display: block;background: #dddddd;margin: 5px 4px;cursor: pointer;}
#bloggertrix_slider .slide-nav a:hover {
 background: #27BAFF !important;}
#bloggertrix_slider .progress-bar {width:0px;background-color:#AAAAAA;height:2px;top: -2px;overflow:visible !important;display:block !important;position: relative;}
#bloggertrix_slider .controls {height: 26px;margin: 4px auto 0;display: table;}
#bloggertrix_sliderr .pause-play-control {width: 46px;height: 26px;float: left;background: #3A3A3A;color: #fff;}
#bloggertrix_slider .pause-play-control a {width:9px;height: 19px;display:block;overflow:hidden;text-indent: -9999px;background:url('http://img837.imageshack.us/img837/7647/fqnu.png');cursor: pointer;margin:3px auto 0;}
#bloggertrix_slider .pause-play-control a.play-slide {background-position:-5px -3px;}
#bloggertrix_slider .pause-play-control a.pause-slide {background-position:-29px -3px;}
#bloggertrix_slider .slider-next,#bloggertrix_slider .slider-prev {
width: 46px;height: 46px;background: #3a3a3a;display: block;font-size: 41px;color: #FFF;font-weight: bold;text-align: center;position: absolute;cursor: pointer;text-indent: -999px;overflow: hidden;}
#bloggertrix_slider .slider-next:before,#bloggertrix_slider .slider-prev:before {background: #3a3a3a url('http://img837.imageshack.us/img837/7647/fqnu.png');width:32px;height:32px;position:relative;top:7px;left:7px;content:'';display:block;}
/*#bloggertrix_slider .slider-next {margin: -220px 0 0 681px;}
#bloggertrix_slider .slider-prev {margin: -220px 0 0 4px;}*/
#bloggertrix_slider .slider-next:before {background-position:-5px -31px;}
#bloggertrix_slider .slider-prev:before {background-position:-5px -70px;}
.slide1 img {position:relative;}
.img-logo {margin-left: 150px;}
.img-mobile {margin-top: 45px;}
.img-tablet {margin: -168px 0 0 139px;}
.img-laptop {margin: -186px 0 0 349px;}
.slide1 {background-color: #67b608}
.slide2 {background-color: #03bbd3}
.slide3 {background-color: #cf6b30}
.slide4 {background-color: #f2a87b}
.slide5 {background-color: #388efd}

6. Now Click Save Template and Go to blogger Layout
7. Click Add Gadget and select 'HTML/Javascript'
8. Paste below code.

<div id="bloggertrix_slider">
            <div class="slide1">
             <img src="https://blogger.googleusercontent.com/img/b/R29vZ2xl/AVvXsEia9L0IXr4l6CuW7h3BIydzlJermk4DDJIlRPjgQj6oBaDQ5xS4VA3fXPuka-UOGTot8dD_auXAFMVYmLP8ocFp3dBCDbn-PIUXAPNfDOgeZqobqaFMQk6yvhuv33htfy_NqyOcTQuyfno/s1600/bloggertrix1.jpg" />
            </div>
            <div class="slide2">
              <img src="https://blogger.googleusercontent.com/img/b/R29vZ2xl/AVvXsEhXkBLl8QkYN-uREJDcq6jBPFfQtmdzI9FnA6Is6AA9kNZ62V26ybI3yq4LJOAqk8MCOt4TxSgucQp3sAISrNUYs4z2wcn2DEoZ9FVwYzWgoff6g1BvirY-ZHy9EuWMRdw6s1G-Gr-Aoig/s1600/bloggertrix2.jpg" />
            </div>
            <div class="slide3">
             <img src="https://blogger.googleusercontent.com/img/b/R29vZ2xl/AVvXsEj5nq41CTXl04lQl1OmkllYSX_E9VPYuBINgXHOEDYMd-_zEV6bMxgPHRFm16EgxyXzP3DE4ukdH0NPs0ogt8zNZGqkrI-9jMoaD2waU0RoXYuT2sMN6gUUUX__QuqBJSArTkB_-ZKep9w/s1600/bloggertrix3.jpg" />
            </div>
            <div class="slide4">
             <img src="https://blogger.googleusercontent.com/img/b/R29vZ2xl/AVvXsEiJe9iJishYqvKW4HvvTgREGPPD5wC5_jZfKKhEx0u84E_TUFbHtaKTJR3JvQqeBJ4-SJc53XYF423PwiTVdSb4eL7BWueI2gWwdmE0kZlgMugkKk7_wWJiacb6Nm_KHuim8shi8rInVxs/s1600/bloggertrix4.jpg" />
            </div>
            <div class="slide5">
             <img src="https://blogger.googleusercontent.com/img/b/R29vZ2xl/AVvXsEiwu2rzI9-nUcXGiK34rCCzlfkpihl56xrhGsgB-c4vYrvDL4F1esr1wOBbkykzAuZrNFEqDOFPgPwVpvAopcE3m8jfIKTeRRpIBvnP3mfVwGbLHA-auvT7tDlTpbs26l8a58Bvkpro2l0/s1600/bloggertrix5.jpg" />    
            </div>
        </div>
Replace Red color URL with your image links

9. Now save your HTML/Javascript'.

You are done. If you have any problem related to this Animated Bar With Jquery Image Slider. Just leave a comment.I will help to you.
Read More

Choosing The Right Firm For Your SEO Needs

What Is SEO

 SEO is short form for search engine optimization. It is the technique of optimizing the content of your site as per the needs of search engines. Search engines have rules by which they decipher websites on subject matter and pick them for display on related search terms. When you have a website on a particular product or service, you need to optimize the content and the layout in such a manner that search engines are bound to index your site for searches related to the particular category. There are many firms who can help you to achieve this but you need to know how to pick the firm with the optimal pricing strategy.

Choosing-Right-SEO-Needs

Basic SEO Techniques For Blogger
Why Search Engine Optimization Is Needed To Make Your Website Popular

Different SEO Pricing Packages

When it comes to picking up a firm which offers SEO it is not much of a problem. The problem lies in deciding whose pricing techniques are robust. There are various online marketing firms these days. There are a wide range of marketing services that they offer to their clients. Their pricing packages are different in different ways. Some offer prices as per the marketing package deal you want. Others will offer a comprehensive package while they charge a lump sum fee which is a contract fee. You need to understand the working of a firm and the way they price their packages. There are several who are reputed and they have a premium rate for their services.

Reaching Out to Users with Search Engine Optimized Content

Know Your Requirements First

If you are determined the optimal SEO pricing strategy, you need to find out what your unique requirements are:
•    You may be an established brand that is looking for ways to fortify their presence online. For that  
       you need to employ the services of a marketing firm on a long term basis. In such cases, taking
      on the services of a required branding firm will help to further fortify your online presence

•    When you are a fledging or a small business, you need to keep your online marketing budget
      small which can be done by taking up SEO services that are inexpensive. Many will add in social
      media marketing services as well which makes your marketing more comprehensive and full-on
      approach.

Seo Techniques for Website Promotion 

Different Pricing Methods

The different SEO firms have different kinds of advertising and online marketing packages. When you have decided what it is that you want, you can either opt for a retainership model where you need to pay monthly fees. Others come on contractual bass while others will offer online marketing package deals. There are advantages and limitations of any technique you take up.

Package Deals Or Comprehensive Service

There are different package deals that are applicable when you wish to obtain a personalized service and not a full pronged marketing plan. Hence, you might look for SEO optimization, backlink creation, search for the right keywords and so forth. There are different online marketing techniques that get broken down in such package deals. You need to have a working online marketing team who would know what to opt for and when. On the other hand, if you do not have any online marketing expertise and do not have time to deal with it, you need to opt for the online marketing plan which is available on contractual basis. They will come on board, understand your SEO requirements and then tailor make the online marketing campaign for your site. That will surely put your worries at rest and you will soon see results from the increased page rankings of your site and more online traffic flowing in.
Read More

Awesome Social Media Tools To Increase Online Business

Websites serve as a medium of communication between the businesses and the customers. An attractive website with all the essential information laid out in an impressive manner is capable of attracting more and more customers. The only question that arises in the process is how to reach the potential customers and compel them to visit your site. It is here when social media marketing comes into play. With the increasing use of such platforms most of the business organizations have started planning their marketing strategies keeping the various social media channels in mind. Using these channels for SEO has also proved to be beneficial with enhanced sales.

social-media-tools
An effective marketing strategy plays an important role in boosting the business. Hence, the business organizations should prefer to hire professionals who excel in this area and can design  a result-oriented marketing plan for you. Multi-channel marketing can be effective in the long run and you can easily improve your brand image and get your products known among people by promoting them via different social media platforms. The most commonly used channels which can be considered by you while planning your strategy are as follows.

Read:  How to Win Customers Through Social Media
           Social Media Tools For Journalists

Google Adwords For Gaining Result

Brand recognition is not an easy task and requires great efforts and right marketing strategies. Google Adwords can be an effective method for gaining immediate results. However, the results can be made more effective and impressive by using a combination of Search Engine Optimization techniques which will help you in occupying the top notch position in search engine rankings. Apart from this, you also need to be specific about the budget and campaign you choose. Have a look below link, how to boost your website ranking.

Read: Awesome SEO Tricks To Boost Website Ranking

Blogging For Promoting The Business

Blogging is another effective method of promoting the business. You can create a blog with a unique but business related name so that the name itself tells the products and services offered by you to your customers. In order to enhance the traffic on your website, it is essential that you keep updating your blog with relevant information related to your niche. You can also adopt guest blogging techniques and earn back links to your blog making a pathway for more customers to visit your site.Check blow tips as well.

Read: Useful Seo Blogging Tips For Blogger

Different Social media platforms

With so many platforms like Facebook, Linked In, Twitter, Google+ etc. the businesses can easily promote their offerings among different groups of people. With so many users using these platforms at a high rate, it becomes easier to reach them.

Read: 8 Simple Tips for Increasing Facebook Traffic to Your Blog
           Awesome 8 tips to Increase Google Plus Followers

SEO Techniques To best Result

Implementing SEO techniques like social bookmarking, directory submission, getting quality back links etc. are also effective in promoting the business and enhancing the traffic on the website which as a result enhances the overall sales of the business. In order to receive outstanding results, it is necessary to evaluate your current position on the web. You can ask your experts to design an outstanding marketing campaign which can be fruitful for the business.

Read: Basic SEO Techniques For Blogger
           Seo Techniques for Website Promotion

Multi-channel marketing is proven to deliver outstanding results as it allows the businesses to use different platforms for promoting their brand. With access to some effective social media marketing techniques, they can easily reach their potential customers and convert them into loyal consumers.   
Read More

Thursday, February 21, 2013

Top 5 SEO Mistakes That Spoil Your Websites Ranking

The blogging world is   indeed facing   intense competitionand  it  is  need  of  the hour  to stand  out from the crowd.You  do  not just  need  to excel  in  your  SEO tactics, but equally has to be good in  writing  informative   and original articles. There  are various  websites which have created a
death  knell  for  themselves due to low rankings  in search engine.  It  has  happened  because  of various mistakes of SEO by the  website  owners.  Hence,  if you are running a website,  then  the  following  article is  going  to   help you immensely  as  it  will  arm  you  with  knowing    the  SEO mistakes  which has  the  potential  of spoiling  the ranking of your website

SEO-mistakes

Irrelevant Backlinks

It is important to have a good PR if you are eying towards gaining popularity of your website.
Backlinks work wonders towards helping you to decide about the page rank of your website and
it should come from the related article. For example, as an owner of heath related website, it is
no use to get backlinks from a tech website. As it has the potential of doing more harm than any
good and will spoil the image of your website as well.

Keyword Stuffing
Keyword Stuffing is being hated the most by search engine giants like Google along with others.
There are few website owners who in the pursuit of getting immense popularity use wrong
keywords. Hence, it is true that Keyword stuffing stands out to be the worst SEO mistake which
can be committed by any website owner.

As their website gets banned, then they have no where to go than to repent over their childish
action. It can be understood with the help of an example. Like if you are writing an article about “Web Designing” and it is of no use to talk about the entertainment stuff since it is not going to serve
any purpose. You will only ensure a hefty penalty by the search engine and readers will also not
prefer to stay any longer as well.

Poor Website Design

The design of the website matters a lot as the themes are not limited for appearance purpose, but
it equally have relevance for SEO too. Increasing numbers of websites have been penalized in
the past by search engines for using substandard design. It is imperative for you to choose website templates as they are available free of cost. Hence choose the one which is considered to be SEO friendly, rather than sticking with a poor random design.

Duplicate Content

There are people who want to ensure big term success without working hard at all. Hence they
resort to unethical means of copying the articles from other websites and use them as their own.
However, such type of malpractice is easily detected by search engines which in turn spoil the
ranking of the website. After all, SEO starts from content and it has to be original one which is
indeed a must.

No Internal Linking

There are increasing numbers of writers who simply writes articles without resorting to any
internal linking. Needless to say that Internal Linking is indeed a must for SEO point of view.
Hence, it necessitates you to do that or else you are going to find it in the spoiled websites list
which you do not want to happen for sure.

Finally, aforesaid are the Top 5 SEO Mistakes That Spoil Your Websites Ranking. You cannot
overlook any point or else be prepared to tarnish the image of your website. Hence, read them
and experience the pleasant difference in the process as well. So, what are you waiting for?

About The Author:
This is a guest post contributed by Osho Garg who blogs for WebNet, a web
hosting company that offers reliable, budget-friendly, easy-to-use Ffmpeg Hosting, Youtube
Clone Hosting, Video Hosting.
If you would like to write for bloggertrix, check our guest posting guidelines.
Read More

Css3 Slide Style Navigation Bar For Blogger

Today im   gonna explain  how to add  attractive slide style navigation  bar for blogger.Slide style
look amazing.This is not a jquery, im using Css3 and HTML. Check  it  from  below link. you can get itYou can get my all menubar here
Css3+Slide+Style+Navigation+Bar+For+Blogger

Demo

1. Log in to blogger account and Click drop down.
blog-post-option
2. Now select "Template" Like Below.

Select-template

3. Now you can see Live on blog, Click EDIT HTML Button"

4. Now click Proceed button.
   
5. Find this tag by using Ctrl+F    ]]></b:skin>

6. Paste below code Before ]]></b:skin> tag

/* The CSS Code for the menu starts here bloggertrix.com */
navrotatebt {
        max-width: 900px !important;
            margin: 100px auto;
            margin-top: 20px;
        }
        navrotatebt ul {
            list-style: none;
            overflow: hidden;
        }
        navrotatebt li a {
            background: #D8D8D8;
            border-right: 1px solid #fff;
            color: #fff;
            display: block;
            float: left;
            font: 400 13px 'Montserrat Alternates', Arial;
            padding: 10px;
            text-align: center;
            text-decoration: none;
            text-transform: uppercase;
            width: 80px;
            -webkit-transition: transform 1s;
            -moz-transition: transform 1s;
        }

        navrotatebt#nojquery li a:hover, .rotate {
            -moz-animation: animrotate 2s; 
            -webkit-animation: animrotate 2s; 
            background: #222;
        }
        @-moz-keyframes animrotate {
            100% {background: blue;-moz-transform: perspective( 200px ) rotateY( 360deg );}
        }

        @-webkit-keyframes animrotate {
            100% {background: blue;-webkit-transform: perspective( 200px ) rotateY( 360deg );}
 }

7. Go to blogger and click Layout

8. Click Add Gadget and select 'HTML/Javascript

9. Paste below code.

<navrotatebt id="nojquery">

   <ul>
     <li><a href="#">Home</a></li>
     <li><a href="#">About</a></li>
     <li><a href="#">Portfolio</a></li>
     <li><a href="#">Services</a></li>
     <li><a href="#">Blog</a></li>
     <li><a href="#">Contact</a></li>
   </ul>
</navrotatebt>
Replace # with your links.

10. Now save your HTML/Javascript'.

    You are done...
Read More